
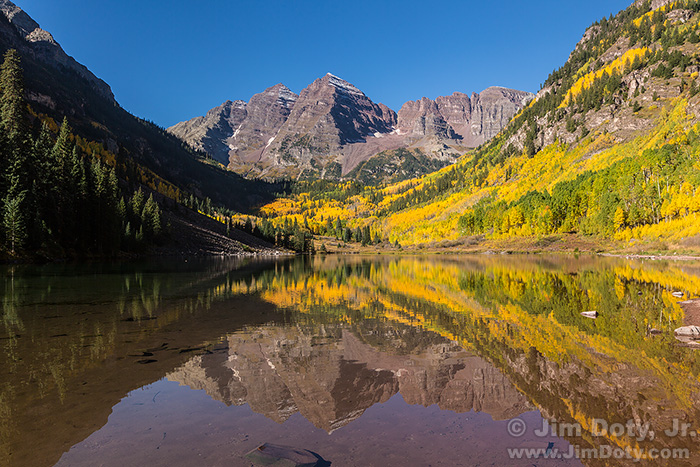
Maroon Bells and Maroon Lake, September 24, 2015.
This article will show you how to find the metadata embedded in a photo in any of four different ways: iPhone, Windows 11, Adobe Photoshop and Adobe Bridge. I was asked in a recent email if it was possible to determine what camera was used to take a digital photo. The answer is yes, provided: (1) the camera saved that information in the metadata for the photo at the click of the shutter, and (2) the metadata has not been stripped out of the photo at some later time. In addition to the camera being used, the metadata usually tells you the lens that was used, the date and time of the photo, the aperture, shutter speed, ISO, and in some cases, the GPS coordinates of the photo.
Originally posted September 18, 2025. Revised and updated September 22, 2025.
Every time you click the shutter of your camera or smart phone, the image is saved along with some photo information called metadata. The metadata that is saved varies from camera to camera, and the metadata can be stripped out of the photo later on. For example, when you post photos on Facebook, Facebook deliberately removes the metadata and renames the photo.
You can access metadata in several ways. I will cover four of them in the sections that follow. You can also check the metadata online. I explain how in this article, (which is also linked below).
iPHONE
Using my iPhone, I went to the Maroon Bells photo above and saved it to my phone.
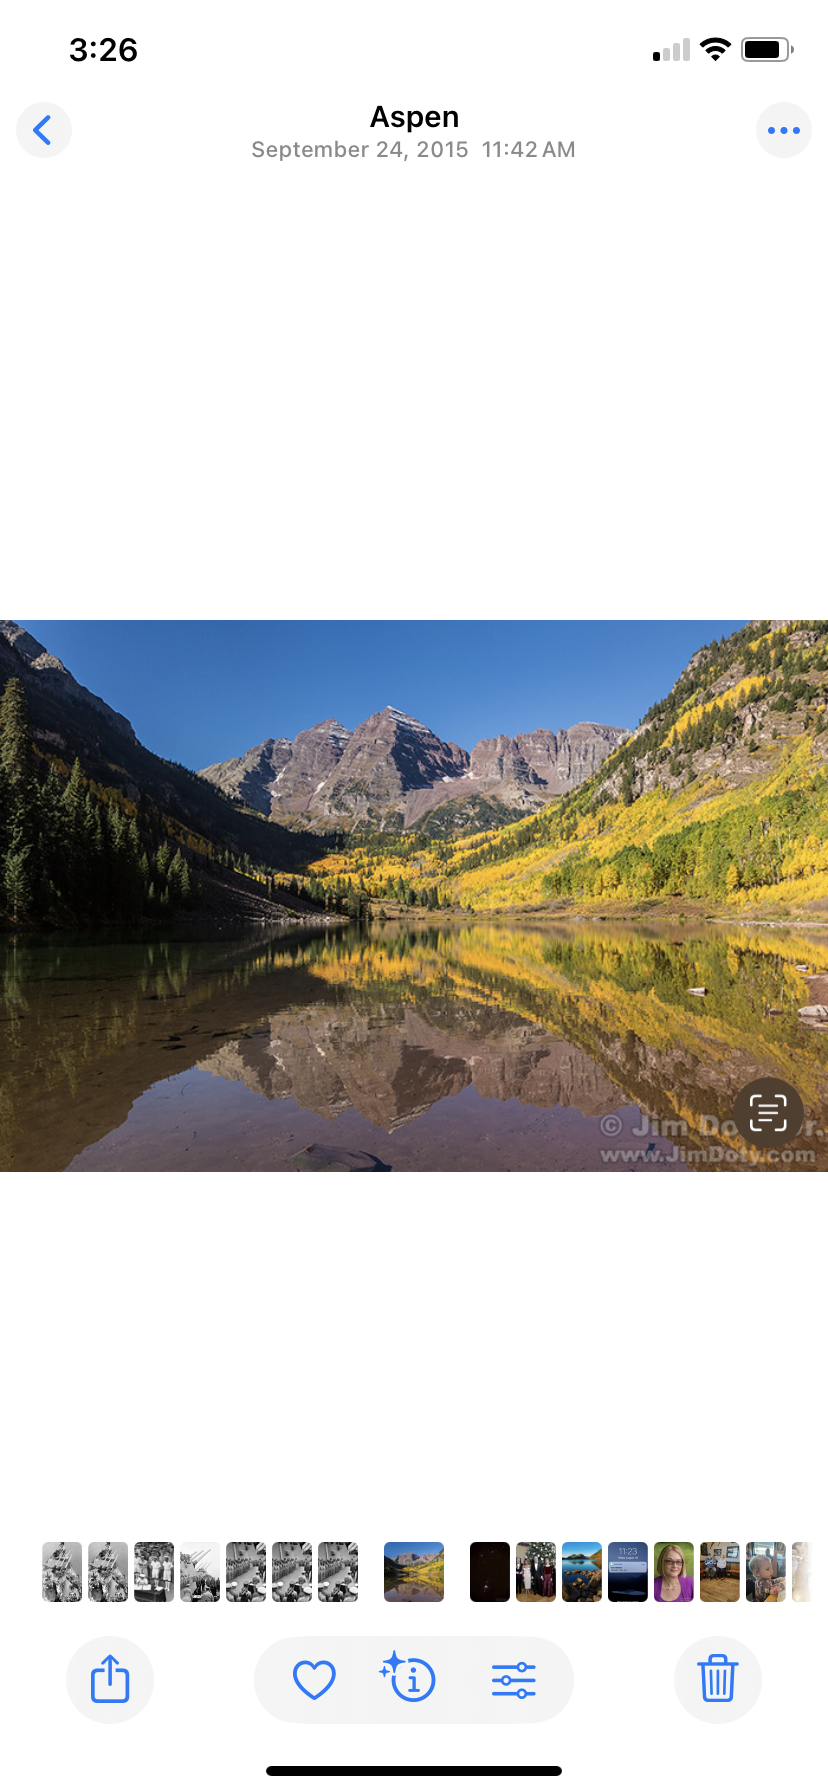
This is how the photo looked on my iPhone. At the bottom of the screen, I clicked on the “i” in a circle (for info) to bring up the metadata.
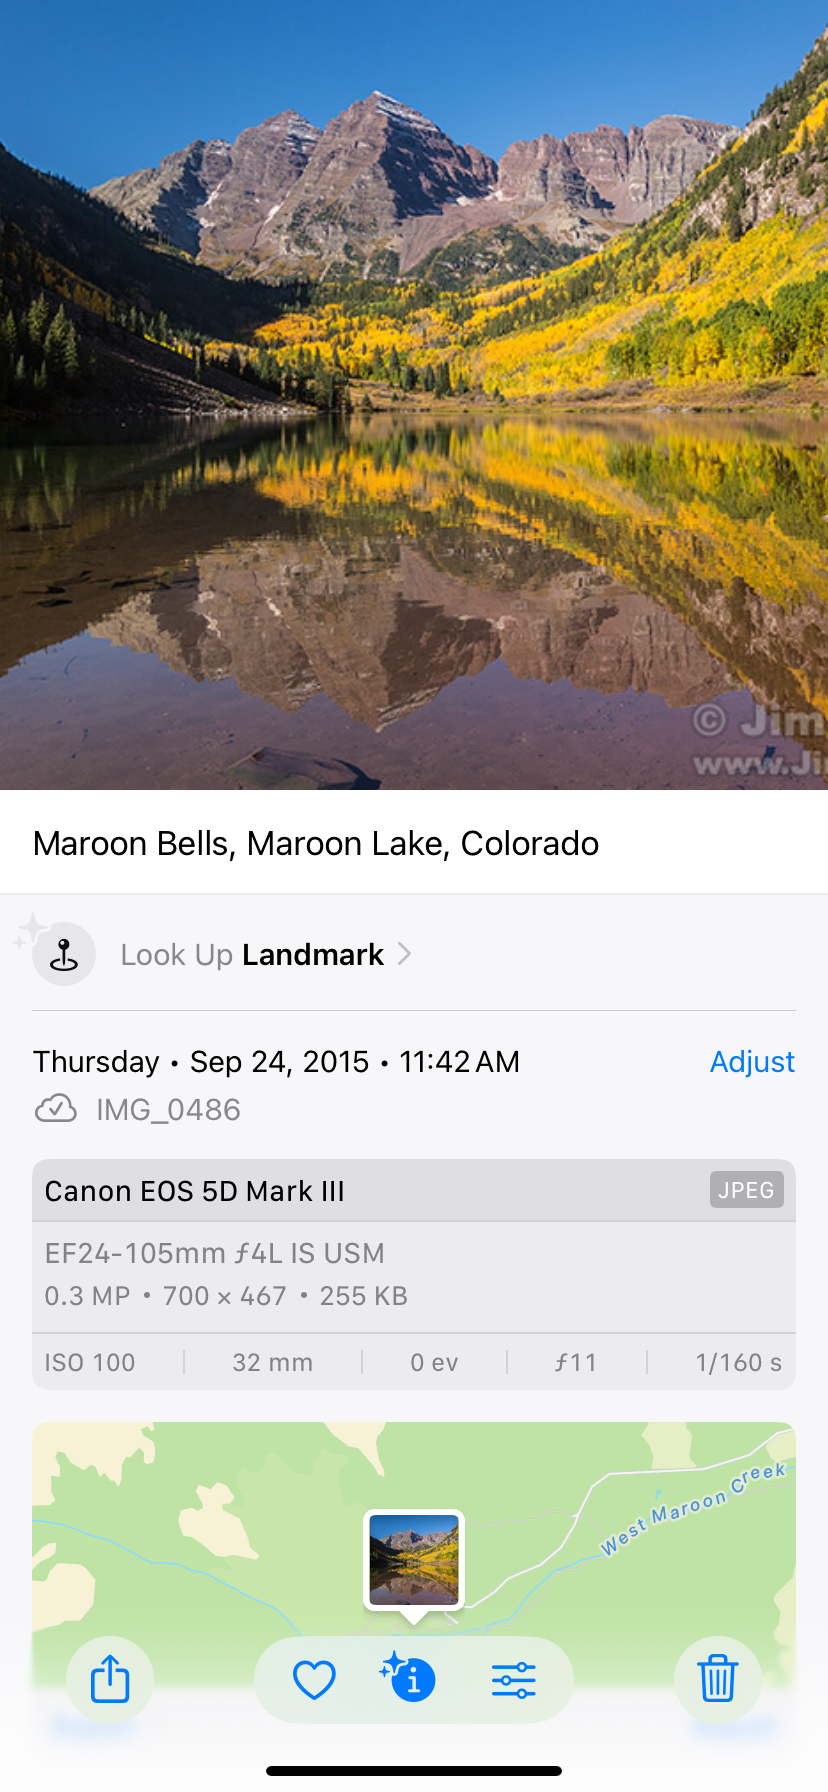
Here’s the photo as it appeared on the screen of my phone, along with a basic set of metadata, which includes the camera, the lens, the focal length (32mm), the ISO (100), aperture (f/11), shutter speed (1/160th sec), and a map of the location of the photo. This is a pretty quick and simple way to access the metadata.
WINDOWS 11
If you are using Windows software, make sure the photo is on your computer. For illustration purposes, I put the Maroon Bells photo on my desktop. The desktop background happens to be a photo of a Great Gray Owl.
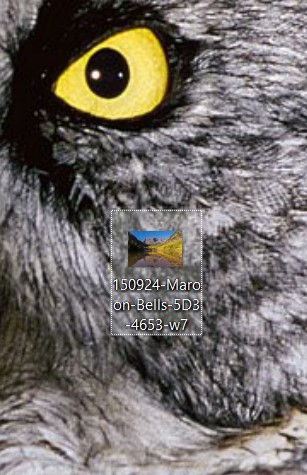 This is the thumbnail of the Maroon Bells photo on my desktop right below the owl’s left eye. The steps to find the metadata are easy.
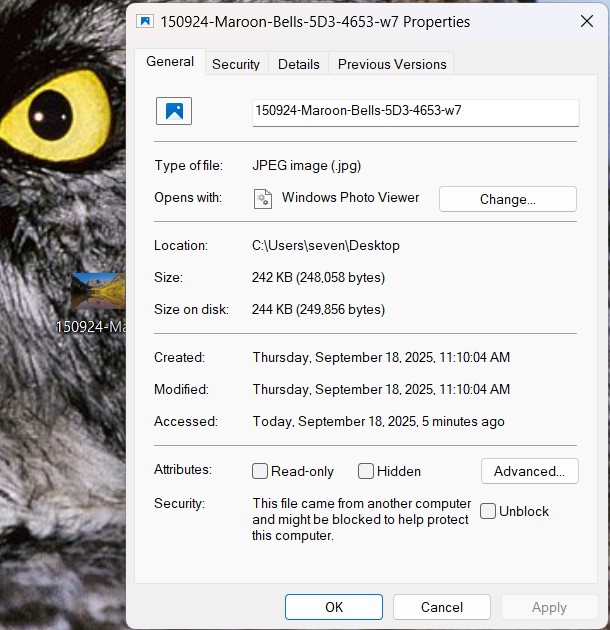 Right click the thumbnail to bring up the General metadata window which usually shows the filename of the photo and the date it was taken. But in this case the “Created” date is the day and time I moved the photos to my desktop, NOT the date and time I took the photo. At the top of the window, click “Details” to bring up more information.
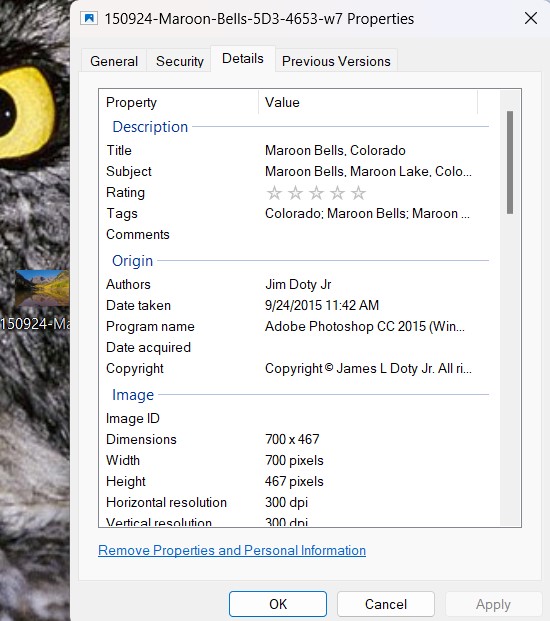 You will see a scrollable window with lots of details. In this window the date and time I created the image are accurate. Toward the top is “tags”, which is another name for the keywords that some photographers embed in their photos. To see all of the tags, click on some of the visible tags, see below.
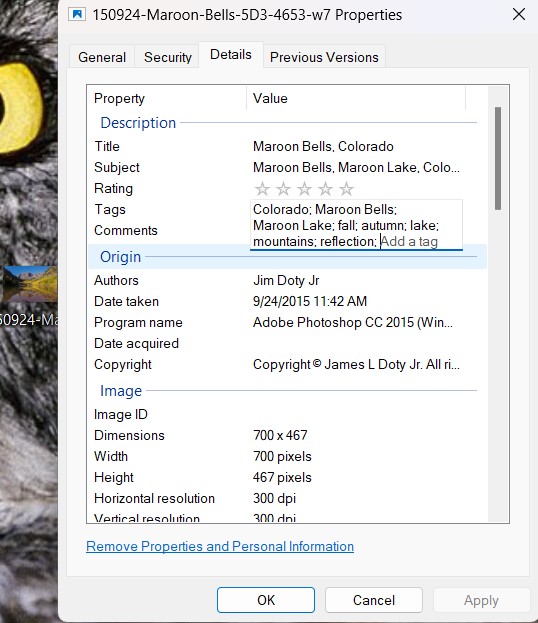 You will see a longer list of all the tags/keywords. As a side note, keywords are a great way to find specific photos out of a large number of photos. For more information about using keywords, see the Adobe Bridge articles in the links section below.
If you scroll down the Details window you can see more metadata.
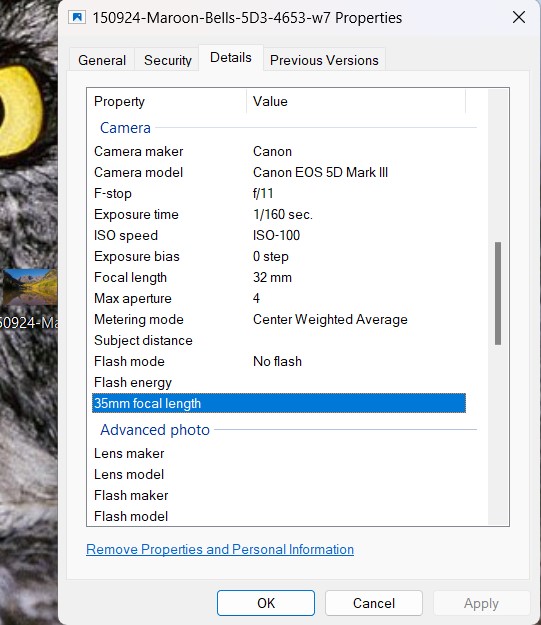
Farther down the Details window you see the camera settings.
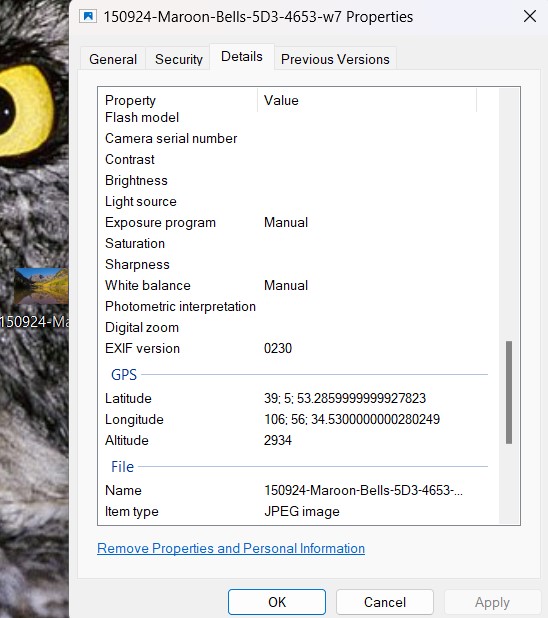 Even farther down the Details window you will see the GPS coordinates and altitude of the photo in meters. Not all cameras record GPS information. Most smart phones do record GPS coordinates provided that feature is turned on.
ADOBE PHOTOSHOP
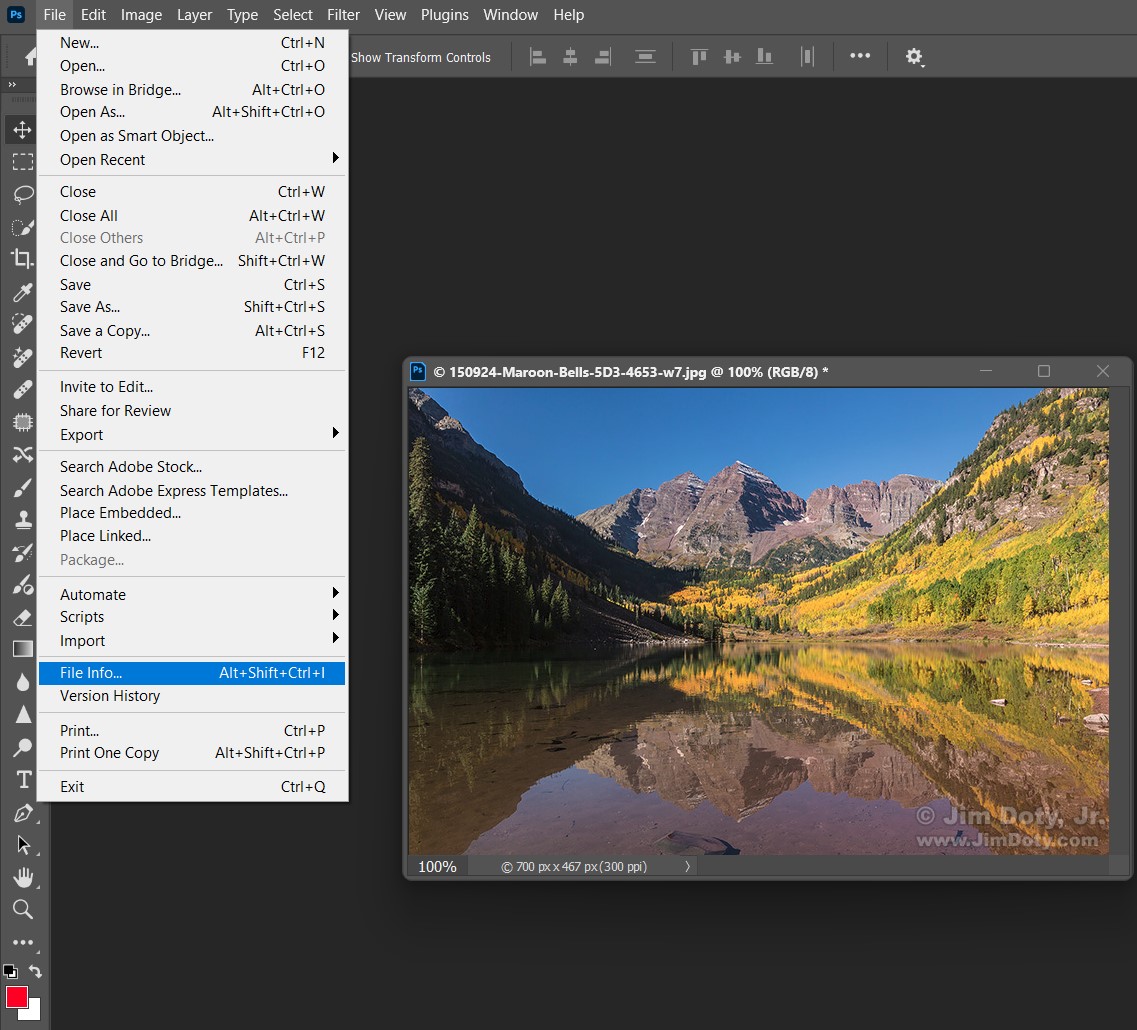
To find metadata using Adobe Photoshop, open the photo in Photoshop. At the top of the Photoshop window click “File”. In the drop down menu that opens, click “File Info”.
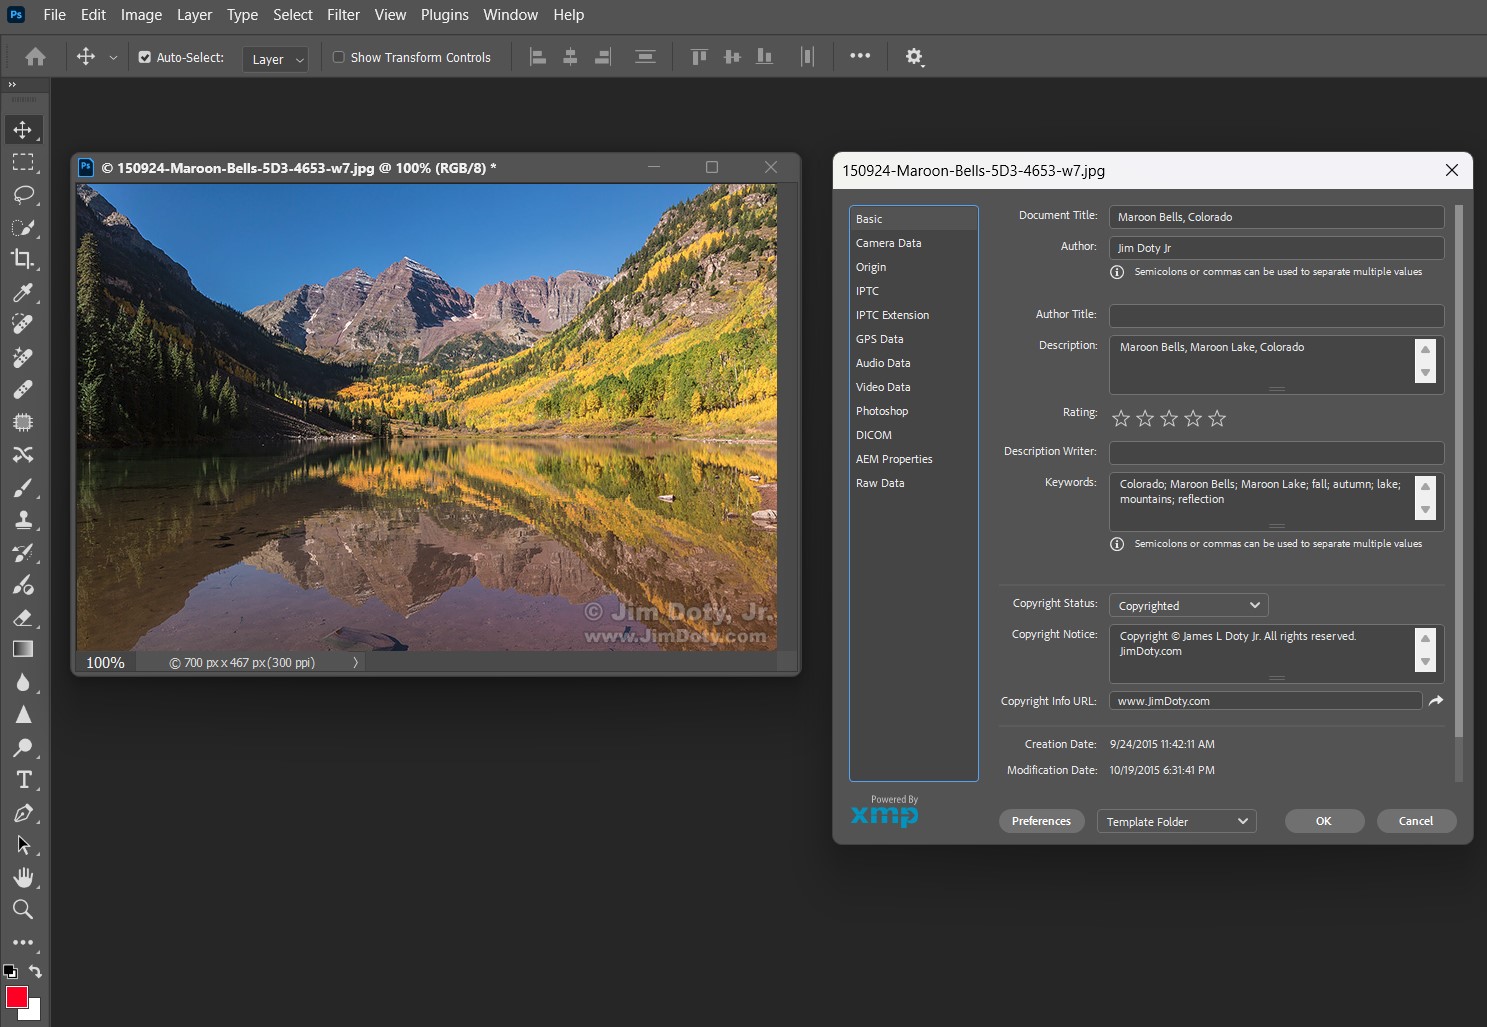
A window will open with lots of options on the left side of the window. Choose “Basic” and you will see the name of the photo, keywords attached to the photo, copyright information, and the date and time the photo was created.
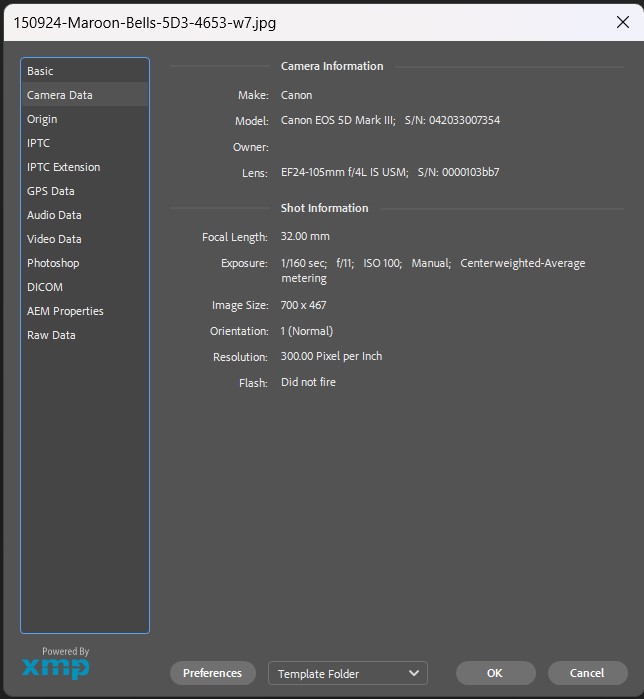
Choose “Camera Data” and you will see the camera, lens, focal length, exposure data, and more.
ADOBE BRIDGE
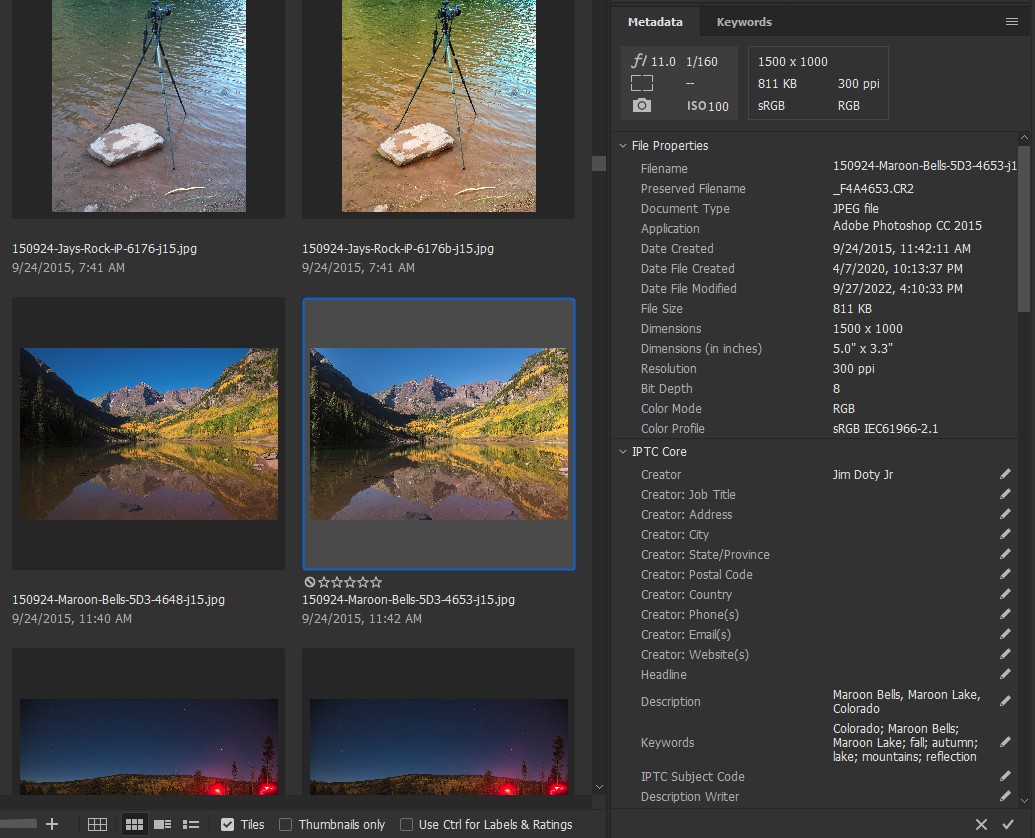 If you are using Adobe Bridge, navigate to a folder that has the photo. Click the photo and a whole bunch of metadata shows up on the right side of Bridge. On the right side of this screen capture you can see the top of the metadata window. Aperture, shutter speed, and ISO are at the upper left. The File Properties section has basic photo information like the date and time of the photo. Farther down you can see a description of the photo (if the photographer added a description) and any keywords (if the photographer added keywords to the photo).
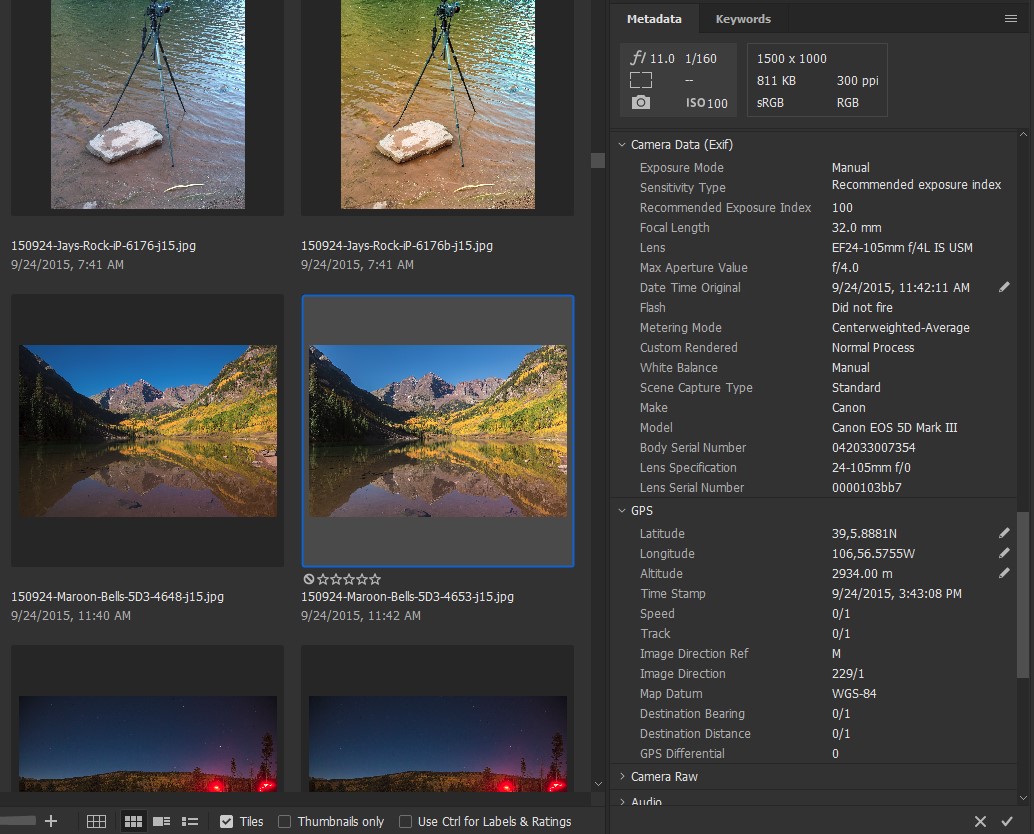 Scroll farther down in the metadata window and you will see additional detailed information about the photo, including Camera Data and GPS data.
TIME DISCREPANCY
Don’t be surprised if you use more than one metadata viewing method and you find a small time discrepancy. I used four different methods to get the metadata from the same photo. They all agree on the camera, the lens (or focal length), and the date of the photo, but not on the exact time the photo was created.
Metadata checked by iPhone: 11:42 am
Windows 11, Details window: 11:42 am
Adobe Photoshop: 11:42:11 am
Adobe Bridge: 11:42:11 am
So which time is right? The actual camera time was 11:42:11 am. Adobe Bridge and Adobe Photoshop are correct. My iPhone and Windows 11 rounded off the time by 11 seconds. However, when we drove from Ohio to Colorado I forgot to change the time zone in my Canon DSLR from Eastern to Mountain time. So the actual time in Colorado was 9:42:11 am.
ADOBE BRIDGE SOFTWARE
Adobe Bridge is my favorite software for downloading photos from my camera, batch renaming them, adding descriptions, and keywording photos to quickly find them later. Adobe Bridge is a free download.
I wrote an introductory series of articles on how to use Adobe Bridge. Check the links below. The first link is an introduction to the series.
Links
How to Find the Metadata in a Photo Using an Online EXIF Viewer
How to View the Metadata for a Photo on the Internet
The Adobe Bridge series:
“How To” Series: Adventures with Adobe Bridge
Adobe Bridge Basics: How to Download Photos into Folders By Date
Adobe Bridge Basics: How to Batch Rename Photos
Adobe Bridge Basics: How to Batch Keyword Photos
Adobe Bridge Basics: How to Do a Keyword Search