
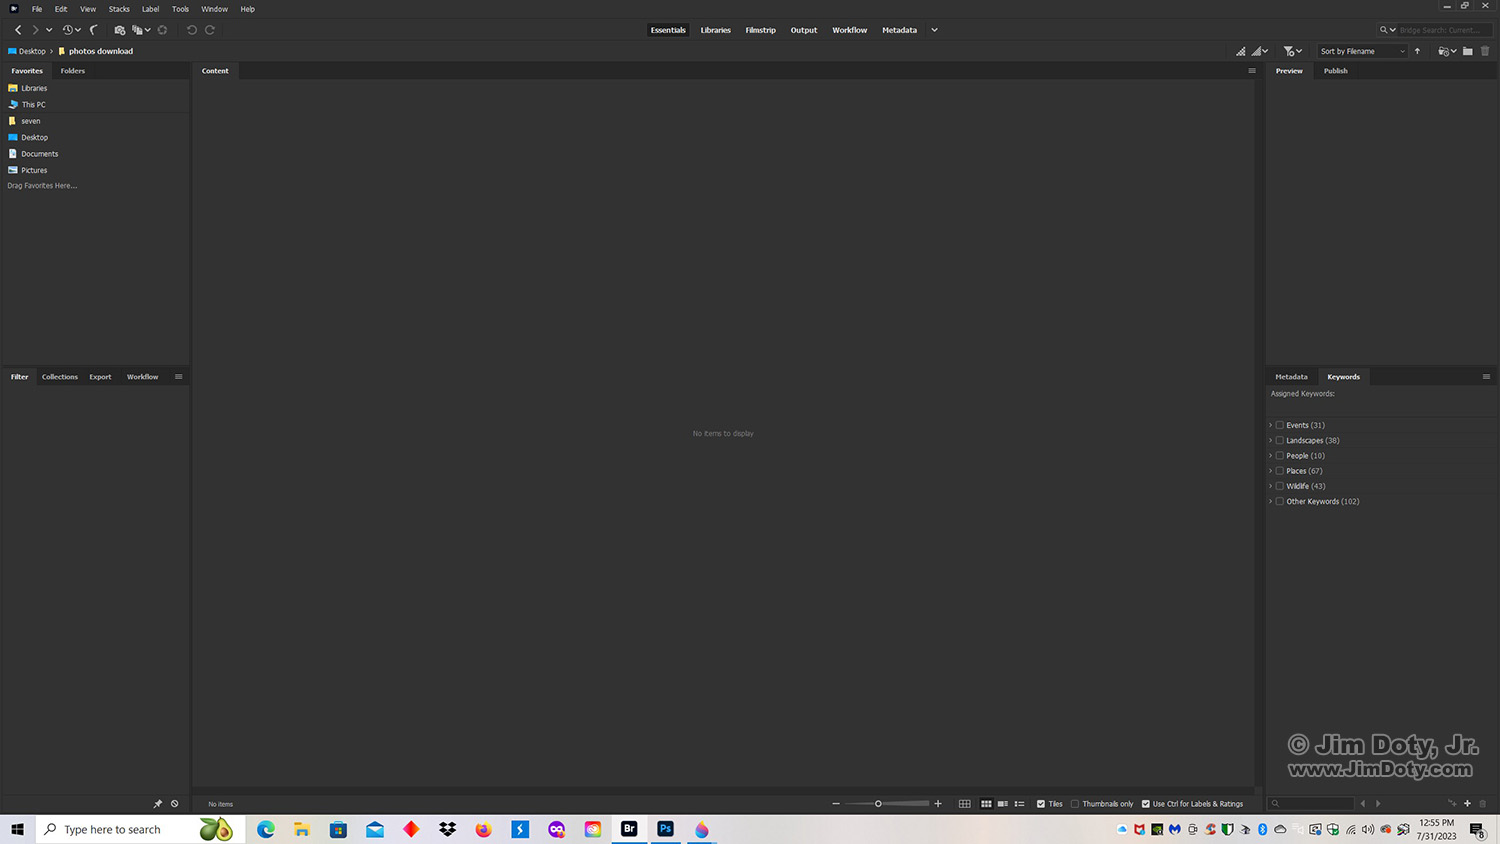
I was downloading, renaming, and keywording photos today so I did some screen captures to create this series of three tutorials on how to use Adobe Bridge. If you find Bridge intimidating, this series is for you. When you click on Bridge to open it, this is what the workspace looks like. There is more about why you should use Adobe Bridge in Adventures with Adobe Bridge. FYI, Adobe Bridge is a free download.
You can click on any of the illustrations for this article to see a larger version.
Before you use Adobe Bridge to download photos, you need to choose the place to put the photos you download. One excellent option is to create a folder that lives on your desktop. That makes the process fast and simple. My desktop folder is called “photos download”. Clever, right? Put your folder in a place on your computer that makes sense to you. You might want to put the download folder on your primary hard drive (Drive C). This folder is just a temporary place until your files are named and keyworded. Then you can move the photos to whatever permanent place you use to store your photos.
Before you download photos, open Adobe Bridge. Then put your camera’s memory card in a memory card reader and plug the card reader into your computer. Or your computer might even have a built in memory card reader.
A memory card reader is the safest way to download photos without losing any photos. I have received too many emails from people who lost photos trying to download them directly from the camera to the computer. The experts I trust say a memory card reader is the best way to go.
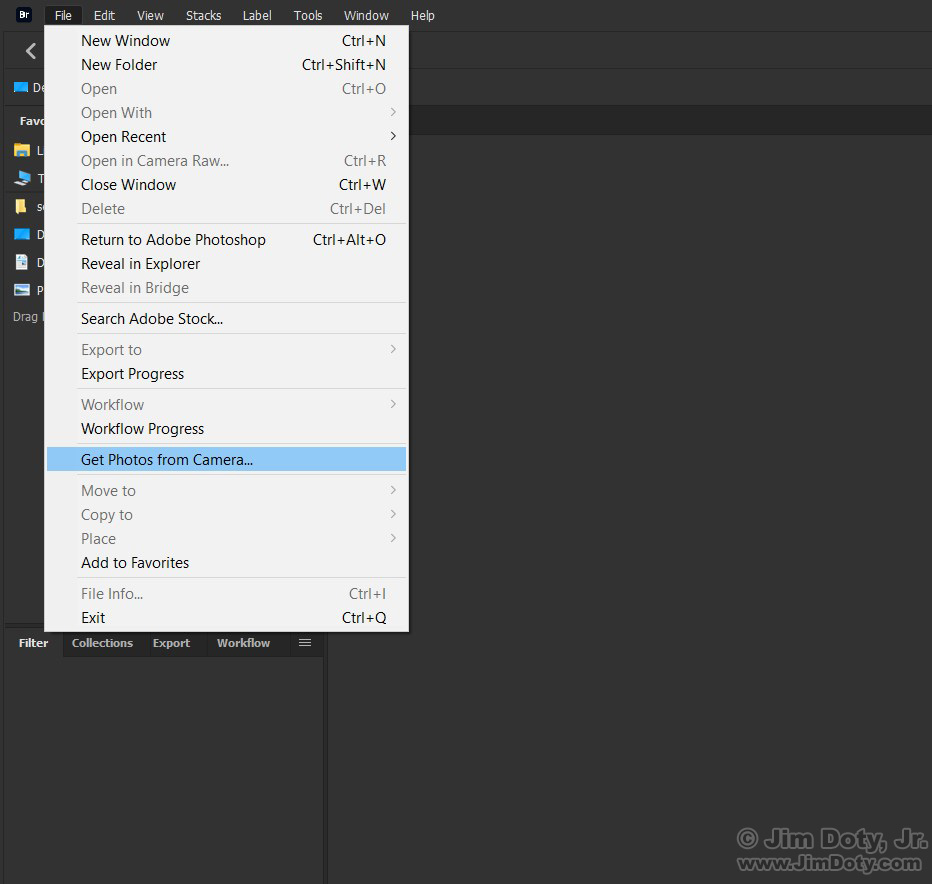
After you plug in the memory card reader, at the upper left corner of Adobe Bridge, click “File” in the menu bar and a drop down menu will appear. Click “Get Photos from Camera”. If your computer wants to use its own operating system to download the photos, just ignore its advice.
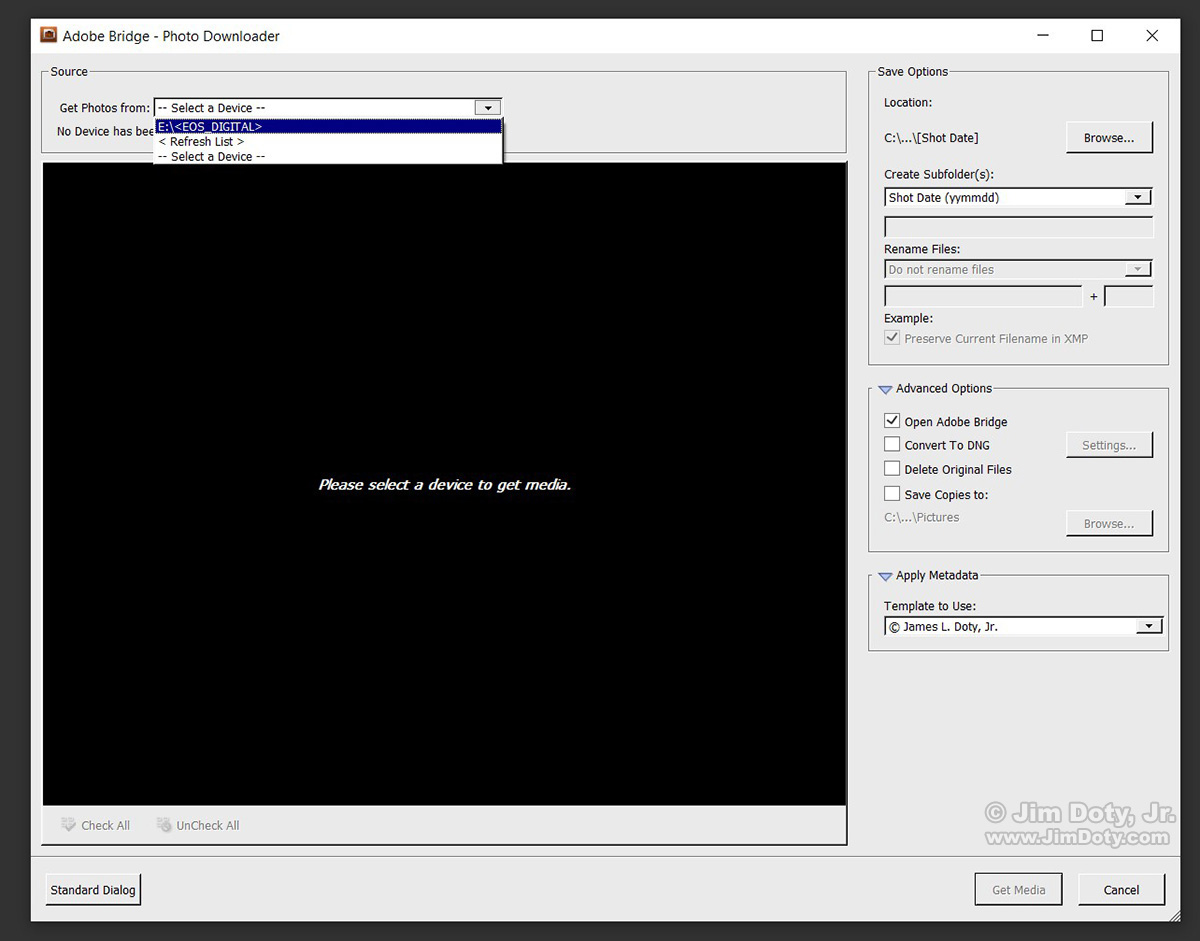
A Photo Downloader box will appear. At the upper left of the box is your “Get Photos from” choice with a short drop down menu. In the case of my card reader with an EOS memory card in it, my choice is “EOS Digital”. Choose whatever option will help Bridge find your card reader. Then you will have some more choices to make before you actually download the photos.
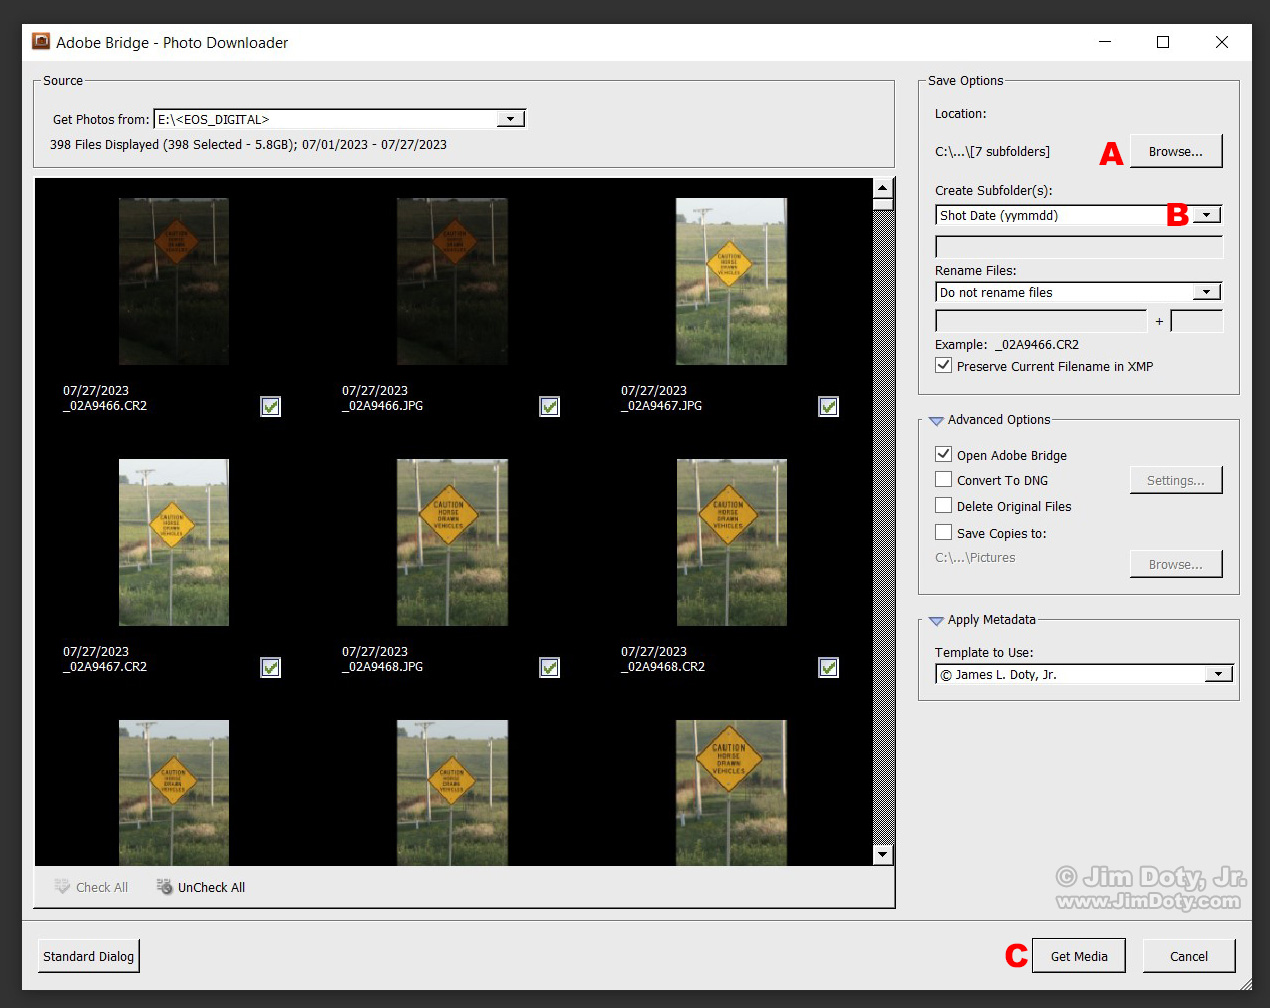
The next choice is to tell Adobe Bridge where to put the downloaded photos. Click “Browse” (red A) in the upper right corner and navigate to the folder you created for your photo downloads. For me it is the “photos download” folder on my computer’s desktop. You only have to do this once. For future downloads Adobe Bridge will (or should) default to the choice you made.
Next you need to use the drop down menu (red B) to choose how the dated download folders will be named. I chose the yymmdd format because it is short and simple (photos taken July 27, 2023 will be put in a folder that is named 230727). yyyymmdd and other options are available.
For the rest of the choices I use the default options. I want to preserve the current file name as an XMP file so that box is checked. I created a Copyright Template so all of my files automatically have a copyright notice embedded in them when they are downloaded. How to create that template is a topic for another day.
Adobe Bridge will remember your choices so you don’t need to do all this again unless you decide to change some choices, or change the place you put your downloaded photos.
After you show Bridge where to find the download folder and how to date the folders, you can click “Get Media” (red C) in the lower right corner. The download will begin.
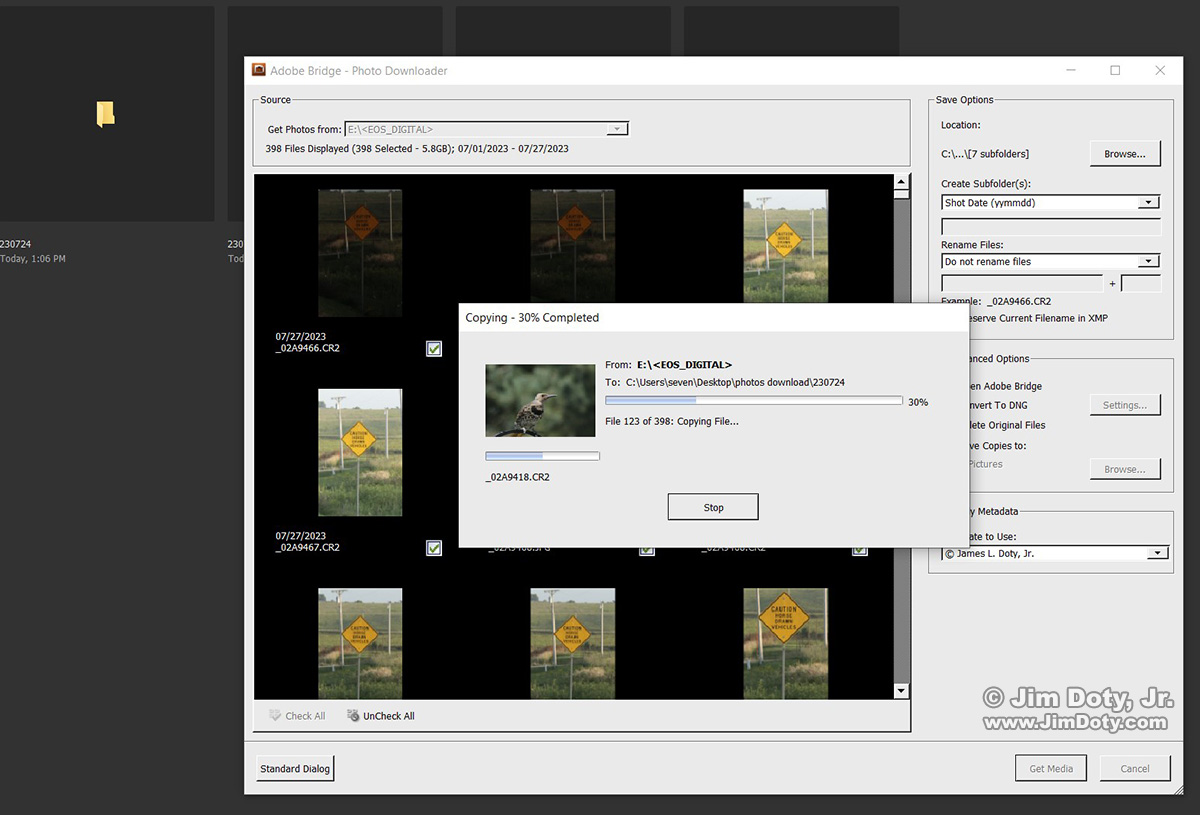
The Photo Download box will show you the progress of the download. In the background you will see the individual dated folders that are created.
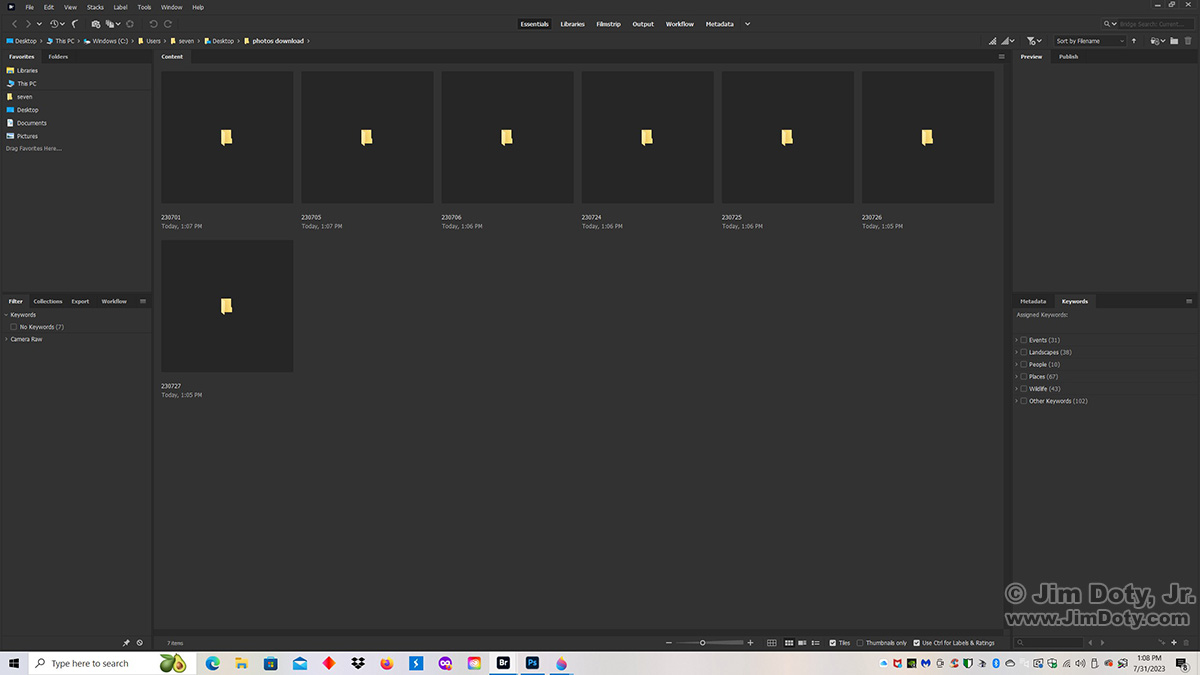
When the download is complete, in the Bridge workspace you will see the individual folders which have the photos for those dates. In the next article I will show you how to batch rename the photos one of these folders.
This may seem complicated, but once you get used to the process, downloading photos will be simple and quick.
When the photos in the “photos download” folder have been renamed and keyworded (the next two articles), I move all of these folders with their photos to their permanent home on external hard drives. Then the folders in the “photos download” folder are deleted so the folder is ready for the next download.
Originally posted July 21, 2023. Updated September 25, 2024.
Links
Adventures with Adobe Bridge – What Adobe Bridge Can Do For You
Adobe Bridge Basics: How to Batch Rename Photos
Adobe Bridge Basics: How to Batch Keyword Photos
Adobe Bridge Basics: How to Do a Keyword Search