
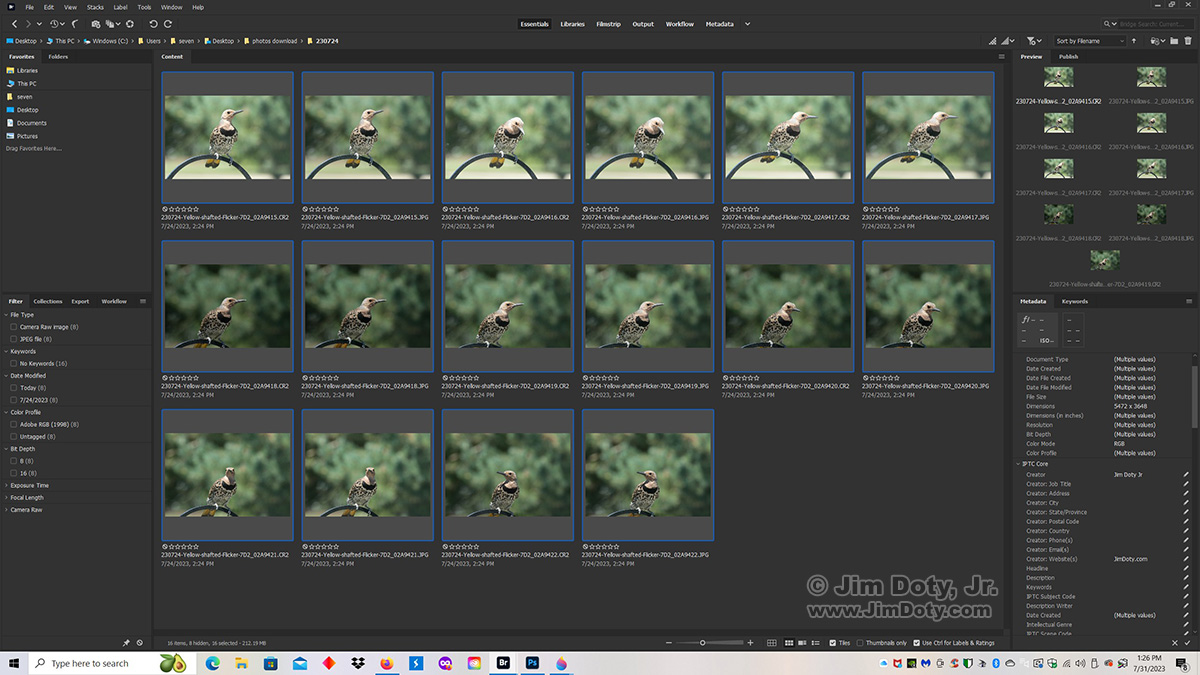
This is the third article in a “how to” series. In the prior article in this series we ended up with a folder of renamed photos that need to be keyworded. They are still all selected as you can see by the blue borders. This article will show you how to batch keyword these photos.
Click any of the images in this article to see a larger version.
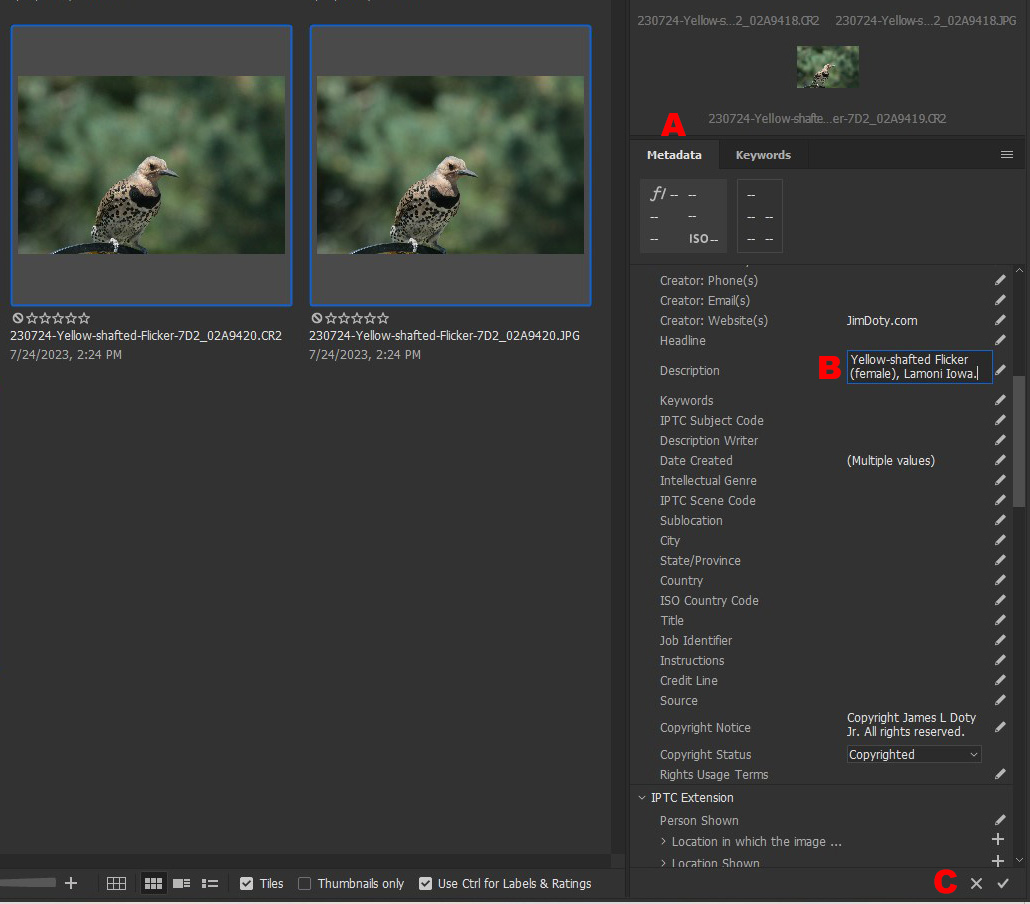
Adobe Bridge: Description box.
But first I need to show you how to put descriptions into the metadata of your photos. In the lower right quadrant of the Bridge workspace you have a choice between Metadata and Keywords. Choose Metadata (red A). If you scroll up and down you can see all of the metadata that is embedded in a photo. Most of that metadata was created when you clicked the shutter. There is an empty box called Description (red B). This is where you type in the description for one photo or a group of photos. With all of the photos selected I typed in Yellow-shafted Flicker (female), Lamoni Iowa. Then I clicked the check mark (red C) in the bottom right corner and in a few seconds that description was added to all of the photos. If you make a mistake typing in the text box, click the X (red C) instead of the check mark.
You can also add to an individual description, after you have put a description in all of the photos. In the folder of 73 parade photos I mentioned in the prior article, with all 73 photos selected I typed “4th of July parade” in the description box. I clicked the check mark and that description was added to all 73 photos. Then I went back and selected just the photos of the State Fair Queen and added her name and title to the description box abd clicked the check mark. I did the same thing for the photos of Miss Iowa, adding her name and title to just the description for her photos. I did all of this in batches so I didn’t have to type out each individual description. If you make a mistake when adding to a description, click the X (red C) instead of the check mark and your original description will be intact without the added mistake.
Drum roll please, the part you have been waiting for. Keywords.
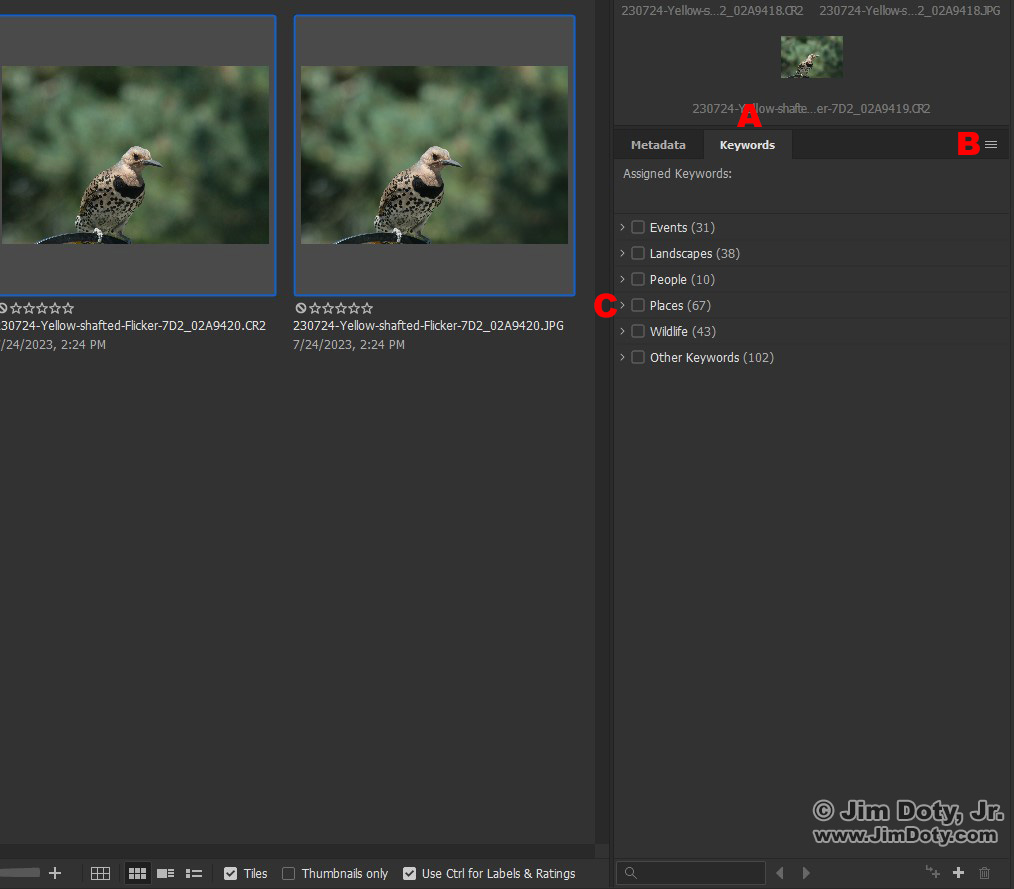
Bridge, Metadata and Keywords.
Go back to the Metadata and Keywords panel and choose Keywords. When you download Adobe Bridge you might have some broad general categories already created. Click on the three bar menu (red B) and you can create more categories. If you are using Windows, right click on any category of keywords and you can create sub-keywords. Right click on “wildlife” to create “birds”. Right click on “birds to create “eagles”. right click on “eagles” to create “bald eagle” and “golden eagle”. Create Colorado under places. Create Denver under Colorado. You can make this as simple or complex as you want. See Adventures with Adobe Bridge for more advice on creating keywords.
For this folder of flickers, we are going to click on Places (red C) first.
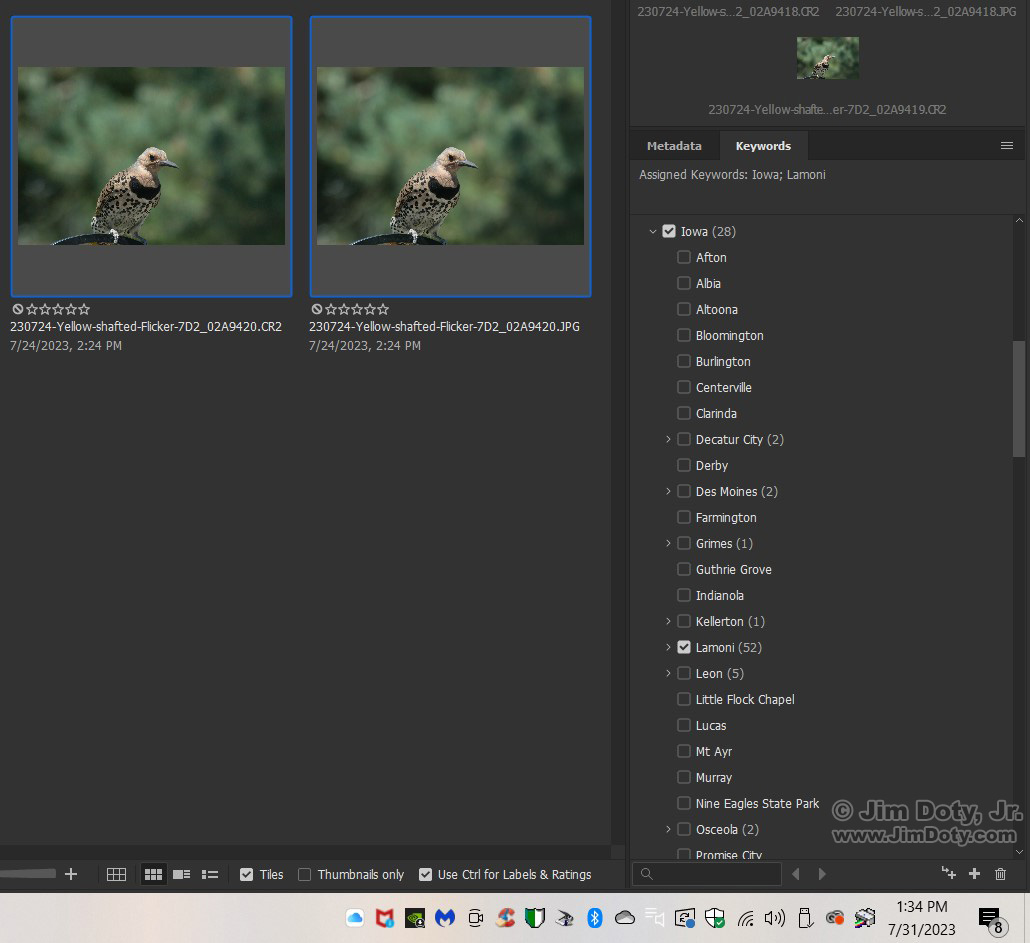
If we scroll down to Iowa, and open the subcategories, we find Lamoni, the location of these flicker photos. Click the boxes in front of Iowa and Lamoni and all of these flicker photos are keyworded with “Iowa” and Lamoni.
Now we are going to scroll down until we find Wildlife. Under Wildlife we will go down to “birds”
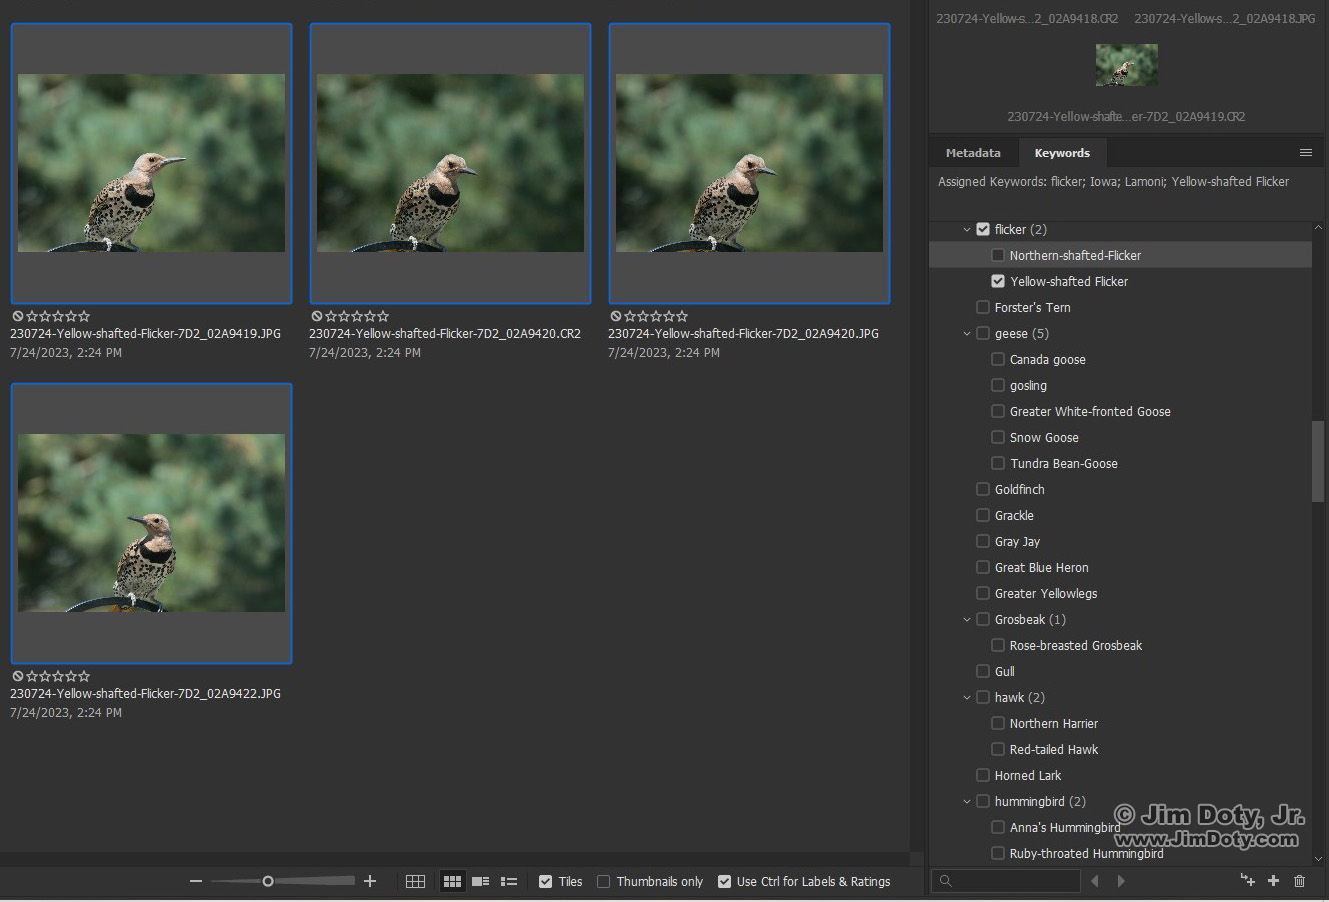
We scroll down in the birds category and we click the boxes in front of flicker and Yellow-shafter Flicker and all of these photos are keyworded.
Simple. With four clicks all of these photos are batch keyworded with the kind of bird and the city and state in which they were photographed.
To go to another example, with just three clicks, 73 parade photos were batch keyworded with “parade”, Lamoni”, and Iowa”.
In the future I can search for all of my flicker photos no matter where they were taken and they will pop up in less than a second. Or I can can search for flicker photos that were only taken in Lamoni. If I search for the keyword “Lamoni”, my Lamoni photos will pop up, including birds, parades, dances, baseball games, lakes, or whatever. Read more about the advantages of keyword searches in Adventures with Adobe Bridge.
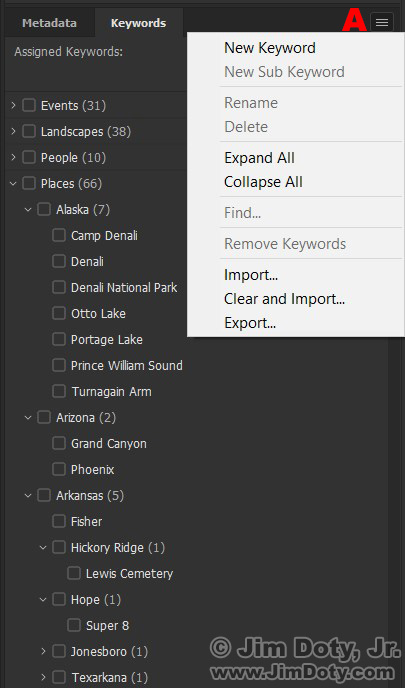
Before we leave keywords there is one more important thing to do, and that is to save your keyword list. It is simple to do. With the Keyword panel selected, click the three bar menu (red A). Go down the menu and click Export. Give your keyword list a name (I use the date and keyword: “230731-keywords”), and save it some place you can find it. Digital accidents can happen. Recently I lost a whole section of my keywords. I don’t even now how it happened. To restore your keywords, go to the three bar menu, click Import, navigate to your saved list and click on it. Your keywords will be restored.
Links
Adventures with Adobe Bridge – What Adobe Bridge Can Do For You
Adobe Bridge Basics: How to Download Photos into Folders By Date
Adobe Bridge Basics: How to Batch Rename Photos
Adobe Bridge Basics: How to Batch Keyword Photos (this article)