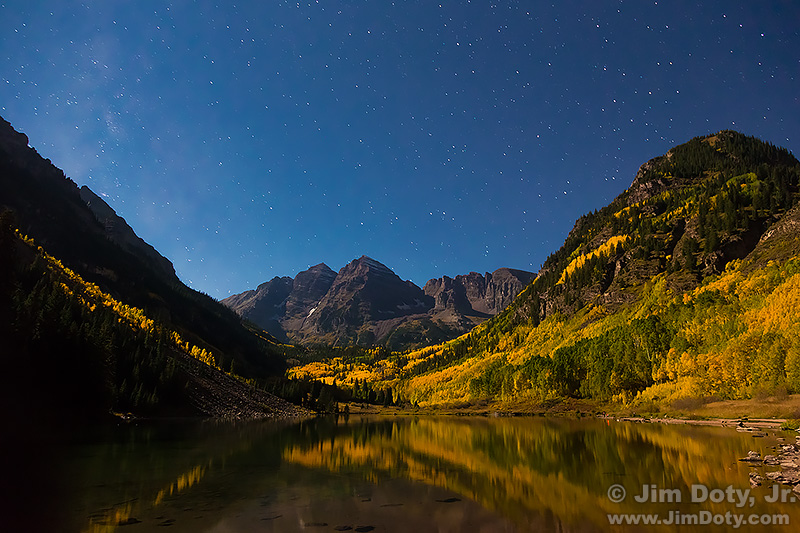
The Maroon Bells and Maroon Lake by Moonlight with the Milky Way. Colorado. Click to see a larger version.
The Maroon Bells deserve their reputation as one of the best photo locations in the state of Colorado, especially in the fall. They look just as spectacular by moonlight. It is an added bonus if you get a hint of the Milky Way in the frame (left side of the image). It won’t be as sharp and defined as on a dark night without the moon, but it will be there.
I am in Colorado for my annual photography workshop at Rocky Mountain National Park so I came a couple of days early to have an evening, night, and morning at the Maroon Bells reflected in Maroon Lake.
There were only 8 photographers at Maroon Lake taking photos by moonlight. Considering how beautiful night photography can be, that is a puzzlement. The next morning, not surprisingly, I counted 108 photographers lined up tripod to tripod along the shore of Maroon Lake. Anyone not there by at least 5:30 am did not get a prime location so they had to settle for a restricted view or include a bunch of photographers in the frame. But at night we had the place to ourselves so we could pick the best locations with the most unobstructed views.
A sturdy tripod and a quality tripod head are essential for night photography. Flimsy won’t work.
Make sure your camera is level. Use the camera’s built in level or use a double bubble level.
Wide angle lenses are best.
A prime (single focal length) lens is best but a zoom lens will work if you know exactly where infinity is on your zoom’s focusing scale. Zoom lenses focus past infinity so if you turn the focus ring as far as it will go, you will be focused past infinity and your photo will be blurred. With a zoom lens you need to find infinity during the day time and learn exactly where it is on the focusing scale of your lens. If you don’t have a focusing scale, find infinity while it is still light out, take a photo, zoom in to make sure objects at infinity are razor sharp, then tape the focusing ring so it won’t move and wait for the stars to come out. If you camera has a “live view” mode with 5x and 10x magnification, while it is still light out use it to focus on infinity with your lens at it’s widest focal length. Keep in mind that infinity focus changes as you zoom the lens, so choose the widest focal length on your zoom and stick to that.
So you don’t mess up your night vision, it is helpful to have a flashlight or headlamp with a red filter. The red filter is also a courtesy to other photographers. The photographers at Maroon Lake that were using red filtered lights got great images (along with a little help).
The photographers well down the lake from us were using white flashlights and headlamps and they did not get great images. When they closed up shop and left, they walked by us and I said “Did you get some good images?” They shrugged and said “Not so much.” That doesn’t surprise me. Their eyes never had a chance to fully dark adapt which is a huge handicap. It takes about 15-30 minutes for your eyes to fully dark adapt, depending on your age. Turn on a bright light and your eyes have to start all over.
Photographers near me had tried night photography before but without much success. They would come over and look at images on the back of my camera to see what I was getting and they started asking questions, beginning with “How do you do that?” So I started giving advice. With a little coaching and a number of tips, they were all able to come away with images like the one above. The first time out It helps to have someone who can coach you when things aren’t going right. On all my weekend photography workshops, every day I take everyone out on field trips well before sunset but we stay until it gets dark to work on night photography skills.
Long exposures and high ISO’s are the rule. 30 seconds, f/4 and ISO 1600 or ISO 3200 are a good starting point. High ISO settings mean high noise levels so you need to know your way around Adobe Camera Raw to eliminate most of the noise and create a pristine image. This also means you need to shoot RAW files or you have lost most of the battle before you even start.
You learn by doing. The next time you are at a great location and there is a fairly full moon, get out there and have fun!
Photo Data: Canon 5D Mark III. Canon EF 24-105mm lens at f/4. 30 sec., f/4, ISO 3200.
