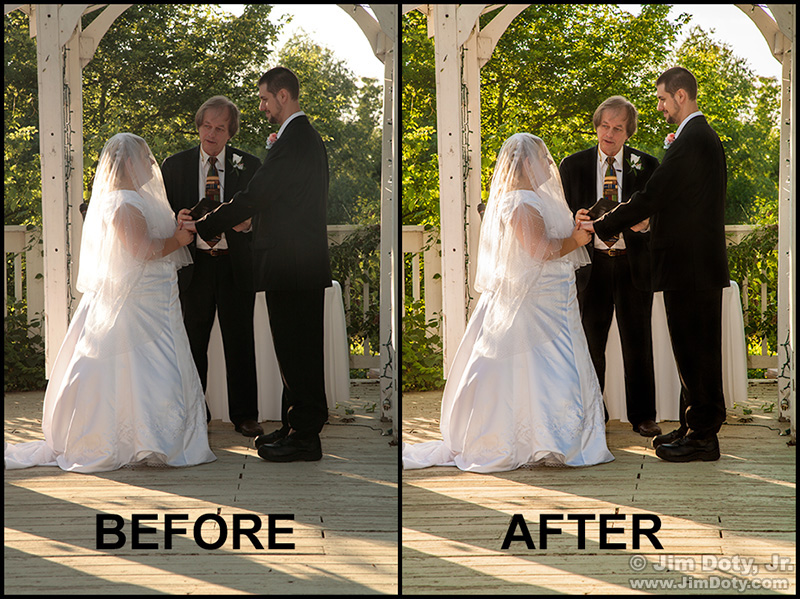
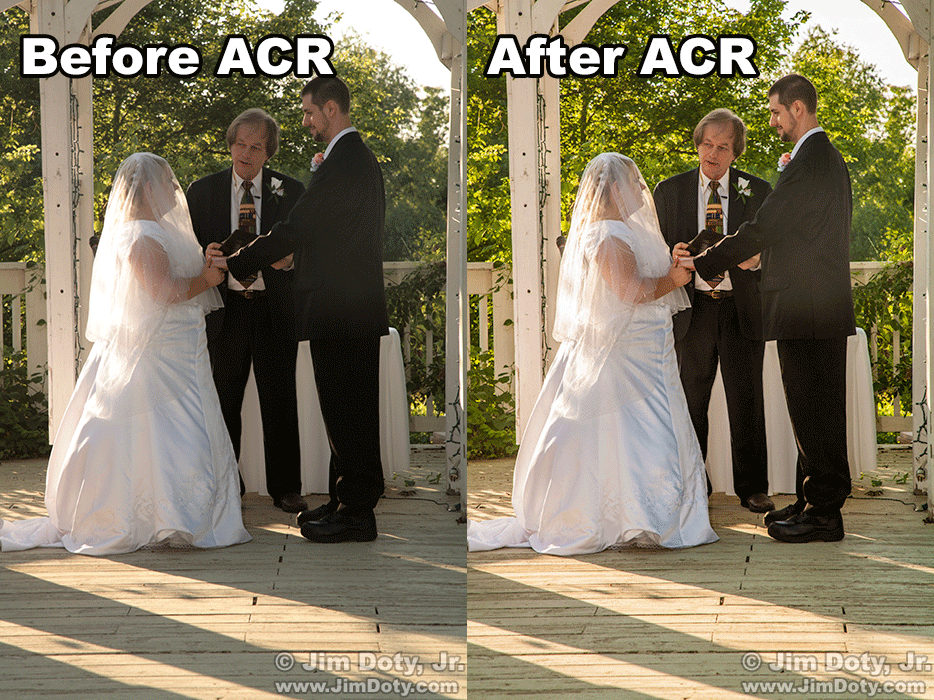
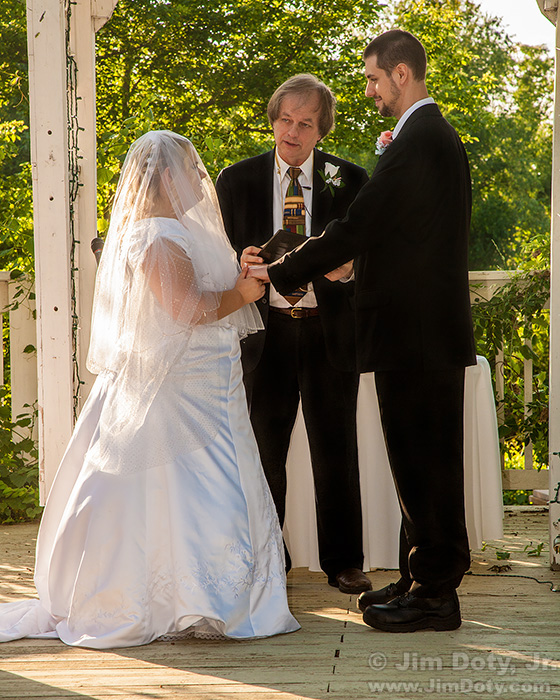
I was a guest at this wedding and seated in a location where the sun created a lot of contrast and flare. If I was the official photographer at the wedding I would have been at a different location, but I took the photo anyway, hoping to fix it later. I will take you through the process with some extra tips along the way.
Everything in this tutorial can be done with Adobe Photoshop or Adobe Photoshop Elements.
I tamed the contrast as much as I could by using fill flash and left the rest for post processing.
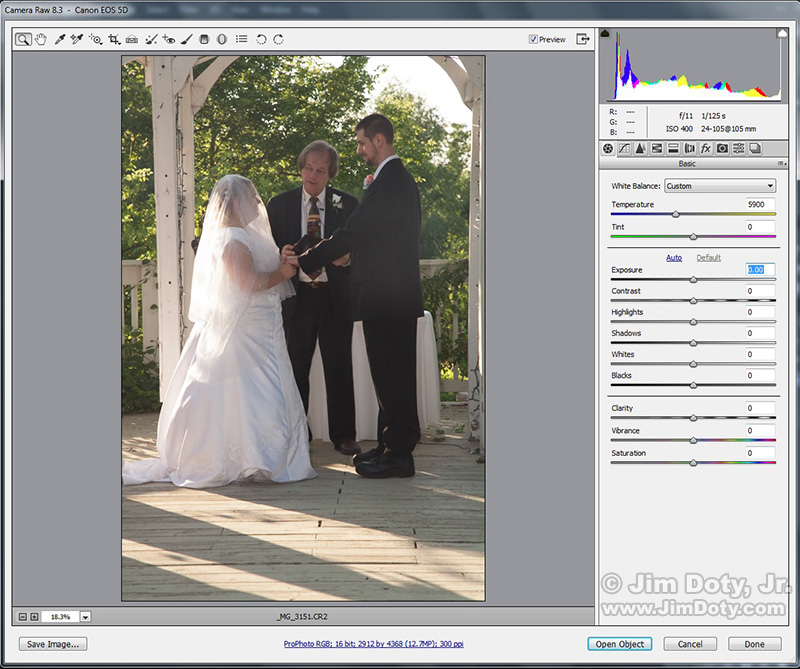
I opened the RAW image in Adobe Camera Raw (ACR). This is amazing software that comes with Adobe Photoshop Elements, Adobe Lightroom, and Adobe Photoshop. I consider ACR to be essential for every photographer who is serious about the quality of their images.
FYI: a RAW file gives you a lot more information to work with when using ACR. Some JPEG files will fall apart if you make dramatic changes with ACR. ACR was initially designed to process RAW files. In a lot of situations RAW files are better. See the links at the end of this article.
The first steps were to tame the contrast and as many of the effects of the flare which mutes the overall colors in the scene. Flare is caused by sunlight bouncing around inside the elements of your lens. It is why lens hoods were invented. But sometimes the angle of the lens makes flare impossible to avoid.
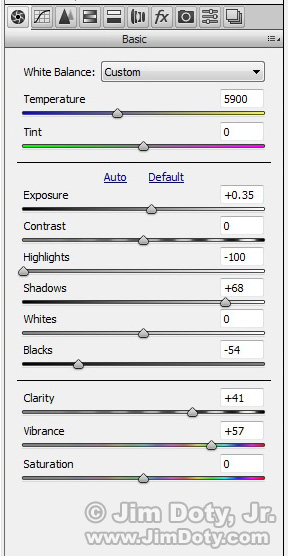
The Basic Panel is the same in all current Adobe software. I grabbed the Highlights slider first and drug it all the way to the left (-100) to tone down the blown out highlights in the image. With the highlights toned down I boosted the Exposure slider to the right (+0.35) to lighten the overall scene just a touch. Next I moved the Shadows slider to the right (+68) to lighten the darker areas of the scene significantly. I wanted darker blacks so I moved the Black slider to the left (-54).
Flare from sunlight entering the lens dulls the overall look of an image and desaturates the colors. To counteract that, I moved the Clarity slider to the right (+41) to add back the crispness in the scene and moved the Vibrance slider to the right (+57) to recover the lost colors.
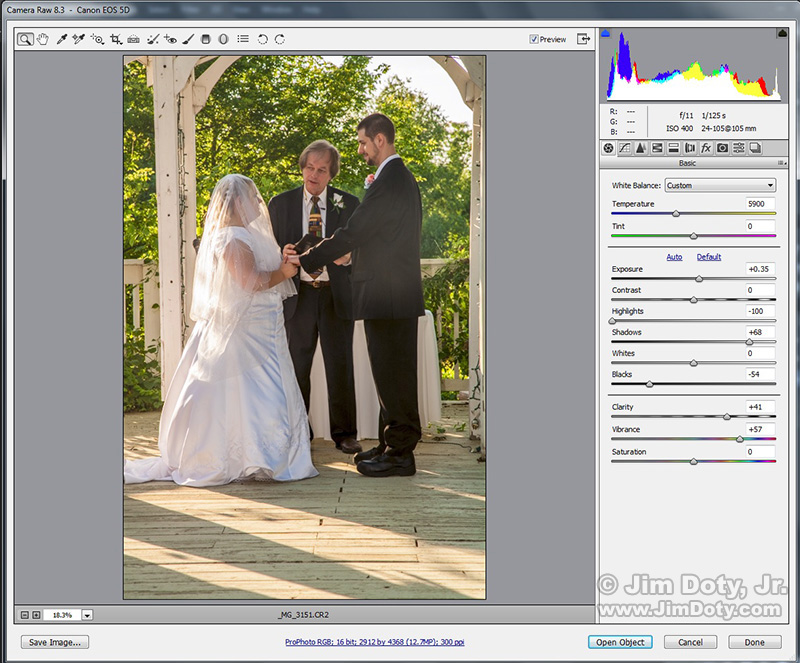
The way to learn ACR is to experiment. Drag the various sliders back and forth until the image looks like you want it too look. With the changes made I clicked Open Object to send the corrected imaqe to Photoshop.
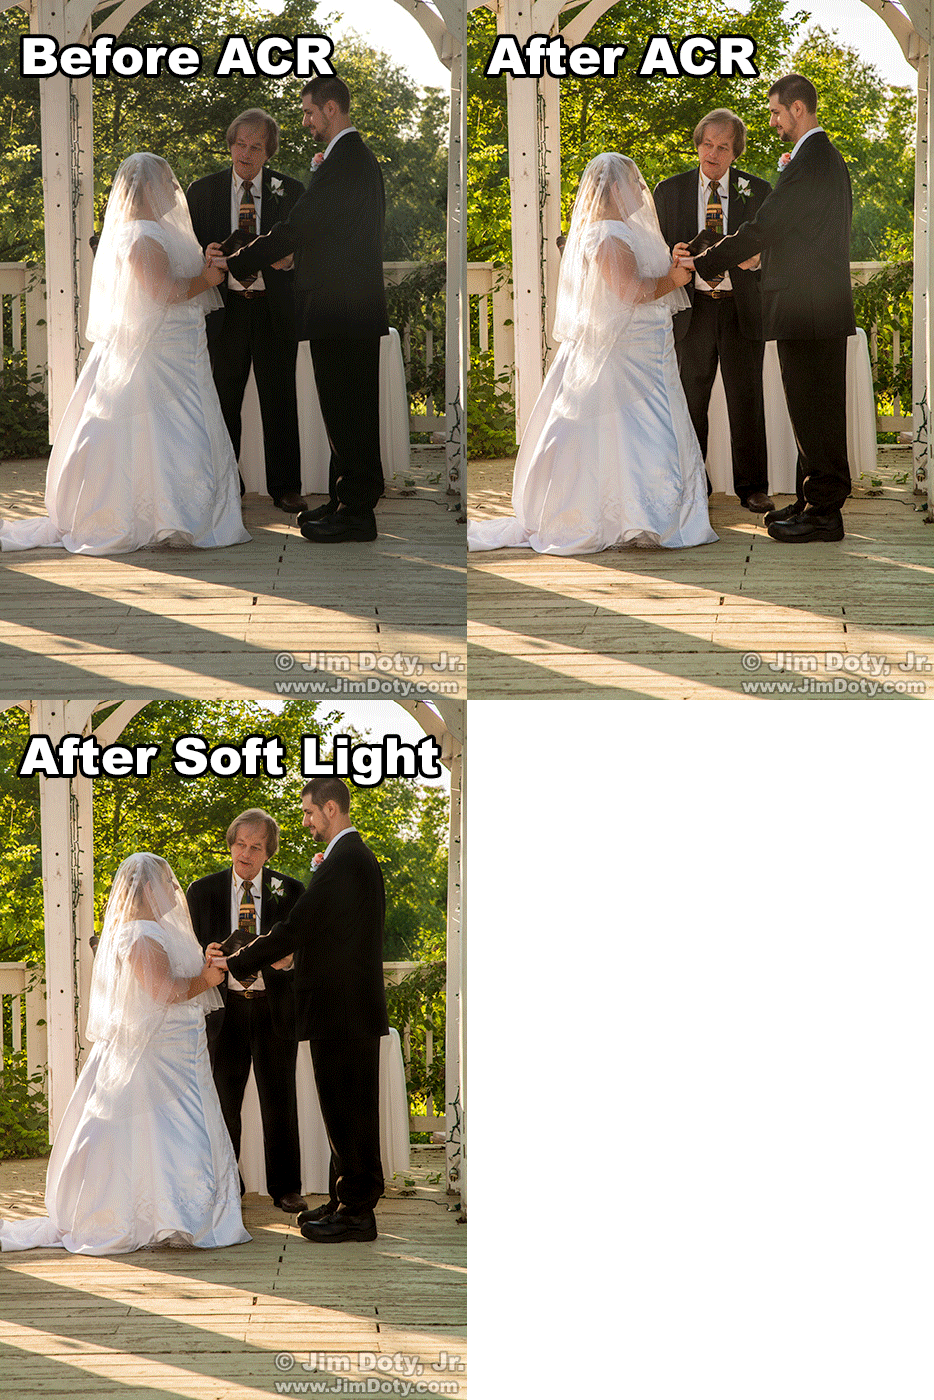
The ACR changes took just a few minutes, but they make a dramatic difference in the look of the image. I find it quite remarkable that a few minutes playing with the sliders in ACR can improve an image so much.
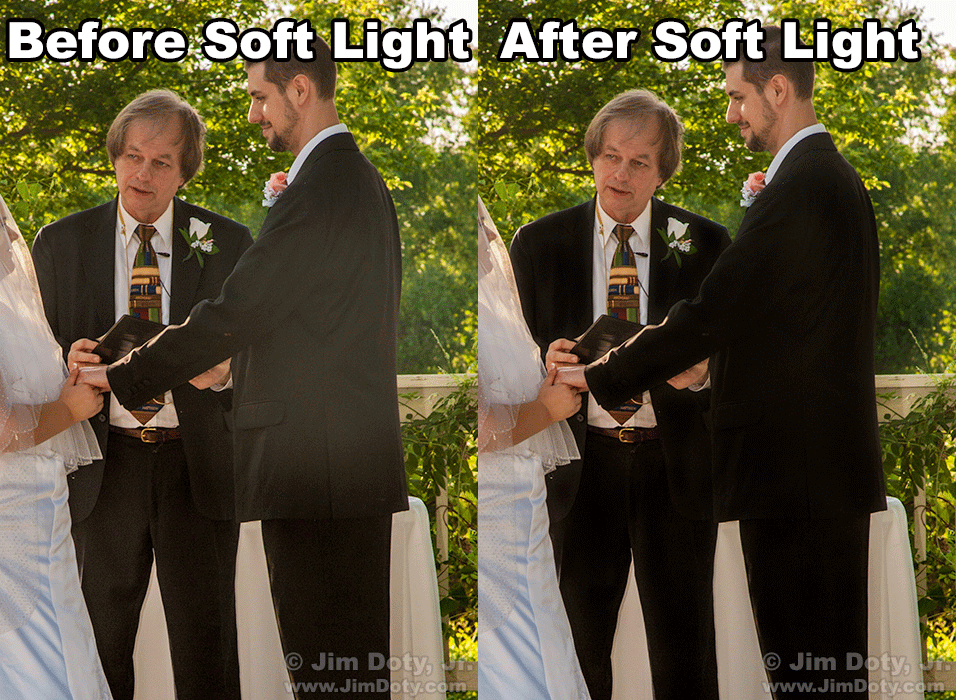
There are still problems caused by the sun flare which sometimes shows up in photos as a light haze. It is most obvious in the lighter area of the groom’s jacket in the “After” part of the above animated GIF. Plus, by bringing up the shadows in ACR (which helps the bride’s dress), the dark suits are now too light. Both problems can be solved using a soft light brush in Photoshop or Photoshop Elements.
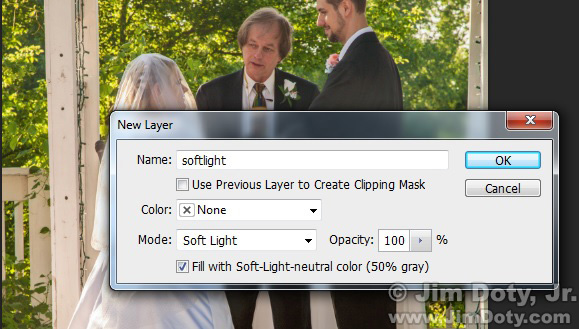
With the image open in Photoshop (or Photoshop Elements), choose Layer > New Layer from the menu to open the New Layer window. Change the name of the layer to a name of your choosing. The Mode box will say Normal. Click the down arrow and choose Soft Light. Then put a check mark in the box for Fill with Soft-Light-neutral color (50% gray).
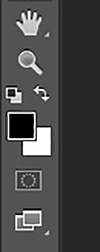
When you paint on a soft light layer (neutral color), it will lighten or darken the area you paint, depending on your foreground and background color in the tool box. Set the foreground color to black to paint an area and make it darker, and set the foreground to white to paint an area and make it lighter.
If you are new at this, click the tiny overlapping triangles to change the foreground and background colors to their defaults, black and white. Clicking the curved arrows will switch black and white. Make sure the larger overlapping box (the foreground) is black.
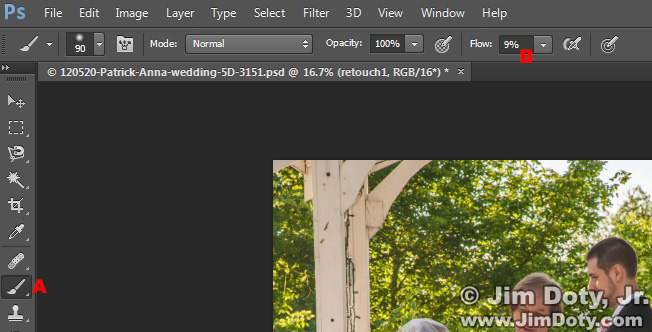
Next select the paint brush from the tool box (marked with a red A). Go up to the paint brush settings and change the Flow (marked with a red B) to about 9%. This makes the changes gradual when you paint.
If you prefer you can change Opacity to about 9% and leave Flow at 100%. The difference is FLOW is accumulative. If you click an area once it will get 9% darker. When you set Flow to 9%, if you hold the mouse button down instead of clicking once, it starts out as 9% darker and the longer you hold the button down the darker the area gets. Not sure which your prefer? Try both and experiment.
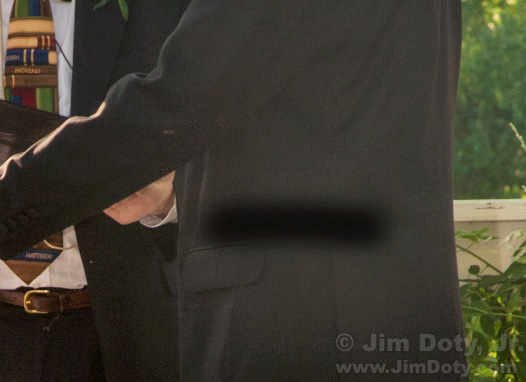
If Flow is set too high (like this example of one brush stroke), the changes will be too abrupt when you paint.
Change the size of the brush by clicking the right and left square brackets ( [ and ] ). When you have a fairly large brush, start painting over the areas of the image that are too light. Ideally, you want Flow set low enough that it takes several strokes to make the light areas as dark as you need them to be. If you over do an area and it is too dark, you can use PS’s History to back up, or you can switch the foreground color to white and paint the area again to make it lighter.
Once I had darkened the areas of the grooms jacket that were too light, I made the size of my brush even larger and darkened all of the groom and minister’s coats and pants.
It took just a few minutes of painting with a soft light brush to get everything like I wanted it.
One of the reasons for using a soft light layer is you are not changing the underlying image. If you mess up (it happens to all of us), you can delete the soft light layer, create a new soft light layer and try again.
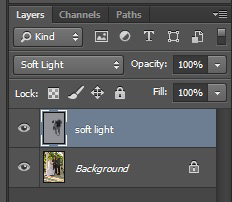
When you create a soft light layer, it will show up on the right side of Photoshop in the layers palete. The layers thumbnail will show where you painted.
If you are a portrait photographer, using a soft light layer with the brush set to white is a nice way to lighten the whites of the eyes.
After my work with the soft light layer, I created a new layer named “retouch” to make some minor changes to the image, like removing a small piece of stray thread on a jacket.
I spent only 3 or 4 minutes in ACR, and around 5-10 minutes painting with a soft light brush, plus maybe 5 minutes doing some minor retouching. When I finished I saved the image file with all the layers intact. I always save my “master files” with all the layers intact in case I want to go back and change any layers. Then I flattened and cropped the image, changed the color space to sRGB and created a “printers file” to send off to one of my favorite labs.
Photo Data: Canon 5D. Canon EF 24-105mm f/4L IS USM lens at 105 mm. 1/125 sec, f/11, ISO 400. Canon 550EX Speedlite for fill flash.
Links
The more adept you become at using ACR, the better your images will be. There are more panels to ACR that I did not cover in this tutorial and a world of things you can do with ACR to improve your images.
Mastering Photoshop & Lightroom: Adobe Camera Raw (ACR)
The Best Image Editing Software
There are lots of good reasons for shooting RAW files.
The RAW versus Jpeg Exposure Advantage
Some Examples of What You Can Do Using ACR:
Color Correction for Images Created in the Shade (using ACR)
Evening in the Rockies: ACR and RAW Files to the Rescue
Sisters: Color Correction With Adobe Camera Raw
Bride’s Portrait: Solving Mixed Lighting challenges with ACR
How to Photograph the Milky Way
Bobcat: Fast and Simple Tonality Adjustments with Adobe Camera Raw

