As the prior article points out, you should not post photos online that were taken at your home, the homes of your relatives, or your place of work until you remove the GPS location information from those photos. There are some other places where you probably won’t want to share the GPS location of your photos. The prior article also tells you how to remove the GPS locations using your computer. For this article I was going to show you how to remove GPS data from photos while they are still in your iPhone. I followed the advice online and discovered that advice did not work, at least on my iPhone 11.
The Advice That Works
Before I get into the advice that doesn’t work, let me show you what does work.
Just a few minutes ago I took the original iPhone photo of this map with pins. The photo on my iPhone has all of the original metadata, including the time, date, camera settings, and the GPS location of this photo. Then I zoomed in on the photo with my iPhone and did a screen capture and posted it here. Since it is a screen capture, all of the camera and GPS data is gone. This is the simplest way to create a photo on your phone that has no GPS data. Since it is a screen capture from an iPhone, it is long and narrow. You might want to make a loose screen capture of your photo and crop it before you post it.
The Advice That Doesn’t Work
Now for the commonly given advice on the internet that looks like it works, but it doesn’t really remove the GPS data from your photo. I just does away with the map.
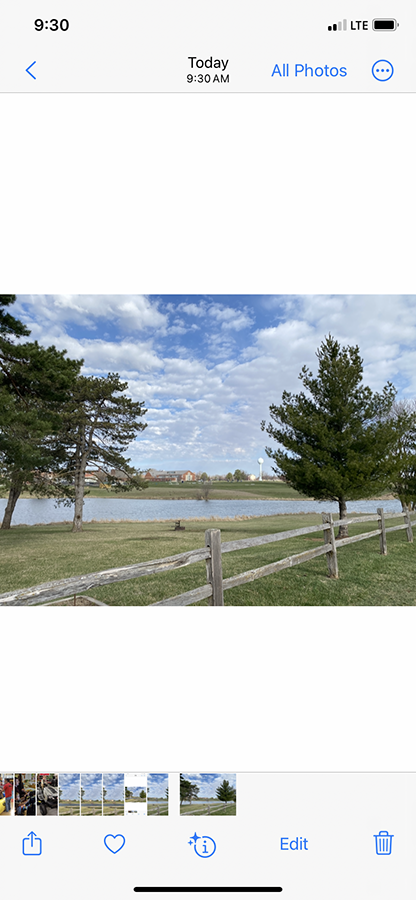
The photo at the top of this article, taken this morning with my iPhone, is Big G Lake. I will use it as an illustration of the GPS removal procedure recommended online that does not work.
The recommended procedure takes just 3 simple steps to supposedly delete the location information using your iPhone.
This is what the photo looks like on my phone after I go to the photos folder and select the photo I want. The first step to removing the GPS information is to click the blue information “i” in the circle at the middle of the bottom of the screen.
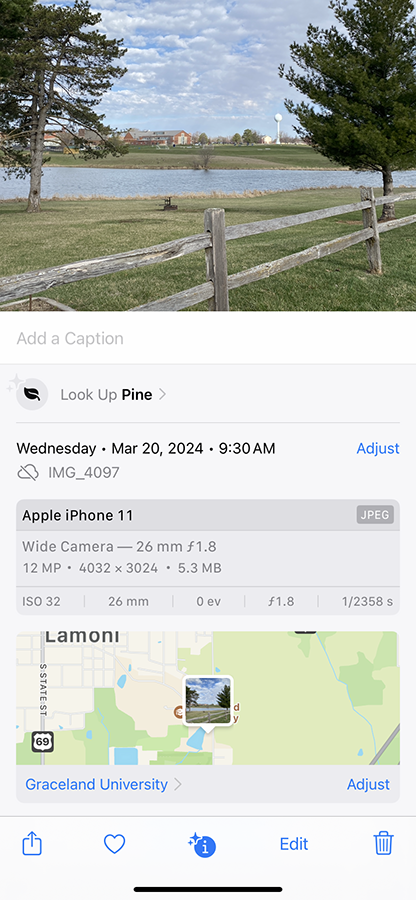
After I click on the information “i”, this is what I see: the date and time, the camera settings, and a map showing where I created the image. If you don’t see the blue word “Adjust” below the map and to the lower right, scroll down until you see it. Step 2: Click on “Adjust”.
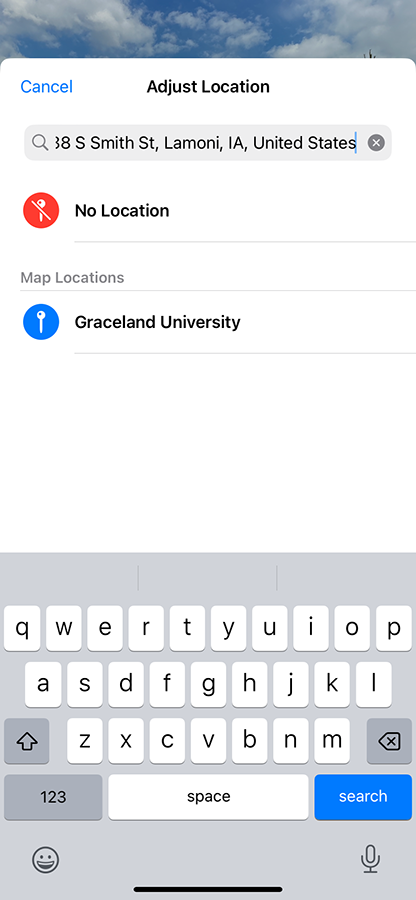
After I click on the blue word “Adjust” under the map, this is what I see. Step 3: Click on the red circle to the left of “No Location”. That will delete the location information from your photo. It is now safe to post online. If you want to be sure the location data is gone, go back to the information screen and check.
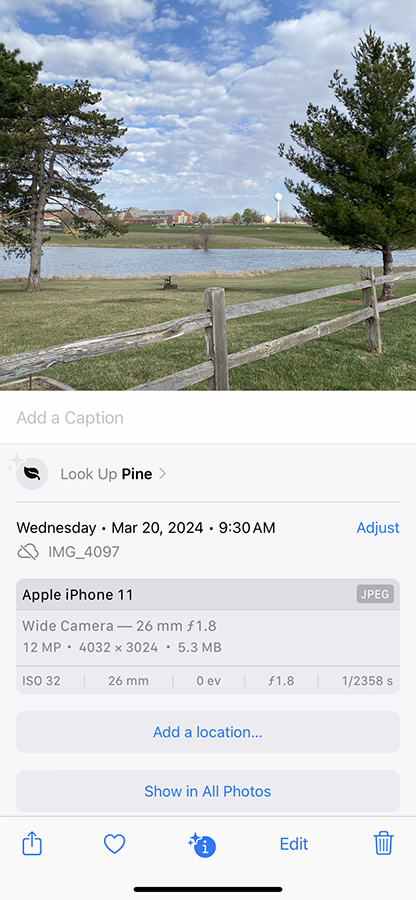
I went to the information screen and checked. The location information is gone.
BUT NOT REALLY. The map is gone but the GPS data is still embedded in the photo.
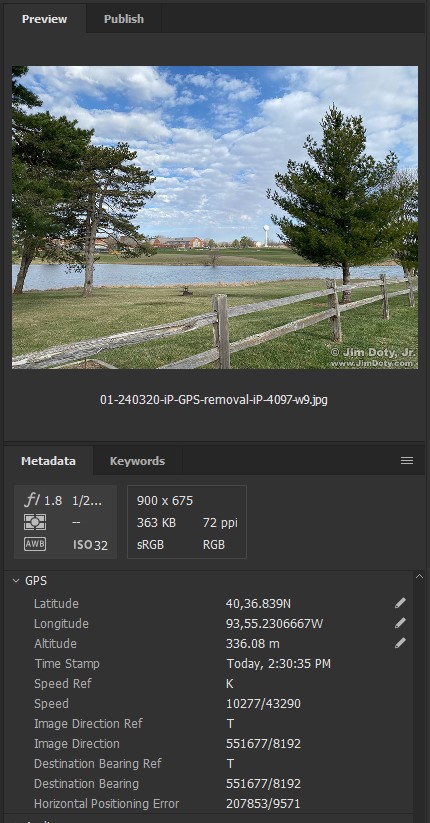
Screen capture: the photo in Adobe Bridge after the location information has supposedly been removed.
After I followed the online advice, I looked at the photo using Adobe Bridge. The latitude, longitude, and altitude are still there. The only thing my iPhone did was to remove the map.
I posted the photo at the top of this article after the location information was supposed to have been removed by my iPhone. It was not. If you click on the photo with an EXIF Viewer it will show you exactly where my iPhone was this morning when I clicked the shutter. If you click on the map photo with an EXIF Viewer, you will not see the GPS location of the photo.
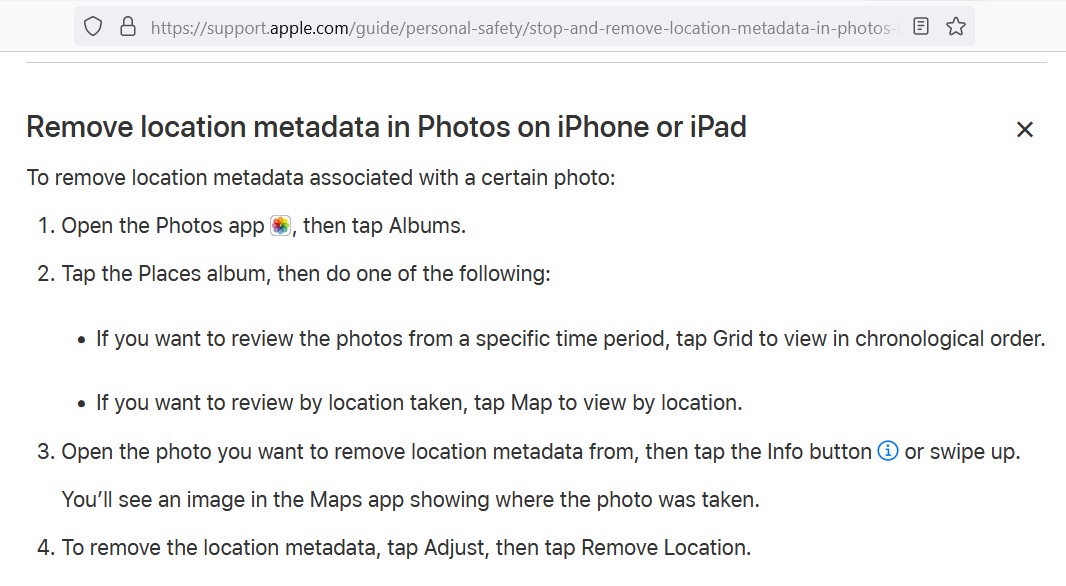
For those of you who are curious, this is the advice I found at Apple. It did not work for the photos on my iPhone 11. I found the same advice at a half dozen other web sites.
Link
How To Remove GPS Information from Your Photos Using Your Computer


