The Sunny f16 rule is really useful on bright sunny days in the spring, summer, and fall, but you can’t rely on it for accurate exposures on bright, snowy winter days. It will often lead you astray and you will have seriously blown out highlights. There are much more accurate ways to meter in the winter.
This is the ninth in a series of articles on winter photography. To see the rest of the articles go to the series link below. The articles in this series are updated every year in January.
A Quick “Sunny f16” Summary
As long as the sun is high in the sky and not obscured by clouds, haze, dust, or other particulates in the air, it is a constant light source. That is why the Sunny f16 rule usually works in spring summer and fall (with some exceptions). The Sunny f16 rule, also known as Basic Daylight Exposure (BDE), (or the “fig” rule because f16 hand written looks like the word fig) is pretty simple. For front-lit subjects set the lens aperture to f/16 and use a shutter speed equivalent to 1 over the ISO you are using (1/ISO). If the camera ISO is set to 100, the Sunny f16 exposure is f/16 at 1/100 second. If the camera ISO is set to 400, the Sunny f16 exposure is f/16 at 1/400 second. (You can also use equivalent exposures.) As long as the subject is front-lit and not really light in tone (like white sand, white animals, and snow), or really dark in tone (like a gorilla), the Sunny f16 rule works just fine. If your subject is side-lit, back-lit, really dark in tone, or really light in tone, you will need to do some exposure compensation. The Sunny f16 rule also doesn’t work for closeup photography when using closeup equipment costs you light. Details on all the ins and out of the Sunny f16 rule are covered in my book Digital Photography Exposure for Dummies (linked below).
Why the Sunny f16 Rule (BDE) Isn’t Reliable in Winter
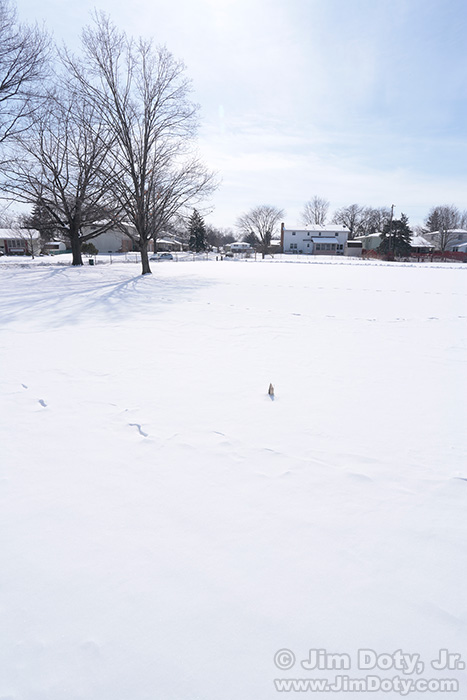
In the winter, bright sun on snow can easily exceed the exposure latitude of most digital cameras, making the Sunny f16 rule unusable. This photo in a local park is an example. I used the Sunny f16 rule and much of the snow is blown out. The clouds in the sky are also washed out. The sunlight on white snow and the clouds backlit by the sun are just too bright. The Sunny f16 rule did not work.
The problem is your camera can’t see the same range of light to dark tones (exposure latitude) that your eyes can see. If you have bright white tones, medium tones, and really dark tones in the same scene, your camera can’t record them all in a single click of the shutter. If you meter for a medium tone (which is also what a gray card or incident light meter essentially helps you do), the medium tones will look great, really dark tones will disappear in inky blackness, and a really bright, white tone will be totally washed out. Sunlight on reflective, white snow is about as bright as it gets. To complicate matters even further, every camera model has a different snow exposure latitude. All of this comes together to wreak havoc with the Sunny f16 rule. The Sunny f16 rule gives you great exposures for medium toned (middle gray) subjects and subjects that are one stop brighter or darker, but not bright white, snow.
There isn’t a simple exposure compensation rule to adapt the Sunny f16 rule for sunlight on snow. There are just too many variables when it comes to sunlight bouncing off of snow. You can stand in the same place in the same light, take pictures in four different directions, and the intensity of the sunlight bouncing off the snow will be different in each direction. The camera angle matters. So does the angle of the snow relative to the sunlight. If the sun isn’t high in the sky, the intensity of the sunlight is reduced by the atmosphere and the Sunny f16 is just not applicable.
The same is true for incident light meters. They will also throw you off since they will give you a great exposure setting for medium tones, but not for bright sunlight on snow. The only way around this is to alter what the incident light meter tells you with the right amount of exposure compensation, plus make additional allowances for the snow exposure latitude of your particular camera (they are all different – see the Snow Exposure Latitude article linked below). The same is true for metering an 18% gray card. You will get a great exposure for medium tones but not bright snow. There are better ways to meter in winter.
Overexposure Warnings
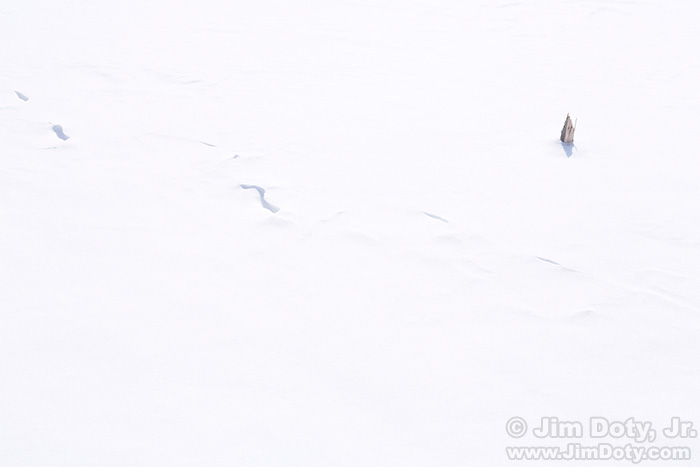
Let’s take a closer look at the snow in the foreground of the above photo in the area of the footprints and small tree stump.
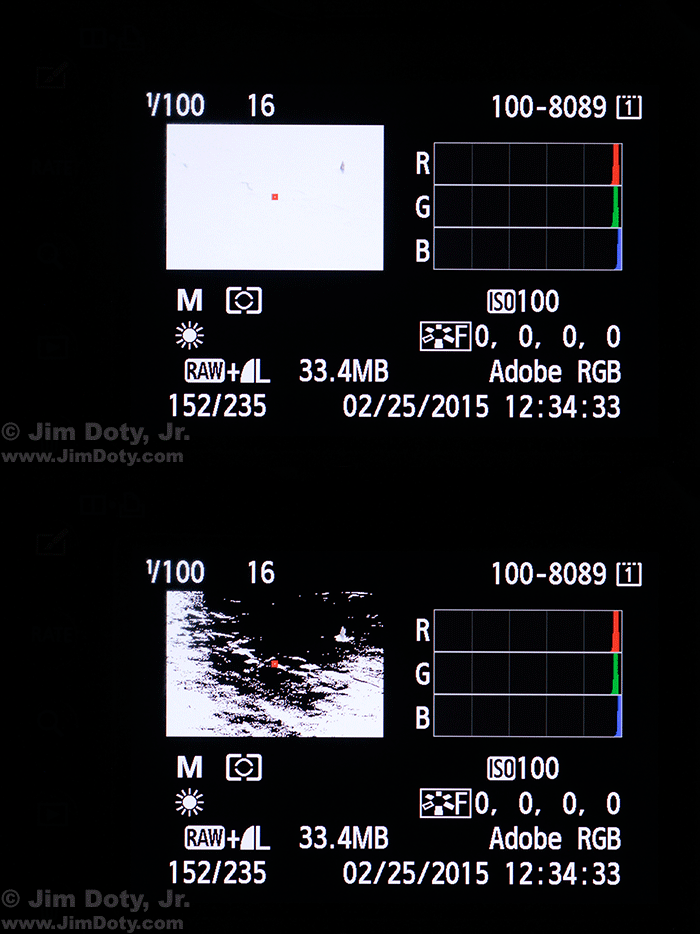
This photo of the snow in the foreground was exposed using the Sunny f16 rule. Most of the pixels are totally blown out. It is a bad exposure. Let’s look at the LCD image and the histogram for this photo.
The “blinkies” (flashing black and white) show all of the overexposed, blown out pixels in the photo of the snow. There are also three spikes on the far right side of the histogram indicating blown out and almost blown out pixels. The camera is giving me two big warnings that the Sunny f16 rule didn’t work.
If your camera has the blinkies feature, you should turn it on. You should also turn on the histogram and pay attention to what it tells you. They will both warn you when you have blown out pixels, no matter the season of the year or the subject. If you have a choice between an RGB histogram and a luminance histogram (which averages all three colors), use the RGB histogram. It gives you a more complete and accurate idea what is going on with your photo. One of the color channels can be blown out, which an RGB histogram will show you, while the average of all three color channels for the same photo will look ok in a luminance histogram, giving you no clue that one channel is washed out.
When you have bright sunlight on snow, the same is true for using a gray card or an incident light meter. You still have the possibility of blown out snow due to the exposure latitude of the typical digital camera.
The Best Way to Meter Winter Scenes
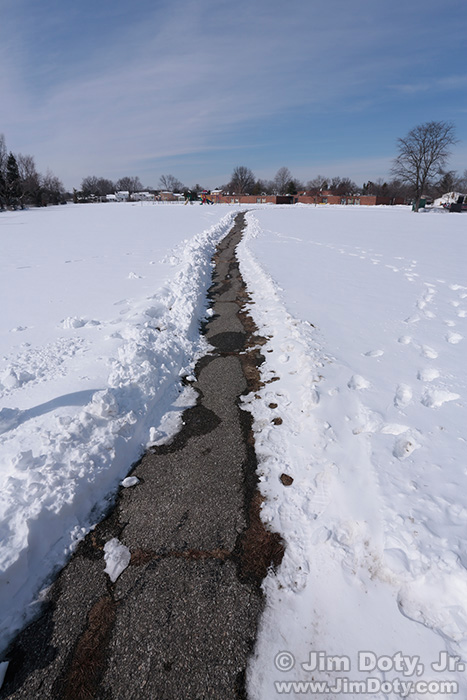
Snow. Same City Park. Same lighting conditions. Taken 4 minutes after the above photos. Exposure: 1/200 sec; f/16; ISO 100.
The most reliable approach is to use your camera to meter just the snow (or in some cases just your subject and not the snow) and use the appropriate amount of exposure compensation for each situation, subject, lighting condition, and time of day (or night). There are several variables involved. How do you know exactly what to do? That is the reason for this series of winter photography articles. See the links below.
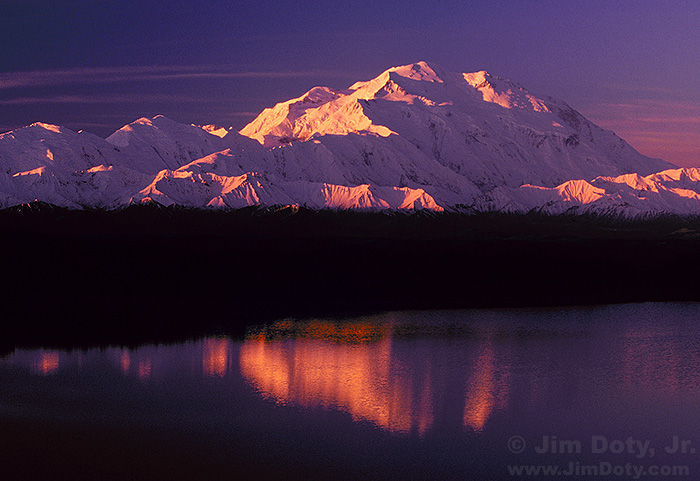
Information for the top photo: Denali (Mt. McKinley) photographed at sunrise from Reflection Pond. Denali National Park, Alaska. Canon EOS 3 film camera. Kodak E100VS professional slide film. Exposure was based on the sunlit, east facing flanks of Denali. Exact exposure data unrecorded.
Originally posted March 13, 2015. Revised and re-posted January 28, 2023.
Winter Photography Series Links
“How To” Series: Winter Photography – An Overview with links to the articles
Testing Your Camera’s Snow Exposure Latitude
Related Article Links
The Best National Parks to Photograph in Winter
One Photographer and Nine Outdoor/Travel Writers Pick the Best Winter National Parks
“How To” Series: Snowy Owl Photography
More Links
Exposure Warning: Turn on the Blinkies
Using Reflected Light Meters, Part One (with a section on exposure compensation).
Why Is Exposure So Important? The first in a series of articles covering the basics of exposure with links to the rest of the articles.
Speaking Your Camera’s Language: Aperture, Shutter Speed, and ISO (thinking in stops).
The Best Colors Come From The Best Exposures
Mastering exposure is one of the first and most important steps to becoming a better photographer. One of the best ways to do this is to read Digital Photography Exposure for Dummies and do the exposure exercises in the book. This book will teach you the basics and then take you well beyond the basics. Digital Photography Exposure for Dummies is one of the highest rated photography books at Amazon.com (5 stars) and it is praised by amateurs, professional photographers, and photography magazines as one of the most helpful and comprehensive books on exposure currently available. You can learn more here and order it at Amazon.com.

