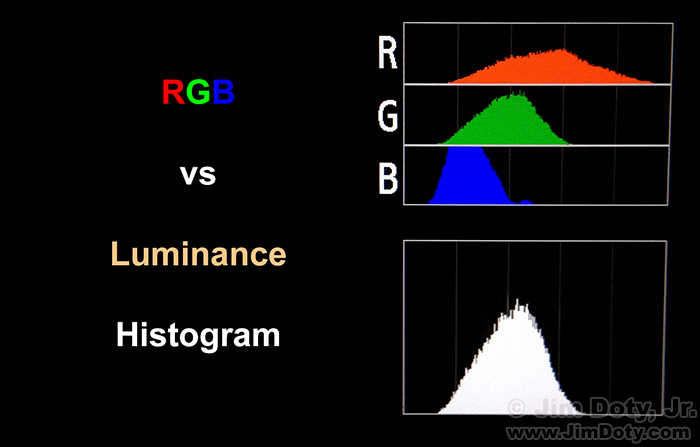
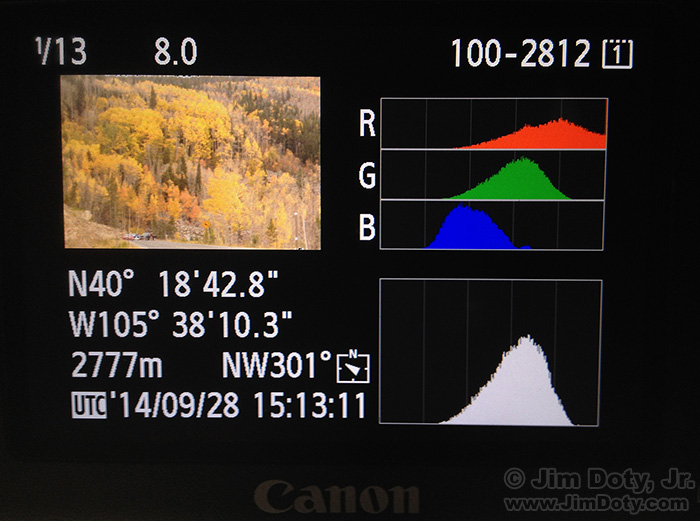
If your camera offers both RGB and luminance histograms, choose RGB. An RGB histogram is one of your most valuable exposure tools. A luminance histogram can lead to bad exposures and poor colors.
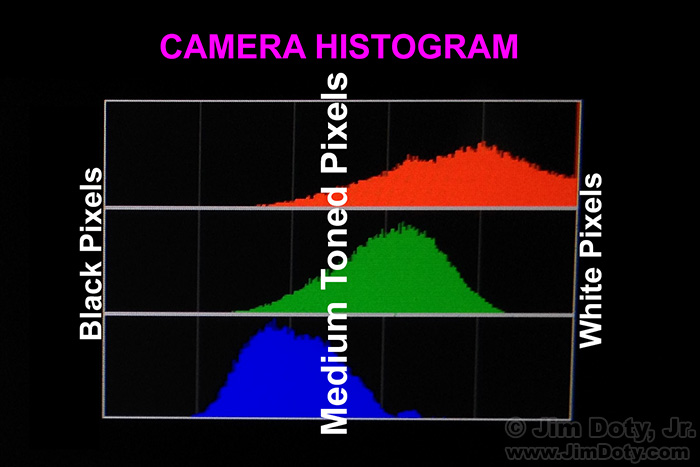
The histogram display on the back of your camera is a map of the intensity of all the pixels in your image. The mountain ranges in your histogram indicate how many pixels you have at each brightness level from black on the left side to white on the right side, and all the shades in between.
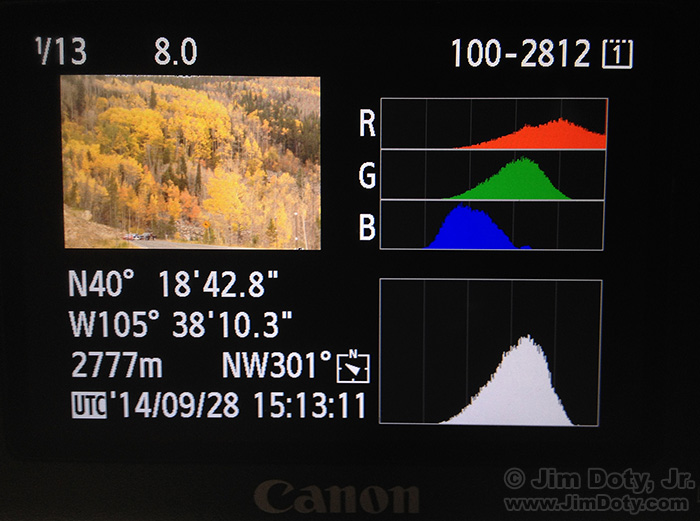
LCD camera display for photo 2812 (upper left) with thumbnail image, histogram, and photo information.
In this particular histogram, there is a spike on the right side of the red channel, indicating a bunch of “blown out” (white, washed out) pixels at the red wave length. The problem with blown out pixels is the loss of color information. This will not always be obvious on the LCD thumbnail image. You can’t trust the LCD image on the back of your camera to give you accurate exposure information. That is because the brightness of the LCD image is determined by the settings in the camera, not the brightness of the actual image file. An RGB histogram is your best indication of a problem exposure. If you have spikes on the right side of the histogram, you have washed out pixels in one or more color channels.
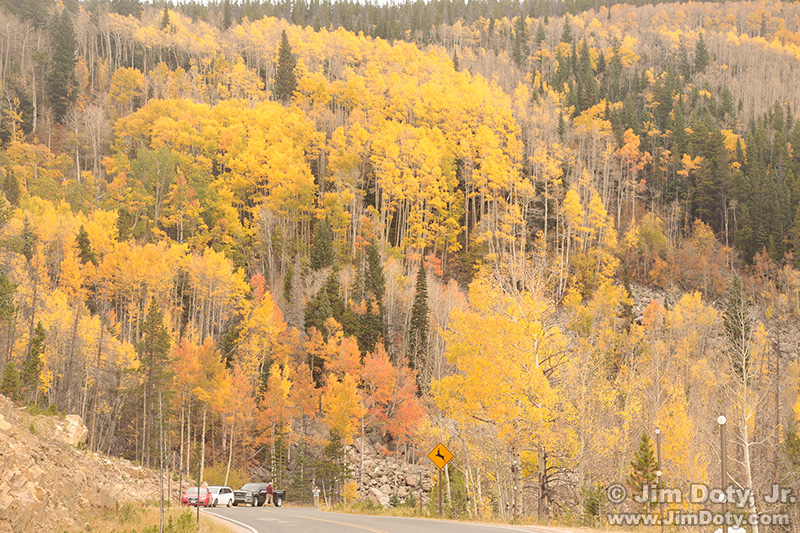
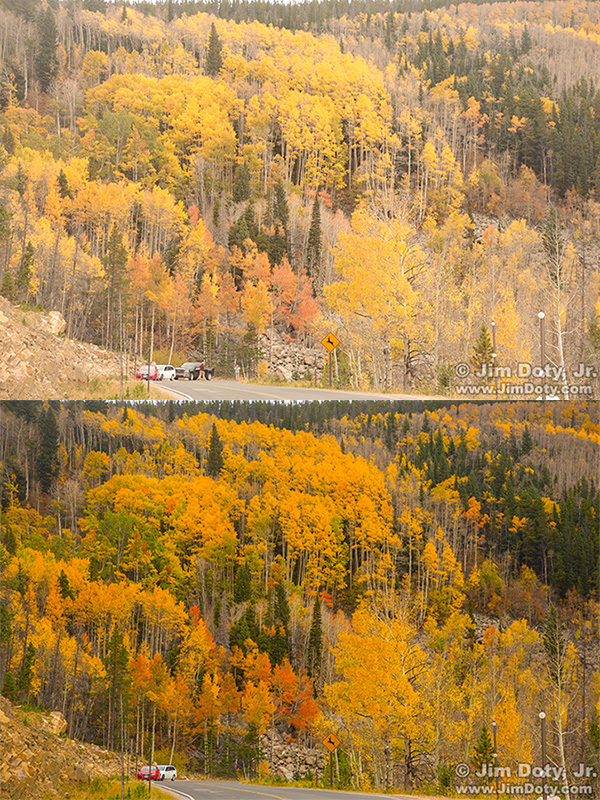
This is photo 2812 as it came right out of the camera. The colors are weak and desaturated. The reason is the red channel has blown out pixels. The red spike on the right side of the histogram is your cue to tone down the exposure by using a faster shutter speed, a smaller lens aperture, or lower ISO setting. The shutter speed for this image is 1/13 second (check the upper left corner of the LCD display for this image).
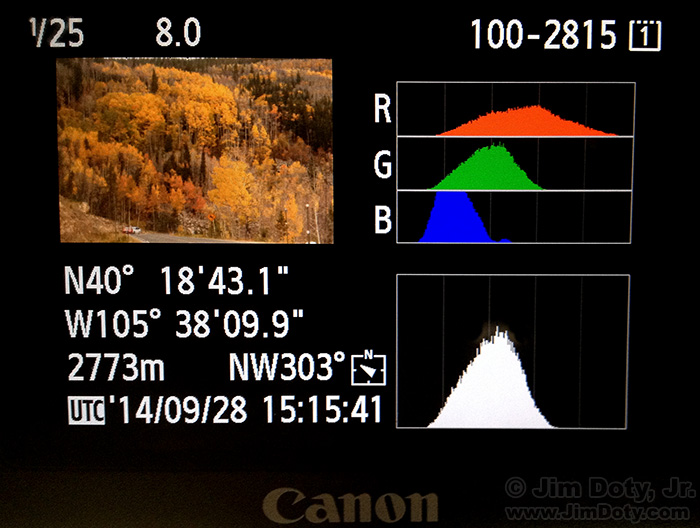
LCD camera display for photo 2815. Shutter speed changed to 1/25 second. Aperture and ISO unchanged.
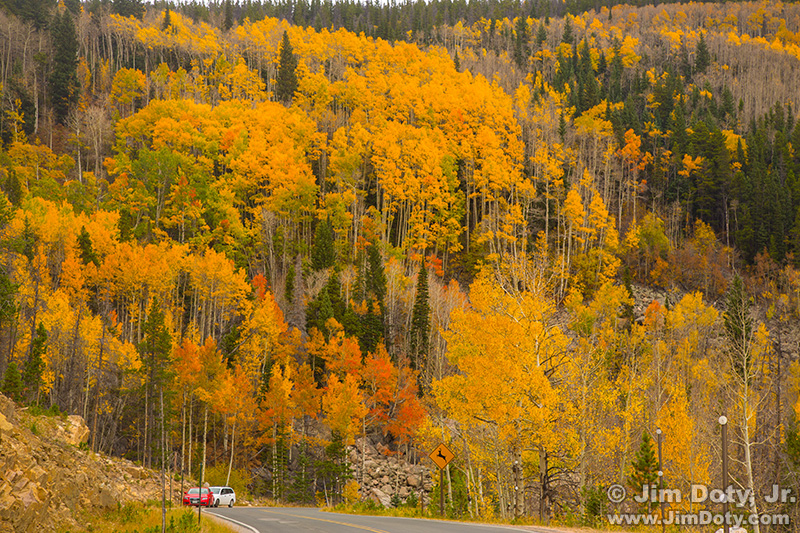
I changed the shutter speed in 1/3 stops increments, took pictures, and watched the histogram every time. At 1/25 second I no longer have a red spike at the right edge of the histogram. I now have good color information in all three color channels.
This is photo 2815 taken at 1/25 second. The color information is much better. This is the kind of color I saw with my eyes. All I had to do was keep an eye on the histogram and make sure I had no blown out color channels. Not only are the trees better, look at the difference in the red car.
Here’s a before and after comparison of the two images.
Update (October 10, 2016): This beautiful aspen covered mountainside is right above Fern Curve where the cars are parked. You won’t find this marked on the park maps, but you can find the location in this article which features a photo taken late in the evening.
Which brings us to the problem with luminance histograms. Here’s another look at the RGB and luminance histograms for photo 2812. The luminance histogram (lower right) gives you no clue that the red color channel has washed out pixels. That’s because a luminance histogram averages the three color channels.
In my opinion, an RGB histogram is an essential camera feature for serious photographers. If you have an RGB histogram in your camera turn it on and check it often to make sure you don’t have any blown out color channels (unless it is the kind of image where you want blown out color channels).
If you only have a luminance histogram, turn it on and keep an eye on it but keep in mind that it won’t let you know if one color channel is blown out. You should always take a few insurance shots on the under exposure side just to be safe.
If you have no histogram at all, put an RGB histogram on the “must have” list for your next digital camera.
Incidentally, an RGB histogram is essential if you who want the best, most accurate colors your camera is capable of producing. Why? One of the least talked about secrets of professional photography is this: great colors come from accurate exposures. If you miss the ideal exposure, the colors in your image will shift in different directions. You can correct the exposure in your computer but you can’t correct the color shifts. This is why professional photographers are obsessive about accurate exposures, and why they get better colors.
Photo Note: I originally did these demonstration images (2812 & 2815) in a small parking lot during a photo workshop at Rocky Mountain National Park. Before walking down the road to our photo location, I had everyone gather around my camera and watch the histogram change as I changed the shutter speeds. I grabbed the LCD images on the back of my camera with my iPhone.
Article posted Jan. 8, 2016. Updated Dec. 10, 2016.
Links
The Best Colors Come From the Best Exposures
Using the Histogram to Check Studio Flash Exposures
An introduction to the basics of exposure with links to more articles.
To learn how to get the ideal exposures in real world photography, read Digital Photography Exposure for Dummies. It has a 5 star rating at Amazon.com and it has one of the most comprehensive discussions of exposure of any book currently on the market. Learn more about the book here and order it at Amazon.com.

