
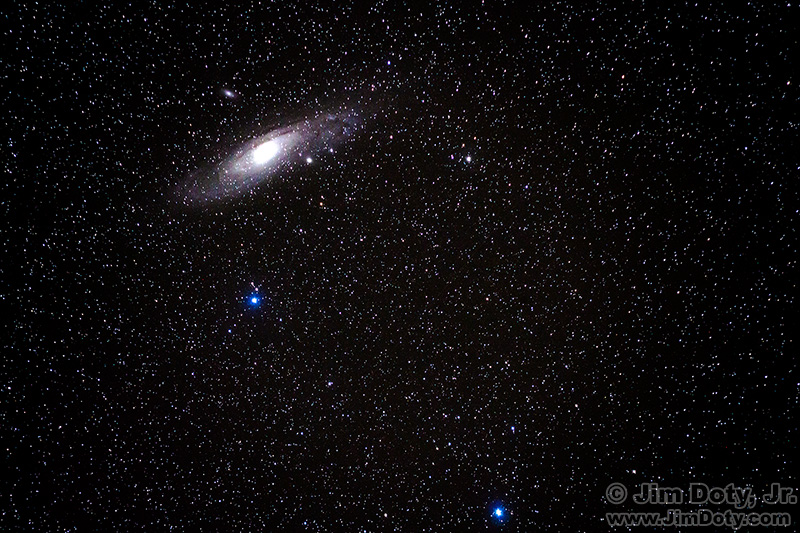
I just purchased the Sky-Watcher Star Adventurer 2i. I read several comparison articles before making my choice. I put it through its paces and decided to write a review with a basic introduction as to how to use it. Not only does it work, it works very well. This photo of the Andromeda Galaxy was taken on my first night out with clear skies.
What does a sky tracker do? It compensates for the rotation of the earth. If you put a camera on a tripod, and take a picture of the night sky with a shutter speed that is too long, the stars will be streaks of light. Put your camera on a well made star tracker, polar align it properly, and the star tracker will track the stars as they cross the sky. Now you can use shutter speeds that last for minutes instead of seconds.
If you are using a camera on a tripod without a star tracker you can minimize star trailing by using the rule of 500. Divide 500 by the focal length of your lens and that will give you the longest shutter speed in seconds that will keep star trailing at a minimum. With a 50mm lens the longest shutter speed is 10 seconds. For a 20mm lens we are talking 25 seconds. For a 300mm lens we are talking 1.7 seconds. A star tracker changes all of that.
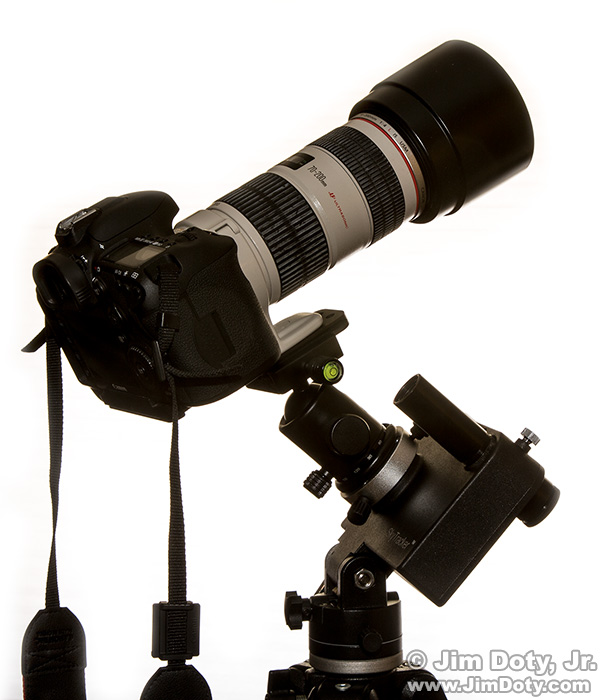
This is not my first start tracker. Four years ago I bought the original iOptron Sky Tracker. I love it and it works well, but it does not provide a way to use counterweights when using larger, heavier lenses. A lightweight lens like the Canon 70-200mm f/4 lens in this photo is pretty much its limit. My experience with the iOptron Sky Tracker made it easier to use the Sky-Watcher right out of the box without a learning curve.
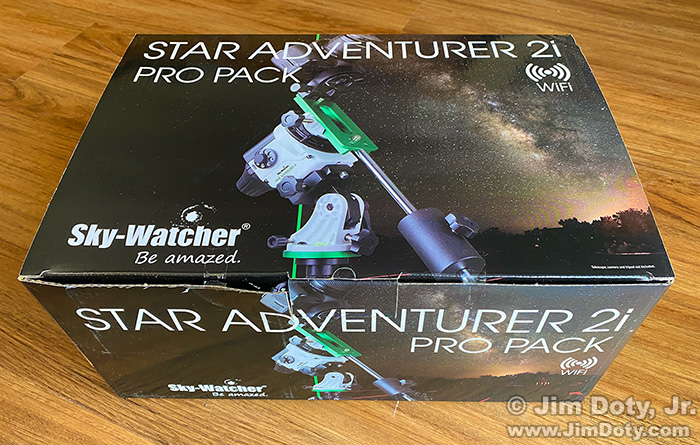
I bought the Pro Pack (more about that later) which comes in a box like this.
Out of the Box Parts
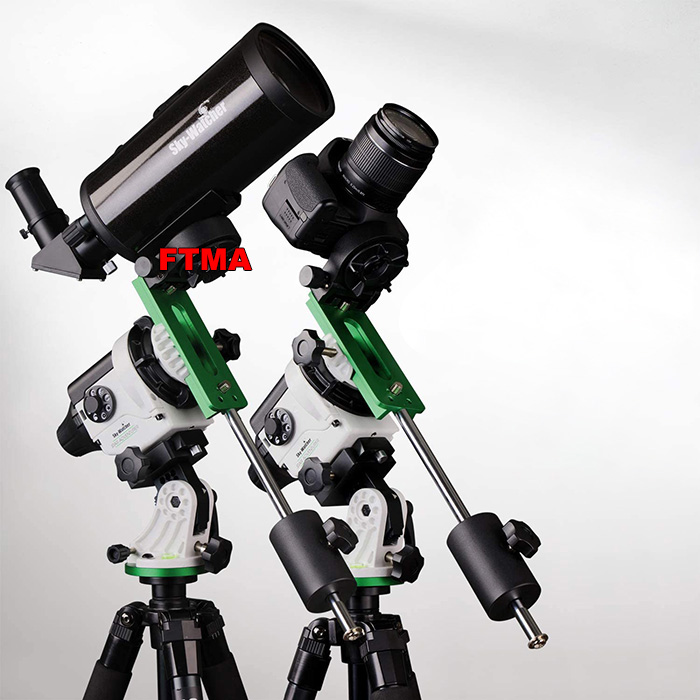
If you put it all together and mount a telescope or camera, it will look like this. But I didn’t put it together this way. If you put a camera or telescope on the Fine-Tuning Mounting Assembly (labeled FTMA in this photo), it seriously limits the ease with which you can point your camera or telescope anywhere you want. The Sky-Watcher must be aimed at the North Celestial Pole (NCP) to work properly. In this photo the camera and telescope are pointed in the same direction, at NCP. You can rotate the camera or telescope to the left or right on the FTMA tripod mount, but that is it. So I took off the FTMA (just loosen two screws to do that) and screwed a ball head on the green dovetail plate.
Assembly My Way
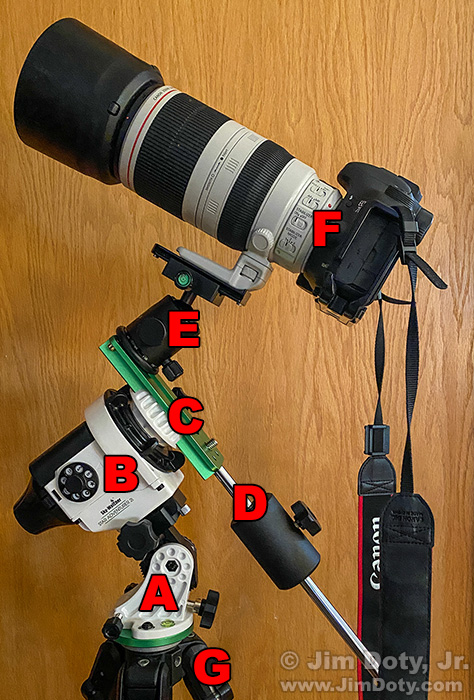
This is how I use the Sky-Watcher with a ball head screwed on to the green dovetail plate. This makes it much easier to point the camera anywhere I want.
There are 3/8 inch threads at each end of the green dovetail plate so you just screw on the tripod head of your choice. I use and highly recommend the iOptron ball head. It is light weight and very sturdy and uses the Arca-Swiss quick release system. It even comes with a quick release plate for your camera and it only costs $58 (as of the date of this review). With the ball head in place, I can point the camera just about anywhere I want.
Let’s look at the parts. There is an “equatorial wedge” (A) that makes it much easier to polar align the Sky-Watcher. Polar alignment is critical and must be meticulously done for the Sky-Watcher to accurately follow the night sky. You turn the large knob on the wedge to incrementally raise or lower the angle of the Sky-Watcher. Smaller knobs on the left and right incrementally move the Sky-Watcher left and right.
The Sky Watcher (B) has a grooved base which slides into the jaws on top of the equatorial wedge. You lock it into place with a large knob on the wedge.
The green dovetail plate (C) slides into the white knurled jaws of the “mounting platform” and lock down on the dovetail plate with a large knob.
The counterweight assembly (D) screws into one end of the green dovetail plate. You can move the weight up and down the bar to balance the weight of the camera and lens. If you are using a light weight lens you don’t need to use the bar and weight.
You screw a tripod head (E) on to one end or both ends of the green dovetail bar. This means you can be using two cameras at once, or one camera and one telescope.
A camera and lens (F) goes on top of the ball head. The Sky-Watcher with counterweight easily handles a DSLR and 100-400mm zoom lens. I used a smaller 70-300mm lens for my first outing.
You will need a good, sturdy, well made set of tripod legs (G). I am guessing if you are reading this article you have a quality tripod. If not, check out the tripod recommendations article in the links below.
Purchase Options
If you get the “Pro Pack” (which I recommend) you get A, B, C, and D. If you don’t get the Pro Pack you just get B and C. Some packages don’t include C so check carefully what you are getting. Sometimes it costs less to get the Pro Pack which has everything. Sometimes you can save a little money by getting all the parts separately. I think the equatorial wedge is essential. Getting a good polar alignment without the wedge is an exercise in frustration. You only need the counterweight assembly if you are using longer, heavier lenses. If you get everything the total cost is about $440, but prices have been fluctuating lately as people rush to buy stuff before the Great Conjunction of Jupiter and Saturn December 21, 2020. I think all you need to watch the conjunction is your own two eyes and a pair of binoculars.
Polar Alignment
Inside the center of the Sky-Watcher is a small telescope called a “Polar Scope”. You want to point the Polar Scope (red arrow) directly at the North Celestial Pole (NCP) which is about 1/2 degree away from the North Star.
Polar alignment is the tricky part of getting ready to do photography. Refer to the owner’s manual as you follow the steps below. Don’t get too discouraged if you find this difficult to do the first night out. It will get better as you get more experienced.
Inside At Home
Do this the first time inside at home (except for finding the North Star in the Polar Scope). Be sure to put 4 AA batteries in the Sky-Watcher. Put the included battery in the Polar Scope Illuminator. Download the free Sky-Watcher software to your smartphone (look in the app store for “Star Adventurer Mini Console”, also called “SAM Console” for short).
Before you mount a camera or counterweight to the green dovetail plate, point the Polar Scope at a white or light colored wall. Look through the Polar Scope at the markings inside the Polar Scope. You will see what looks like the face of a clock except there will be a “0” on the clock instead of a “12”. If the 0 is not straight up, grab the green dovetail plate, loosen the black clutch ring behind the white knurled “mounting platform”, and rotate the green dovetail plate so 0 is straight up. Then lock the black clutch plate.
Look through the Polar Scope and practice using the knobs on the wedge to move the Polar Scope up and down and left and right. Learn how to lock the wedge down by using the side lever to stop up and down movement and by turning the left and right knobs toward each other. Once your are comfortable putting everything together and using the knobs on the wedge to move the Polar Scope, you are ready to go outside.
Outside On Location
Put everything together on location. Put the wedge on the tripod first, then add the Sky-Watcher with the green dovetail attached. Add your ball head next and then the camera and lens. If it is a heavy lens add the counter weight assembly. You may want to keep some of these pieces together all the time for ease of assembly.
Position your tripod so the upper end of the Sky-Watcher (the end with the green dovetail plate) points in the direction of the North Star. Level the tripod by shortening of lengthening one or two tripod legs and checking the bubble level on the wedge.
On the front (north side) of the equatorial wedge there is a latitude scale in degrees. Loosen the side lever on the wedge and use the knob at the front of the wedge (north side) to set the wedge to your latitude. That should point the Sky-Watcher at the approximate correct elevation in the sky for the North Star. Take the protective cap off the back of the Sky-Watcher so you can see in the Polar Scope. Attach the Polar Scope Illuminator with adapter to the green dovetail plate directly in front of the north end of the polar scope. On the side of the Sky-Watcher set the N-S switch to N if you live north of the equator, or S for south.
Look through the Polar Scope. If you are really lucky, you will see the North Star. If you are like most of us you will need to hunt a bit to find the North Star. Use the knobs on the front and back of the wedge to move the polar scope around until you find the North Star. This will get easier with experience. Have faith in yourself.
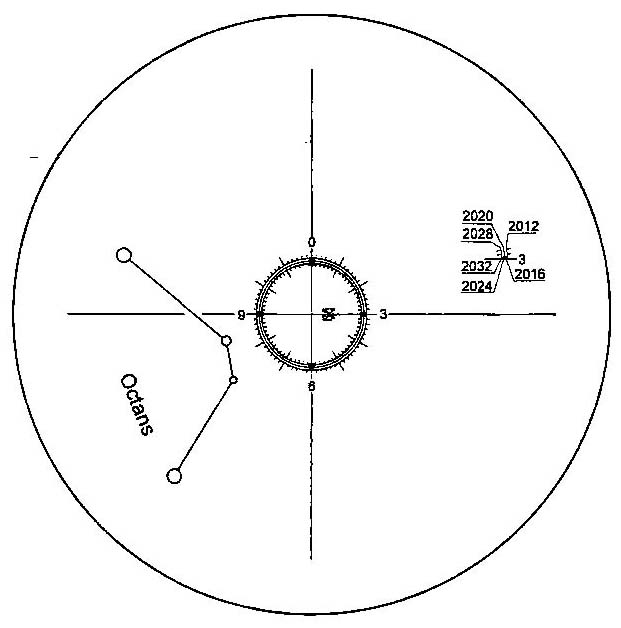
Once you have located the North Star, turn on the Polar Scope Illuminator. It puts out a faint red adjustable glow so you can see the black “clock” markings inside the Polar Scope. Take your phone, turn on the SAM Console app and choose Polar Clock Utility.
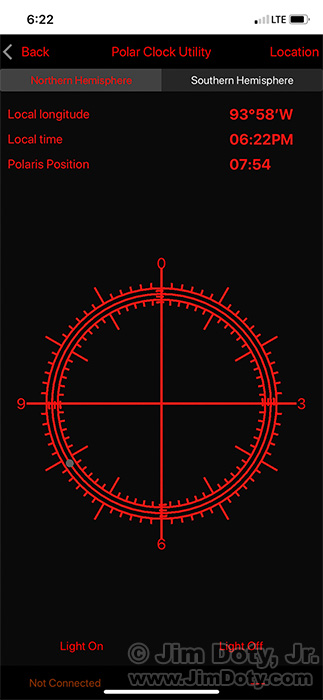
You will see a small gray round dot somewhere on the face of the “clock”. The “time” on this clock has nothing to do with your local time. The small gray dot tells you where the North star is in relation to NCP. Depending on your latitude, the small gray dot could be on or near any of the three red round circles. In this example it is on the middle red circle at 7:54.
Your mission is to put the North Star at the exact same place on the markings inside your Polar Scope as the gray dot is on the clock app. Use the knobs on the wedge to put the gray dot where it needs to be. Then lock the knobs so the settings don’t change. Now turn the round Mode Dial on the side of your your Sky-Watcher to the “star” setting. (You will learn what the other settings are for and when to use them in the manual.)
You are ready to go!
Whew! I hope that wasn’t too hard. The more experienced you get the easier this becomes.
Don’t bump your tripod! If you bump your tripod you will have to do a new polar alignment.
Create Images!
Now for the fun part. Point your camera, focus the lens, and take pictures. The better you were at your polar alignment, the longer your exposure times can be. If you did a really good polar alignment, a 3 or 4 minute exposure time with a 300mm lens will work well. With a 50mm or wider lens think 8, 10, 12 and 15 minute exposures. For suggestions on focusing your lens at night see the article in the links section.
The Bottom Line
I love the Sky-Watcher Star Adventurer. Except for one quibble (covered later), this is a well designed and fun to use star tracker. I am very pleased. I am very happy with my purchase.
There are some technical challenges to face when using a star tracker, the biggest being polar alignment, and that is true of every star tracker. The equatorial wedge for the Sky-Watcher makes the process easier. But it still will take some work. If this was easy, everyone would do it. Patience and practice does the trick.
I have one quibble. The Polar Scope Illuminator could use a better design. It is a bit fiddly when attaching it to the green dovetail plate. It’s a little easier if you push the plastic adapter into the groove in the green dovetail plate first. Make sure the adapter is centered right above the north end of the Polar Scope. Then push the illuminator into the adapter. For your information, you can shine any faint red light at an angle into the north facing end of the polar scope to see the markings inside. Another option is to set up before it is dark, but after the North Star appears. You can use the fading blue light to see the markings inside the Polar Scope and see the North Star at the same time, no red illuminator light needed. That makes polar alignment easier.
Exposure Information for the Andromeda Image: Canon 5D Mark III camera. Canon EF 70-300 DO IS lens at 285mm. Aperture f8, Shutter 202 seconds, ISO 1600.
Links
How To Focus Your Lens at Infinity for Night Photography
How To Get Critical Focus in “Live View” Mode with a Magnified Image
Tripod Recommendations: The Best of the Best
Buying a Headlamp for Night Photography: The Essential Feature
The Best Night, Astronomy, and Astrophotography Books
Purchase Link
Astrophotography Gear section of my Amazon powered photography store.
Buyer’s Guide Series Link
This is one in a series of articles that will guide you to the best of all things photographic. The rest of the series is here: Buyer’s Guide: Recommendations For The Best Photography Equipment, Software, Books, Magazines, DVDs, Online Photo Labs and More.