
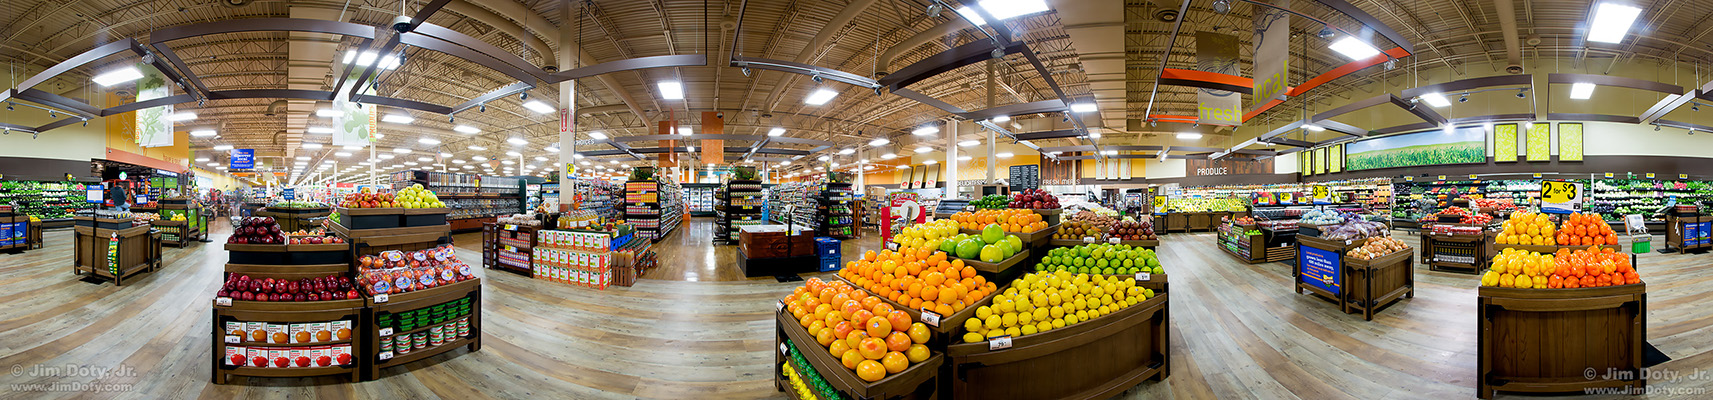
Kroger Panorama. Graceland Shopping Center, Columbus Ohio. November 12, 2013. Click for a larger version.
I’ve done a lot of commercial panoramas for clients as diverse as KOA Campgrounds and Crown Plaza Hotels. When I am on a commercial assignment I follow all the right steps and use all the right equipment. For the Kroger pano above I did everything right.
But there are times when you are doing your own thing and decide at the last minute you want to try a pano. You might get lucky trying to do a handheld panorama. I will tell you how to increase your odds of getting a good handheld pano.
In terms of the right steps, the exposure settings of the camera (aperture, shutter speed, and ISO) need to be the same for every photo. The focal length of the lens and the focus point of the lens (the distance the lens is focused at) have to be the same for every photo. Put your lens on manual focus and don’t bump the settings during the pano. There needs to be about a 30-40% overlap between each of the photos. Whether horizontal of vertical, the camera needs to be level.
One of the biggest problems with panorama photography is parallax. To see parallax in action, hold your thumb about 6 inches on front of your face, and without moving your thumb, alternately look through your left and then your right eye. Your thumb will jump back and forth in front of the background. The same thing happens with photos taken with a camera in the same location. As the camera pivots on itself, foreground objects don’t line up with background objects so you get multiple ghost images.
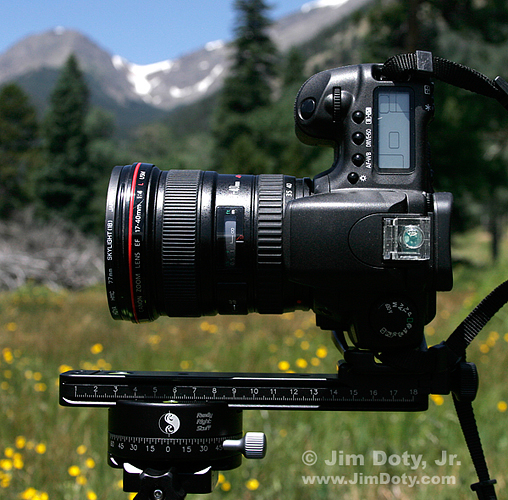
Really Right Stuff pano gear: PCL-1 panning clamp and MPR-CL II nodal slide.
The solution is to use a panorama rig so everything pivots around the nodal point of the lens (also called the “no parallax point”). The nodal point of this lens (which about one inch back from the front of the lens)Â is directly above the pivot point of the panorama rig. As the pano rig pivots, everything (including the camera body) will pivot around the nodal point of the lens
If you do everything right, and if nothing moves from frame to frame (which is a big if), your software can stitch all of your frames into a perfect panorama.
So shooting a panorama handheld is fraught with difficulties. Most of the times I try to do it, it doesn’t work out and there are ghosted areas in the panorama where objects in the individual frames don’t line up properly with the same objects in the next frame. But I keep trying. Usually this is when I didn’t plan on shooting a pano, and the opportunity presents itself unexpectedly.

Panorama, Bloomington Community of Christ. December 9, 2018. Click for a larger version.
That happened a week ago Sunday as I was documenting a Christmas celebration at church. From a corner of the sanctuary I took a picture of the congregation. Then I decided at the last minute to try and do a panorama by taking two more photos and stitching all three photos together. First, I hoped no one would move or I would get ghost images when the individual photos were stitched together. Shooting at the end of a prayer helped with the motion issue. Second, I held the camera and lens as parallel to the ground (floor) as possible. Third, I tried to pivot the camera with my hands like it was on an imaginary panorama rig with the pivot point being toward the front of the lens.
I was not optimistic that everything would work out, but it did. No one moved and I did a good job of moving the camera like it was on a pano rig.
The message in all of this is that it doesn’t hurt to try. There are times when you are doing photography that what shouldn’t work, at least most of the time, does work, at least some of the time. So go for it!
Links
Best Panorama Gear; Living in Pano Heaven
Kroger Panorama – a much bigger version
Great News! You Can Create RAW Panoramas with ACR 9.0