What is a Snowy Owl expedition really like? This article is your chance to find out. Join me for a two day photo safari! I give you tips and photo suggestions along the way, and you get to see how I prepare, plan, and adapt on a photo trip. This is also about what to do when things don’t go according to plan.
This is the second in an ongoing series of articles on Snowy Owl photography. Originally posted Feb. 27, 2016. Revised and updated Feb. 23, 2017. Revised and re-posted Jan.1, 2018. Updated January 10, 2019.
This all happened Sunday and Monday, February 21-22, 2016. I had never encountered a snowy owl in the wild and this was my first snowy owl photo expedition. I was super excited. Also nervous.
I wanted to photograph snowy owls in Michigan and my window of opportunity was closing fast. February 15 there were multiple snowy owl sightings across the state of Michigan in 15 different areas. Just five days later that had dropped to only two snowy owl sightings in the entire state.
Temperatures were rising, snow cover was disappearing, and the snowy owls were heading back north to Canada. I looked at the sighting information Saturday night, February 20, and again early Sunday morning. The odds of seeing a snowy owl were looking slim and getting slimmer. Did I really want to drive 8 hours one way just to risk not seeing a single owl? On the other hand, if I waited until the next opening in my calendar the snowy owl season in Michigan could be over until next winter. I made the decision to head north. I packed the car Sunday morning and I was off.
Doing Your Homework
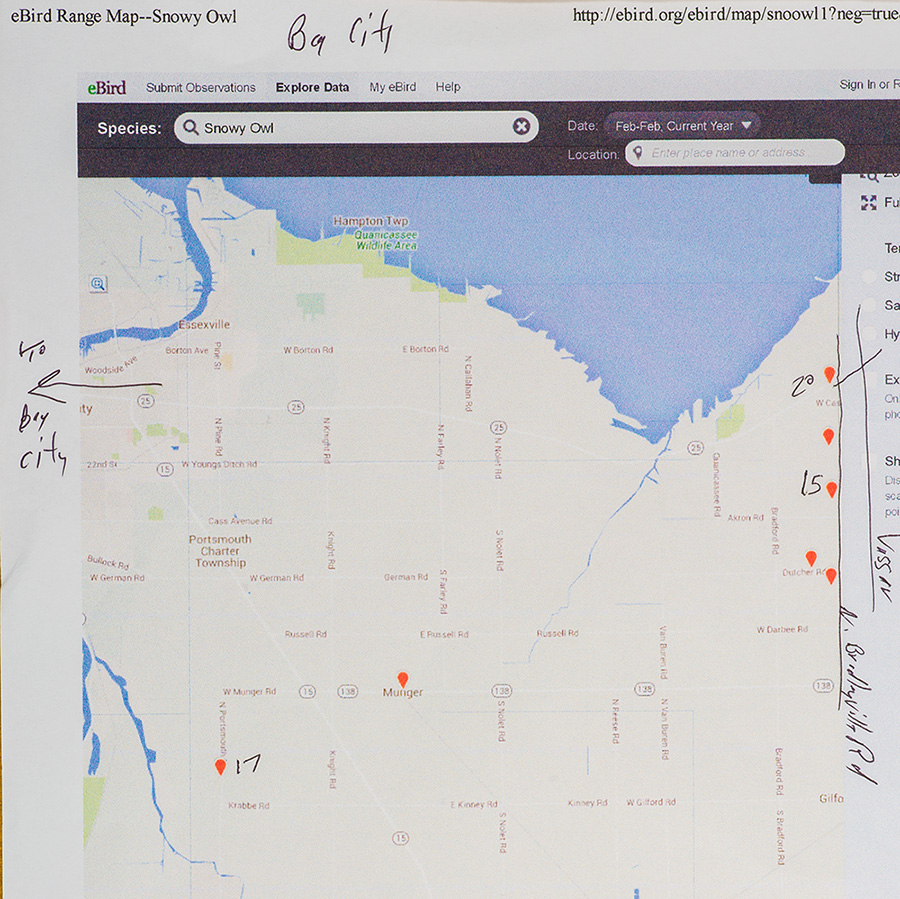
My schedule didn’t allow me to head north any earlier this winter, but I had been doing my homework for a couple of weeks. Using the methods described in this article I narrowed my search to February sightings of snowy owls in Michigan, the closest state to my home in central Ohio. Directly from eBird’s web site I printed maps of all 15 areas in Michigan that had recent snowy owl sightings. Going from small web sized maps to 8.5×11 inch printed pages results in fuzzy maps, but still good enough for my purposes. On each map I wrote the dates of all sightings since February 15.
Maps and Guidebooks
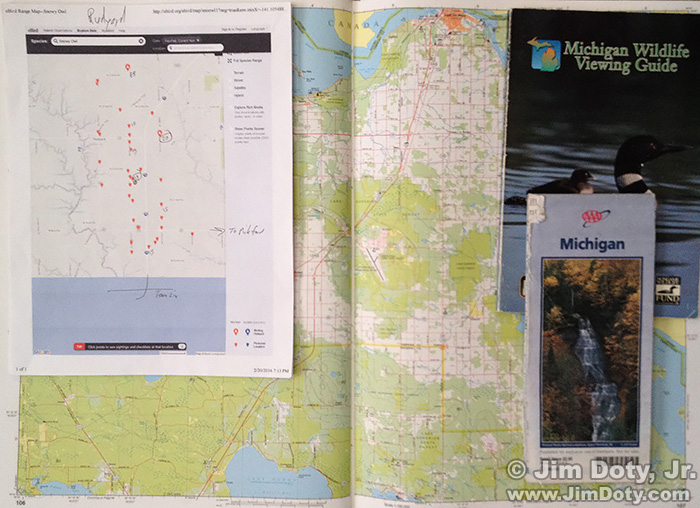
Printed map from eBird, Michigan Atlas and Gazetteer (open), Michigan Wildlife Viewing Guide, and AAA Michigan highway map.
I also took with me the Michigan Atlas and Gazetteer by DeLorme (which has every paved and dirt road in the state). It would show me all the roads that weren’t on the eBird maps. I also took my copy of the Michigan Wildlife Viewing Guide.
It is part of the excellent state-by-state Watchable Wildlife Series which covers the best wildlife locations in most U.S. states and some Canadian Provinces. More about the Watchable Wildlife Series in this article.
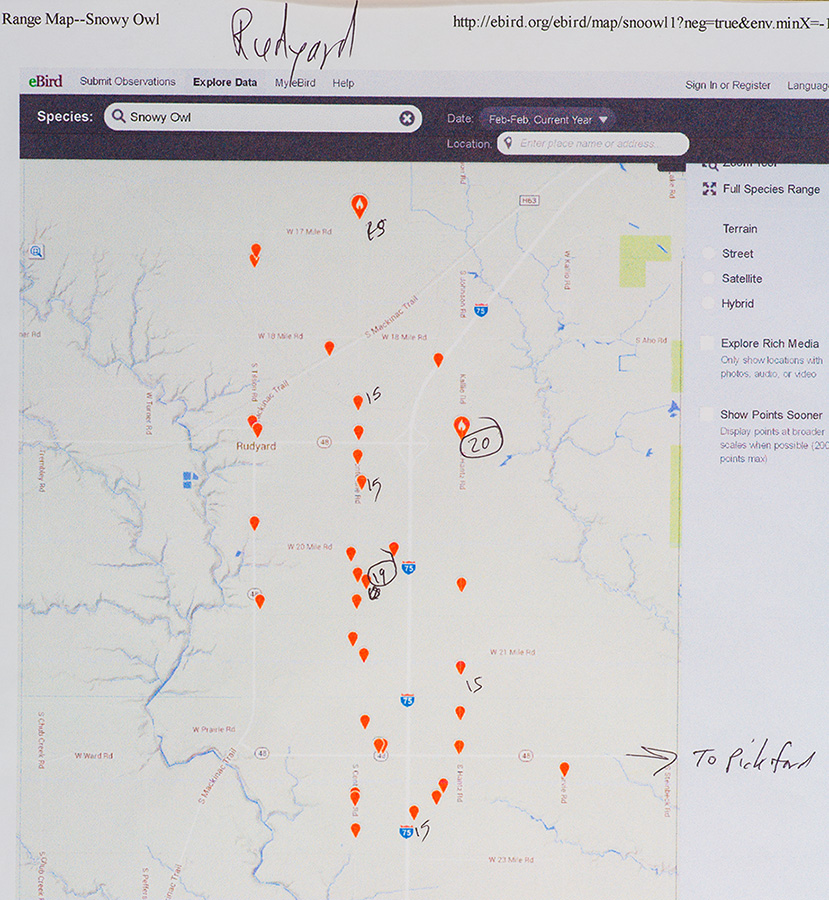
Rudyard Michigan area: Snowy Owl sighting map from eBird with recent sightings hand dated. Click for a much larger version.
Of the two Michigan locations with Snowy Owl sightings on February 20, I considered the one near Rudyard in Michigan’s Upper Peninsula to be the best bet. The Rudyard area had 5 different sightings February 15, one sighting February 19, and one sighting February 20. It was also the farthest north with colder temperatures and lots of snow on the ground so the owls were more likely to hang around longer. I planned to spend most of my time up there.
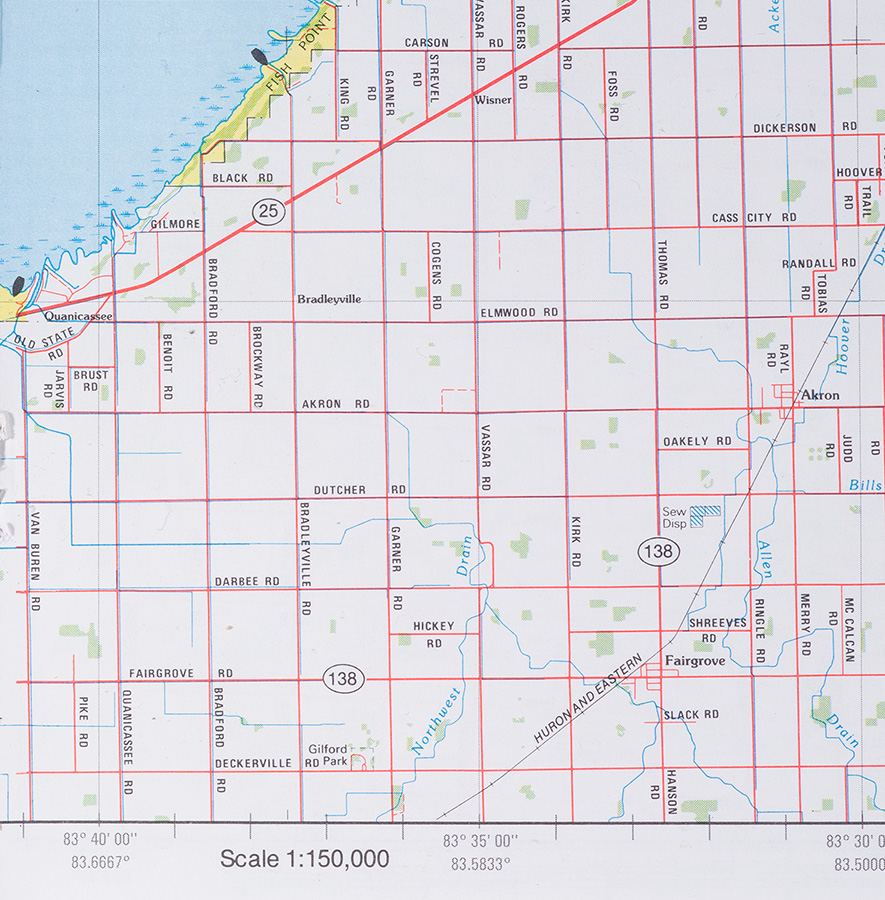
The only other place with a February 20 sighting was near Akron Michigan, east of Bay City. It was much farther south, much warmer and the snow cover was gone, so I was only semi-hopeful any owl would still be around, but it was close to my route up I-75, so I planned to stop on my way north.
Be Ready!
My reference maps (Michigan highway map, eBird maps, and Michigan Atlas and Gazetteer) were on the front passenger seat, open and ready to go. There was also a GPS unit on the dash.
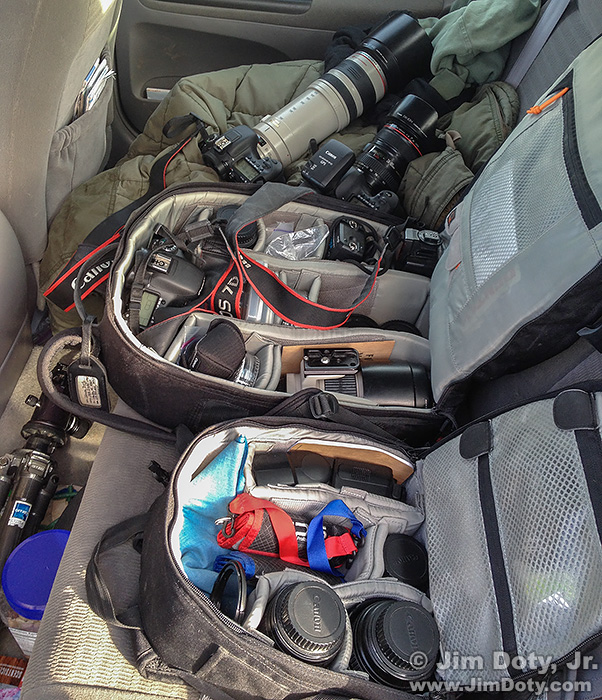
Well before I get to a prime wildlife area I make it a practice to get my gear out of the camera bags and ready to go. You don’t want to miss a great shot while you are fiddling with your camera bag.
I stopped at a rest area well south of Bay City to get everything set up. I put a 100-400mm telephoto zoom lens on one camera, and a 24-105mm lens on the other camera. The cameras and lenses were on the right side of the back seat so they were easy to reach from the front seat. If a great photo op happened before I arrived at my primary destination, I could pull over, grab a camera and shoot. I also had back up lenses in case something went wrong, which happened on this trip. On both cameras I set the white balance (to daylight), the auto focus mode I wanted (predictive, “AI Servo” in case I saw a bird in flight), the autofocus sensors I wanted to use (multiple sensors, wide area – again for birds in flight), and I manually metered for the existing light conditions. Everything was all preset so all I would need to do was grab a camera and shoot.
When I arrived at my primary photo location I moved the camera with the telephoto lens to the front passenger seat and put it on top of the maps. I also turned the radio off since I usually have the windows down when I am looking for wildlife. For most of this trip my windows were down when I was at my primary search areas despite temperatures as low as 16°.
The Search is On
There was an area southeast of Saginaw (not far from Bay City) with a number of February Snowy Owl sightings so I got off I-75 and started looking there first. I wandered slowly up and down all the rural roads where the sightings had occurred, plus nearby roads, but with no luck. From there it was a short drive to the area between Bay City and Akron.
I drove slowly up and down North Bradleyville Road three times and then the other roads that had snowy owl sightings in February, but with no luck. Then I tried other roads in the area. I drove slowly. That is important. Adult snowy owls are big (20-28 inches tall) but from a moving car they are little white feathered puff balls which are easy to miss if you are zipping by at 40-50 mph.
I kept at it. Still no luck.
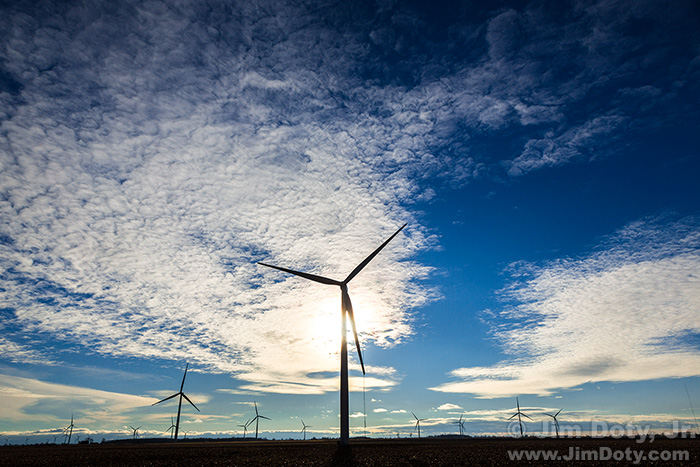
The sun was dropping in the west, it was getting close to 5 pm, and with no snowy owls in sight I turned my attention to the huge electricity generating windmills that were all around me.
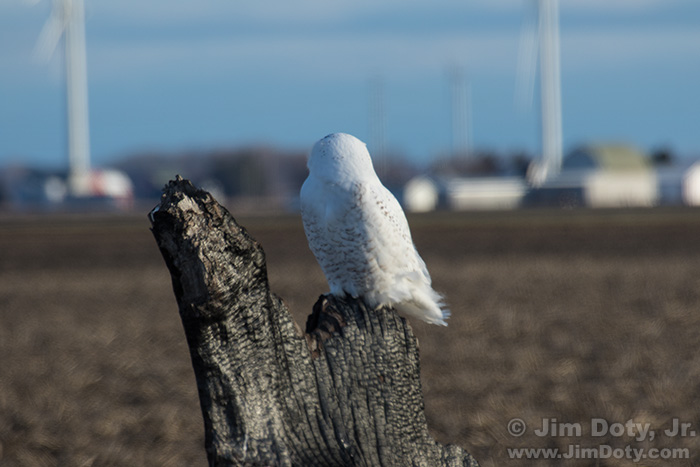
After wandering the roads that weren’t included in my eBird location map (using the Michigan Atlas and Gazetteer), I decided to make my way back to Bradleyville Road for one more search for snowy owls before heading north. I drove north up Bradford Road, turned east and drove slowly down Akron Road. I spotted a little flash of white on the stump of a downed and partially burned tree. If I would have been in a hurry I would have missed it. It was a Snowy Owl!
First Shots
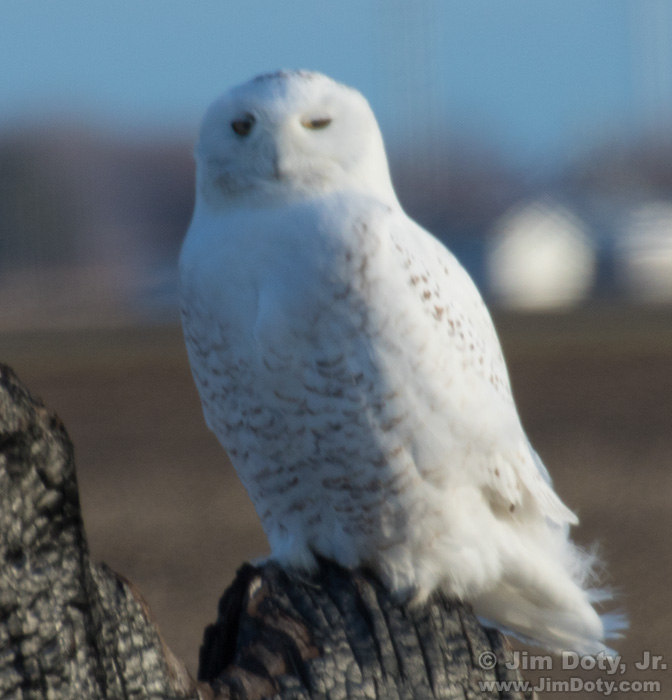
My heart pounding in my chest, I slowly pulled over to the side of the road, picked up my camera and took the first few pictures out the window. My photos were – as someone used to say – “less than wonderful” (i.e., not very good). The owl is ignoring me and looking away. The background is hugely distracting. The light is not what I wanted. And the photo is not sharp. In my excitement I forgot to turn off the car motor so vibrations (not to mention the wind – more about that later) messed up the images. I don’t usually share bad photos, but you can learn from my mistakes and it is important to know that every photographer takes some bad pictures.
Improving the Images
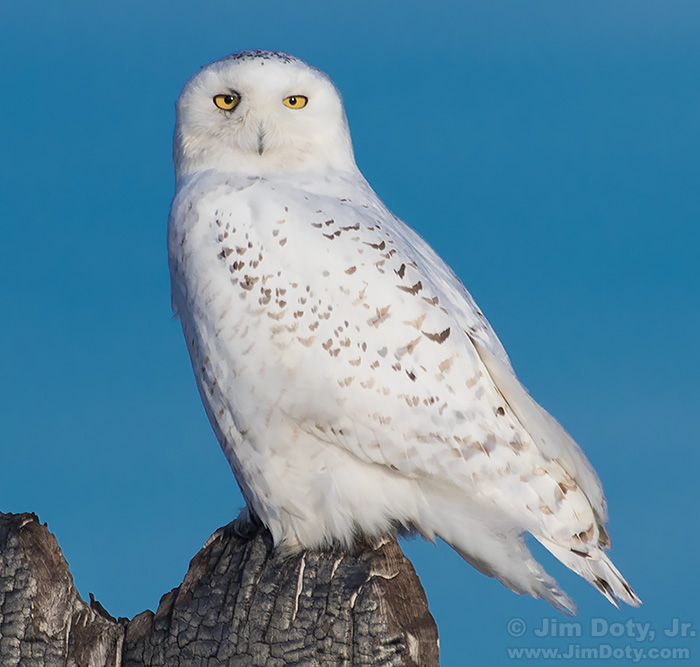
The owl was quite calm so I made several changes: I backed the car up and pulled farther off the road, found a much better shooting position with a better lighting angle and a clean blue sky behind the owl. I go into this in much more detail in this article: Snowy Owl Photography: Control the Background for Better Images.
I turned off the car motor, changed the autofocus sensor settings (single sensor, center, for more control and accuracy), rested my elbows on my chest or the car’s window ledge for more stability, and calmed my breathing. I waited for the occasional moments when the owl turned my way to click the shutter. I ended up with much better images.
Fighting the Breeze
It was a brisk, breezy day and the wind turbines were going at a good clip. Gusts of air were jostling my car which contributed a great deal to blurry images. The softness is obvious in the image immediately above (taken at the first photo location). You can see the wind ruffling the tail feathers and she is even closing her left eye against the gust of wind.
With less skittish wildlife, like elk, I do my best to position the car as a wind screen and I set my tripod up behind the car and well below the roof line of the car so the car provides as much protection from the wind as possible. If I am away from my car I put my tripod behind a fat tree trunk, or a big boulder, or anything else that is available if there is anything handy. If there isn’t anything around, I use the lowest tripod position I can get away with and still get the image. When all else fails, I use my own body as a windbreak between the tripod and the wind.
But with this particular owl I was pretty sure I had to stay in the car.
I did two things to minimize the blur. If the wind was buffeting my car when the owl looked my way I tried not to shoot. Easier said than done. The owl was just so tempting it was hard to keep my finger off the shutter. Besides, there were times the owl looked my way, I pressed the shutter and then at that moment a wind gust would hit the car.
Solution 2 was to set the camera’s shutter drive mode to “high speed”.
Even when shooting wildlife my shutter drive mode is usually set to “single shot, soft” (soft as in quiet shutter). In this mode I press the shutter down and the camera takes only one photo, even if I hold the shutter down. Single shot, soft is my preferred setting.
In “high speed” shutter drive mode the camera takes 10 frames per second for as long as I hold the shutter down (at least until the buffer is full). There are two wildlife occasions when I am almost always in high speed shutter mode, birds in flight (see the eagle in flight below) and breezy days when my car and/or my camera are being buffeted by the wind. I don’t hold the shutter down for long periods of time. Usually just a 3 or 4 shot burst (a half second or less). This isn’t a cure all for heavy wind buffeting, like the blurred photo above, but with a light wind buffeting you will notice times when the 2nd or 3rd shot in a 3 or 4 shot burst is sharper than the first frame in the burst. This is also why I bought a “wildlife” camera (Canon 7D Mark II) with a high burst rate. The next time you are shooting in the wind, it is worth a try to switch to high speed burst mode.
 Windy or not, when your camera is on a tripod (it wasn’t for these owl photos) you can get sharper images by resting your hand on top of the lens and applying just a bit of gentle downward pressure (not a lot) on the lens. Jeremy Bruskotter is demonstrating this technique at one of our joint photo workshops for The Ohio State University.
When it is windy and your camera is on a tripod you should also turn on the Image Stabilization (IS) feature (also called Vibration Reduction – VR) if your lens has it. When it isn’t windy and your lens is on a tripod, it is a good idea to turn IS/VR off (even if it is designed to be left on).
Autofocus Sensor Settings
When I am driving around I have the camera’s autofocus set to predictive autofocus so it can track a moving subject. Canon calls this “AI SERVO”. That way I am ready for a bird in flight. I also turn on all the central autofocus sensors which makes it easier for the camera to track a bird in flight. If my subject is sitting in one place, like this owl, I turn off all the autofocus sensors except the one in the center which is the most sensitive sensor. I also switch from predictive autofocus to “Single Shot”. That allows me to put the center autofocus sensor on the part of my subject I want in focus (with wildlife it is almost always the eye), push the shutter button down half way to hold that focus setting, recompose, and take the picture.
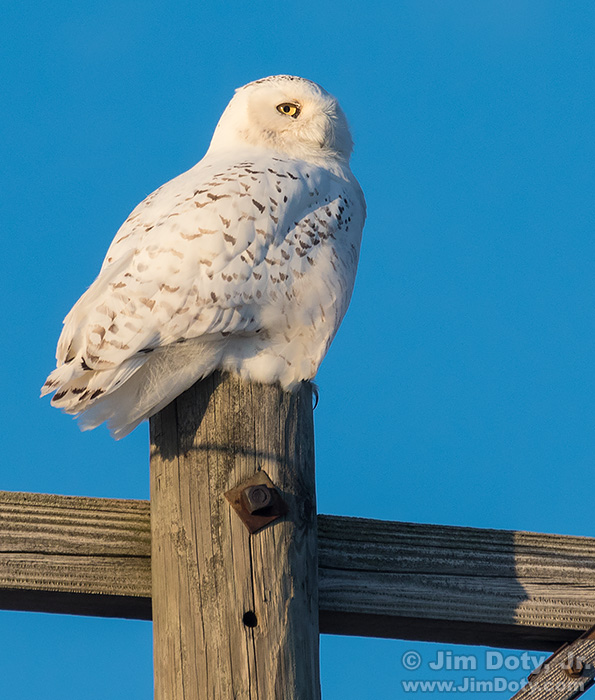
The photo immediately below of the owl on the utility pole is an example of a situation where this technique is very important. If I used multiple autofocus sensors they would latch on to the textured feathers of the owl’s body (which are closer to the camera than the owl’s eye), and the owl’s eye would be slightly out of focus, turning the photo into a throw away. Critical focus on one or both eyes is essential to most wildlife photos. By using the center sensor and single shot autofocus, you can put the sensor right on the eye, push the shutter half way to lock in the focus setting, recompose the image so the eye isn’t in the center of the frame, and push the shutter the rest of the way to take the picture. The eye remains critically sharp and the photo is a keeper. You also have the option in single shot autofocus mode of moving focus control to a button on the back of the camera instead of the shutter button. Either way, focusing on the eye and holding that focus point is the key to making sure the focus is spot on.
Eventually she flew across the road to a new hunting location on a utility pole. (I say “she” because female Snowy Owls keep their feather markings as they mature, while males turn almost totally white.) I slowly followed in my car, parked, and took more photos.
I took my first photo at 5:07 pm and my last at 5:38 pm. She was quite tolerant of my presence and she was still perched high on her hunting post as I left. Needless to say, I was super excited as I drove off and headed for Michigan’s U.P.
It was snowing as I pulled into Gaylord Michigan. I stopped and checked road reports to make sure the roads weren’t worse farther north, booked a room in St. Ignace, and then drove on north. The snow stopped, the sky cleared, and the snow covered landscape was lit by beautiful moonlight. If snowy owls weren’t on my morning agenda, I would have stayed up half the night to do moonlit landscapes.
I crossed the Mackinac Bridge and stayed overnight at the Voyager Inn in St. Ignace (a nice, reasonably priced place to stay – link below). There were more snowmobiles than cars and trucks in the parking lot which is typical this time of year. The U.P. is snowmobile heaven. After I checked in I went online and checked the eBird Snowy Owl map and again checked all 15 areas in Michigan that had Snowy Owl sightings in February. The only sighting in the whole state that day was up near Rudyard. That confirmed my decision to head to Rudyard the next morning rather than go to any of the other possible areas.
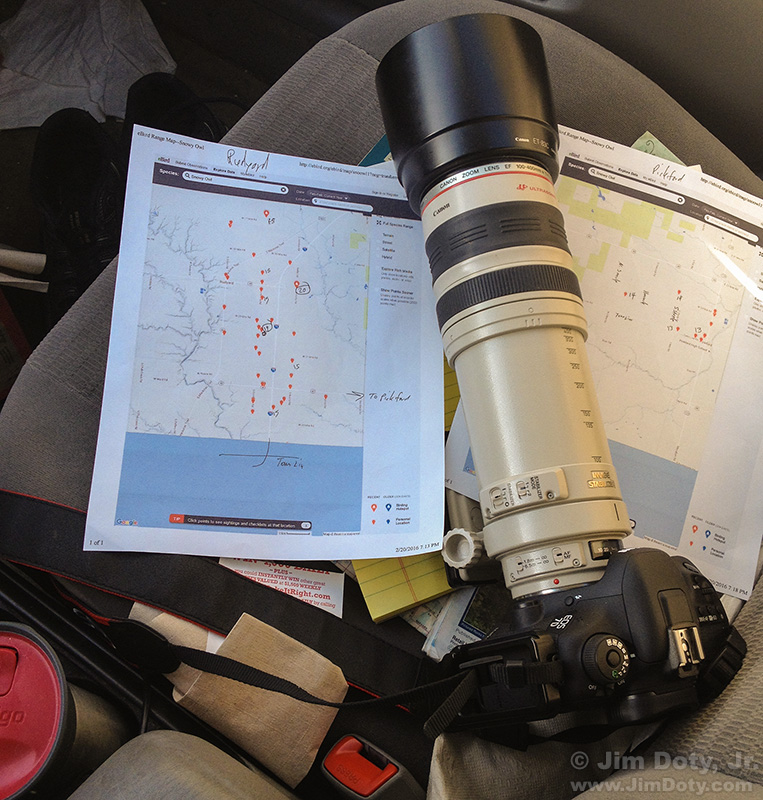
Camera with telephoto zoom lens, printed eBird maps of the Rudyard/Pickford area, and Michigan Atlas and Gazetteer under the eBird maps. Also under the maps is a the Michigan Wildlife Viewing Guide.
The next morning I got my gear ready to go and drove the 30 miles to Rudyard. I was super excited as I drove up and down the rural roads near Rudyard. I checked the printed eBird maps to make sure I covered all the roads with owl sightings for the past week and checked the Michigan Atlas and Gazetteer to be sure I covered all the other nearby roads. I eagerly scanned the landscape for feathered puffs of white in a sea of white snow. I was ready.
There were a few roads I didn’t check. I wanted to spend my time searching for snowy owls, not waiting forever for a tow truck to find me in the middle of nowhere.
When You Don’t Find What You Want
In my mind’s eye I saw an image of a snowy owl soaring low over the snow covered landscape. I didn’t happen. I didn’t see a single snowy owl. After four hours driving the roads around Rudyard and Pickford and taking a few semi-boring photos of icy roads, old barns, and deserted houses that were falling apart (because there was nothing else to shoot), I decided to move on. No snowy owl photos for me that day. Life is like that. You don’t always get what you want.
The Importance of Backup
Did I mentioned my cherished 100-400mm zoom lens became significantly disabled early in the day? The zoom mechanism got stuck and it would only zoom between 125 and 150mm. Not nearly long enough for snowy owl photos or any other wild birds. I switched to a backup lens with a focal length of 100-300mm. Still not long enough but twice as good as 150mm. Later in the day I tested my primary lens and it would zoom from 150-400mm (but not 100-150mm) so I was back in business. Backup is important but doesn’t have to be expensive. I also had an inexpensive point and shoot camera with me which has a 25-500mm lens (35mm equivalent focal length).
Plan B
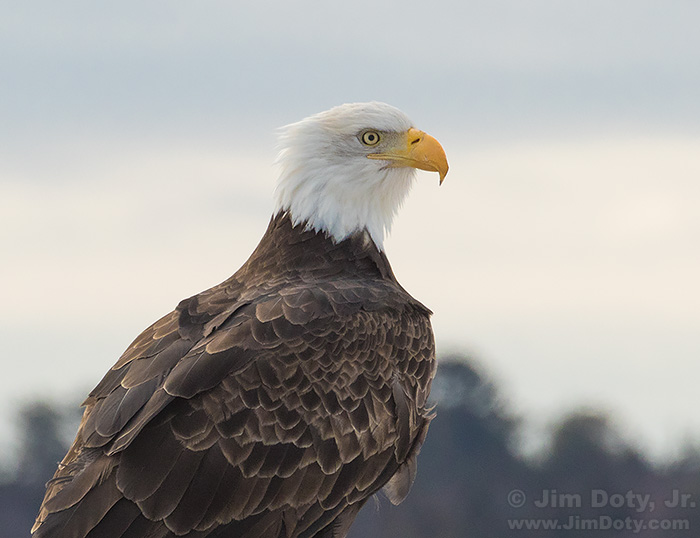
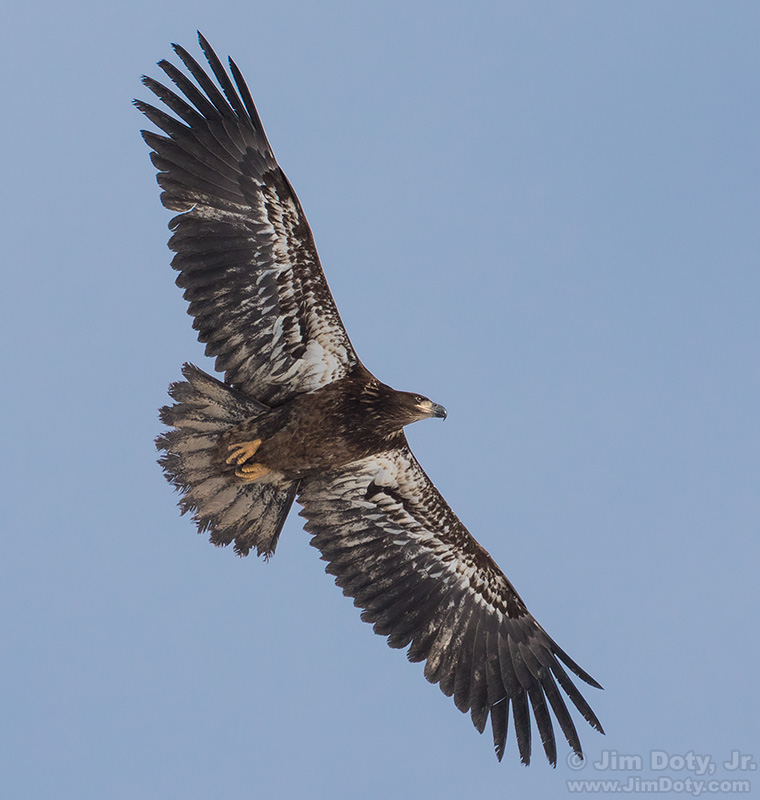
With no snowy owls in sight, and thanks to a tip from a friend whose snowy owl photos helped inspire this trip in the first place (a big thanks to Winnie of Quiet Shutter Photo), I drove north in the afternoon to the Dafter Landfill (Yes Virgina, there is a “Dafter” Michigan). I checked in at the office, drove into the landfill and photographed bald eagles (some were young enough that their heads had not turned white) and a multitude of gulls. It is a great bird photography location. Follow the directions in the next section and do not trust your GPS.
Directions to the Dafter Landfill
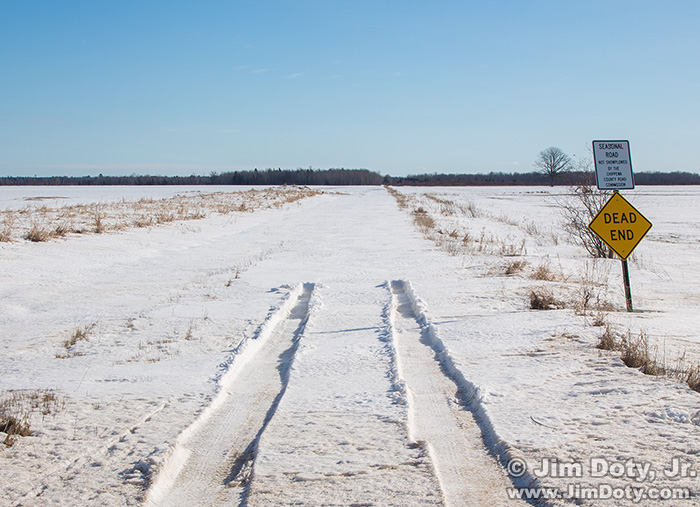
When I entered the landfill address into my GPS, it tried to take me down an unplowed seasonal road into an area marked with “Do Not Enter” government restricted access signs. I did not enter. I went back to my Michigan Atlas. Sometimes an old fashioned map is best.
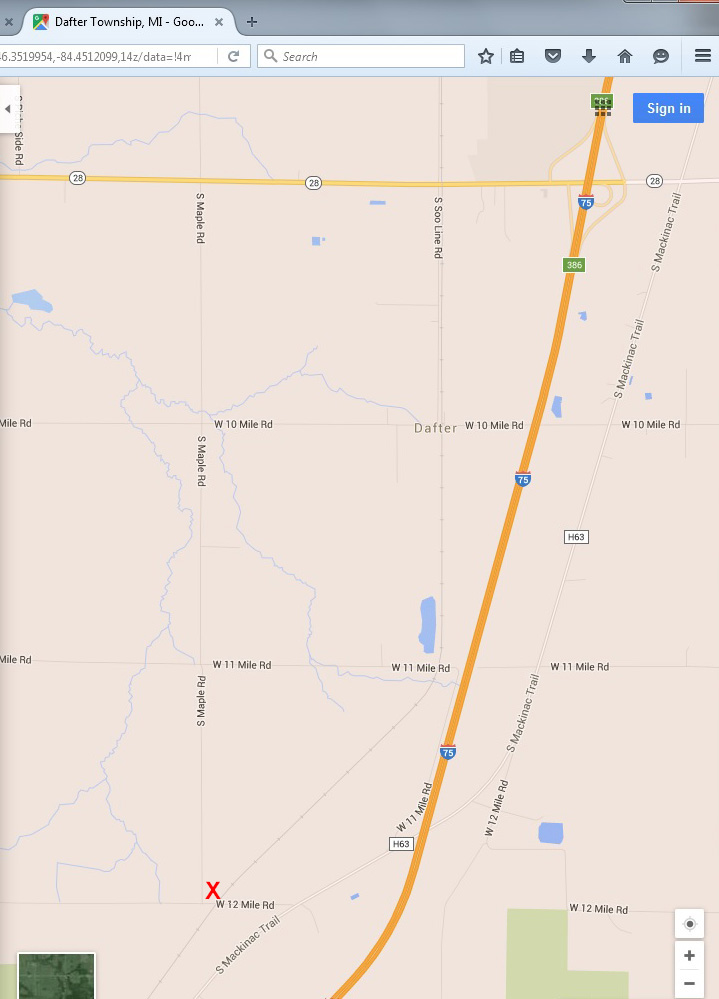
From I-75, exit at M-28 and go east to South Mackinac Trail. Turn right and go south (you will cross I-75) to W 12 Mile Road. Turn right and go west across the railroad tracks and the landfill entrance will be on your right (marked with a red X on the map below).
From Dafter, take W 10 Mile Road (Dafter Road) east across I-75 to South Mackinac Trail. Turn right and go south (you will cross I-75 again) to W 12 Mile Road. Turn right and go west across the railroad tracks and the landfill entrance will be on your right (marked with a red X on the map below). Your other option is to go west on M-28, turn left (south) on S Maple Rd, and then left (east) to W 12 Mile Rd. The landfill will be on your left.
The smell on top of the landfill was awful and the acrid air was hard on my lungs. But I ketp shooting until I had some images that I liked. I finally left for the long, 8 1/2 hour drive home. My two day Snowy Owl expedition was over.
Posting to eBird
 I logged on to eBird and posted my sighting on Akron Road so other photographers would know a snowy owl was still around.
Am I glad I made the trip? Of course! I came away with several good images. There have been so many times I spent two days taking pictures and ended up with nothing worth writing home about.
The Snowy Owl Series
“How To†Series: Snowy Owl Photography – An Overview
How to Find and Photograph Snowy Owls
Snowy Owl Photography: Control the Background for Better Images
Snowy Owl Photography: Solving A Photo Problem (And the Right Way to Exit Your Vehicle)
More Links
“How To†Series: Winter Photography – An Overview with article links
Related Article Links
Metering Wildlife in the Snow, Part One
Metering Wildlife in the Snow, Part Two
How To Find Wildlife, The Best Books
How To Photograph Wildlife, The Best Books
How to Be A Better Wildlife (and Nature) Photographer
If you want to spend a weekend learning how to be a better nature photographer, I do workshops in Colorado and Michigan. A complete list of workshops is at JimDoty.com.
Voyager Inn – St. Ignace, Michigan
Dafter Landfill Hours. Photography is allowed when the landfill is open and you can usually drive to the top of the landfill. There is no entrance fee for doing photography. You must check in and out at the office and wear a reflective vest which they will provide at the office. Stay alert! You do not want our car or yourself to have an unhappy incident with a trash truck or a bulldozer.

