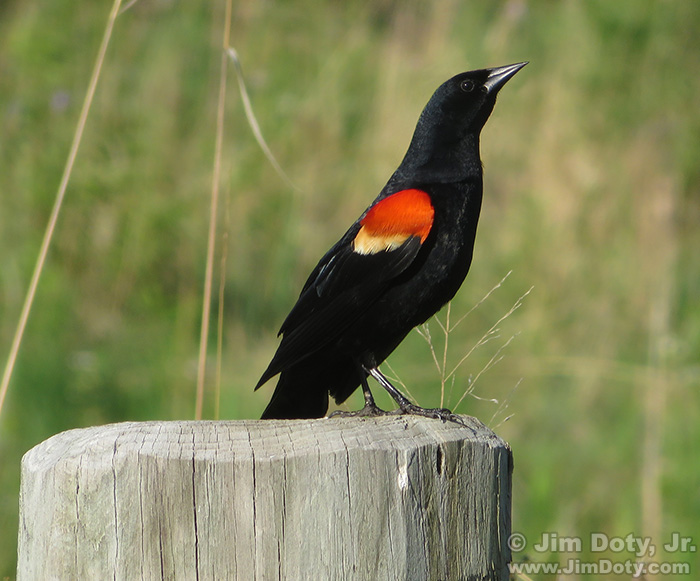
When you just can’t get the right pose out of a wildlife subject, compositing two images together may be just the right ticket to the image you want.
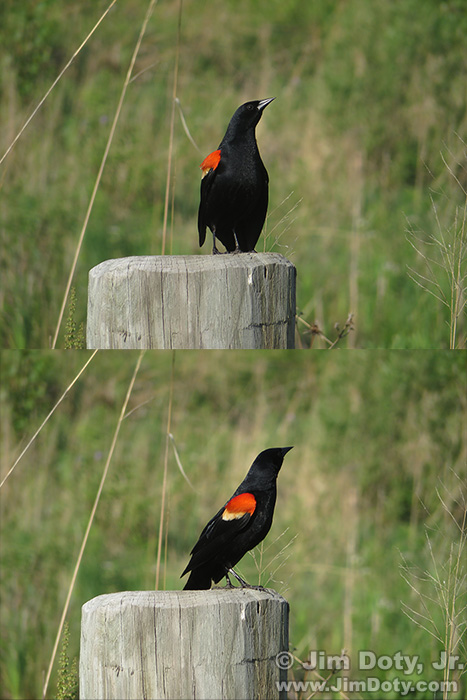
As I pulled onto the campus at OSU Mansfield, a Red Winged Blackbird was sitting on a post near the road. I turned off the radio, rolled down the car window, pulled up slowly as close as I could get, and turned off the motor, hoping the bird would stay put. I unzipped the camera pouch on my belt, pulled out a Canon Powershot SX280 HS, extended the lens, steadied my elbows to get more stable images, and clicked the shutter three times. I got two images. On the third click of the shutter the bird was gone.
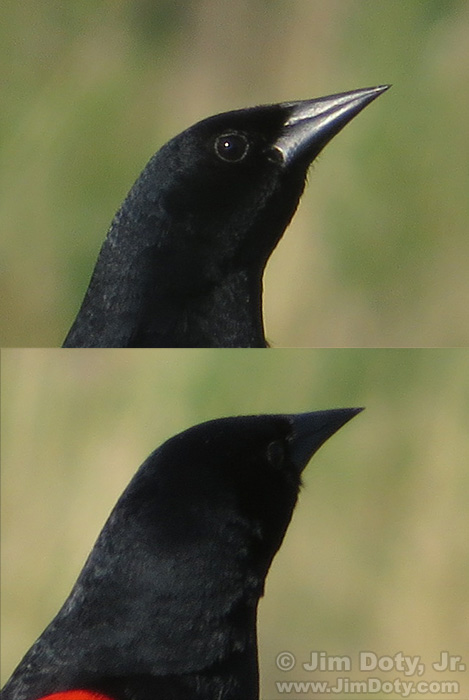
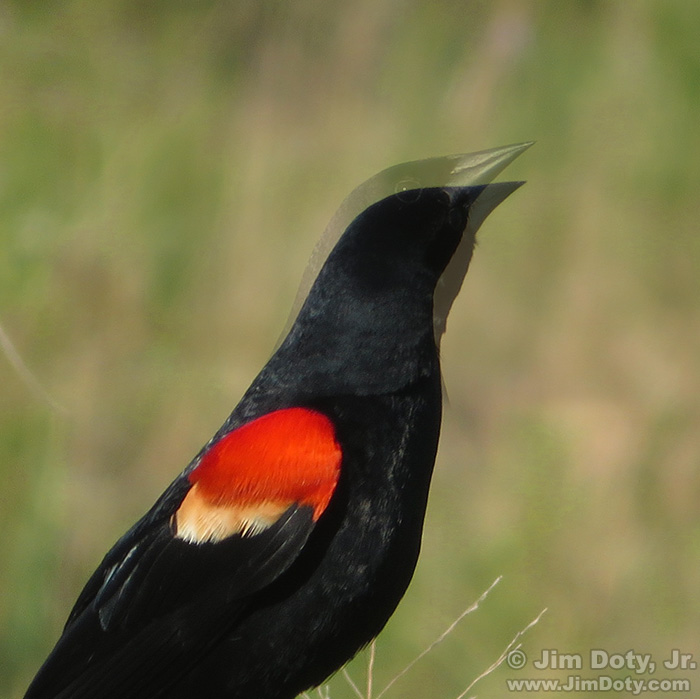
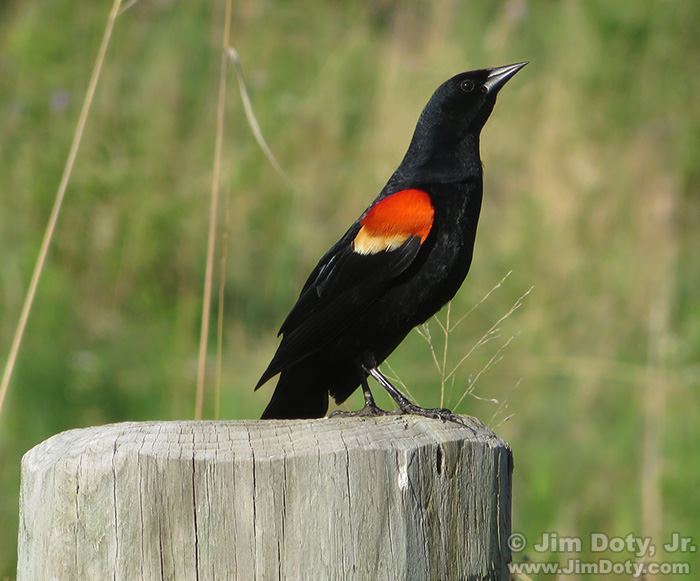
Each photo, by itself, was half a success. The first photo had a great view of the face with the sun creating a catchlight in the bird’s eye (all of the great wildlife photographers try to get a catchlight in the eye), but the angle of the body was wrong. The angle of the body in the second photo was just what I wanted, but the bird was looking away and the eye is almost lost from the photo. The solution is to composite the two images together.
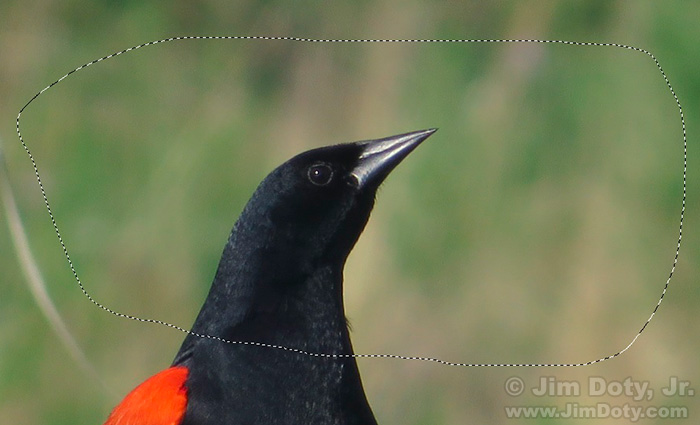
I opened both images in Photoshop (you can also do this with Photoshop Elements). I used the “Lasso Tool” and loosely drew around the bird’s head in the first image and included a generous amount of the background vegetation around the head. With the head and some background vegetation “selected”, I dragged this selection onto the second image, creating a composite image with two layers.
The smaller top layer (the “head with background vegetation layer”) was floating over the bottom or base layer which had the body that I wanted. I reduced the “opacity” of the “head layer” so I could see through it to the bottom layer. That allowed me to move the head layer so it was perfectly aligned with the body layer. After the top layer was aligned, I changed the opacity of the top layer to 100% and everything underneath it disappeared.
The heads in the two images are at different angles, which is the reason for making a generous selection of vegetation around the head in the first image. The extra vegetation hides the head in the bottom layer. If I had done a tight selection of the head, when I aligned it with the body in the bottom layer, part of the head in the bottom layer would still be visible.
The vegetation in the top layer did not completely match the vegetation in the bottom layer so I created a retouching layer and did a bit of blending where the top layer meets the bottom layer. I saved this “master image” with all layers intact. I then flattened the layers and created a web sized image.
The whole process wasn’t that complicated and it took longer to write about than it did to do it. Some excellent, detailed guides for doing all of this (taking wildlife pictures and digital compositing) are in the links below.
Photo Data: Canon PowerShot SX280 HS. 4.5-90.0 mm lens at 90 mm (500 mm equivalent in 35mm). Base image (body): 1/250 sec, f/6.8, ISO 80. Head image: 1/320 sec, f/6.8, ISO 80.
Links
The Best Digital Photography Books
The Best “How To†Nature Photography Books
How To Find Wildlife, The Best Books

