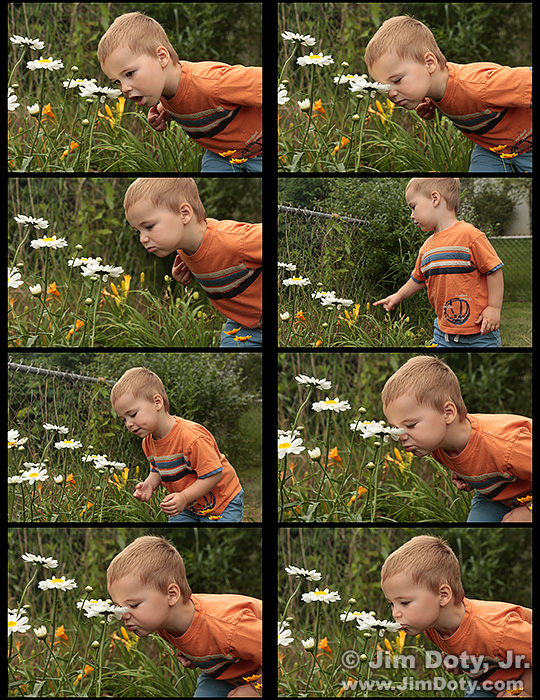
When you are photographing very active children around 2 1/2 years of age, it is often best to just follow them around and let them do their thing, rather than try to “pose” them. I followed my grandson around my backyard for almost an hour, taking pictures and hoping to get just the right image. To get the best point of view I needed to be on my knees. Spending that much time on your knees is hard on the knees, but what else can you do? When you photograph children you need to be down on their level.
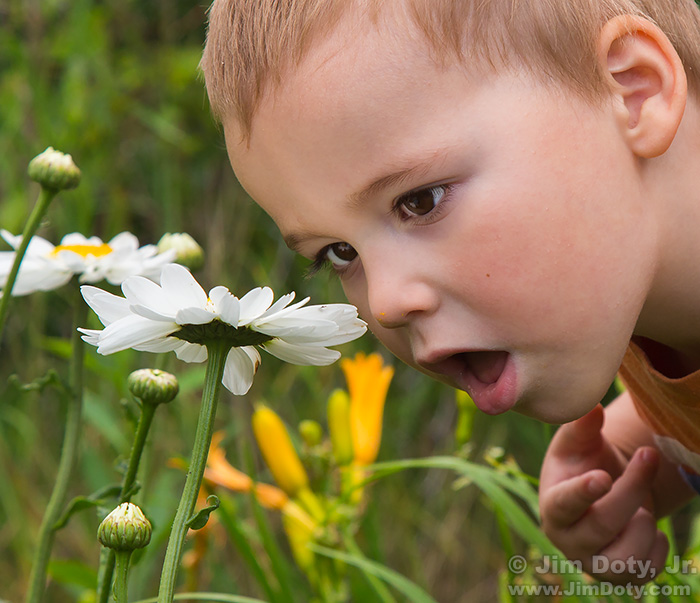
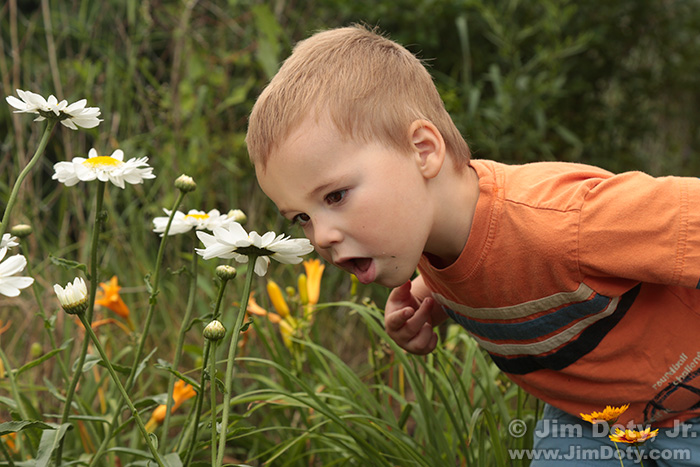
It isn’t always easy to keep artistic considerations in mind when trying to keep up with an active youngster, but facial expressions are key as well as body position and angle. It is good to think about the background and whether you want it sharp or blurred (which determines depth of field decisions), what you want to keep out of the background (chain link fence, neighbors white shed, bright hotspots, and other distractions), and how to frame the photo. With an active subject you might end up with a face in the center of the frame for accurate focus purposes (but not a always good artistic decision), and crop the image later for a better artistic look (see the original below and compare to the finished photo at the top). You could end up taking a lot of photos to get just what you want.
I took 145 photos in all, 11 with a Canon SX280 HS, and then I switched to a Canon 5D Mark III and took 134 more. I switched because the SX280 HS (as much as I like it) just wasn’t going to give me the ultimate image quality I was after and the autofocus in the 5D Mark III is so much faster and more accurate for keeping track of a very active boy.
I was 45 minutes into our “casual” photo shoot when he discovered some insects on top of the daisies in our sun garden. Out of 8 photos of him checking out the daisies, the first is my favorite. Patience is key!
The first technical decision (which was also an artistic decision) was the lens aperture. I chose f/8 to give me enough depth of field for the primary features of the face, but still keep the background somewhat blurred. I chose ISO 400 to give me a relatively fast shutter speed (1/160 second) when the sun was behind a cloud. With adults and teens I can use a much slower shutter speed (1/60 or slower) and still get a sharp portrait, but not with a fast moving youngster. A focal length around 80-100 mm gives a very pleasing perspective for the human face. Wide angle focal lengths in close distort the features of the face.
Although I took photos while the sun was out, you usually get the best portraits when the sun is behind a cloud and the light is soft. I was just fortunate that the light was soft when he discovered this particular flower.
With clouds dancing with the sun, the intensity and color temperature of the light were bouncing all over the place. I settled for keeping up with the changing light intensity by re-metering every time the light changed and I gave up on doing a custom white balance. If I took the time to change the white balance, I would miss too many photo opportunities. Metering on the other hand, is critical, especially if you want the best possible color your camera is capable of creating (see this article).
That meant I would need to correct the white balance of the RAW file after the fact with Adobe Camera Raw (ACR). And in case you are wondering, yes, even when you are shooting RAW files, it really is advisable to get the best white balance possible in the camera.
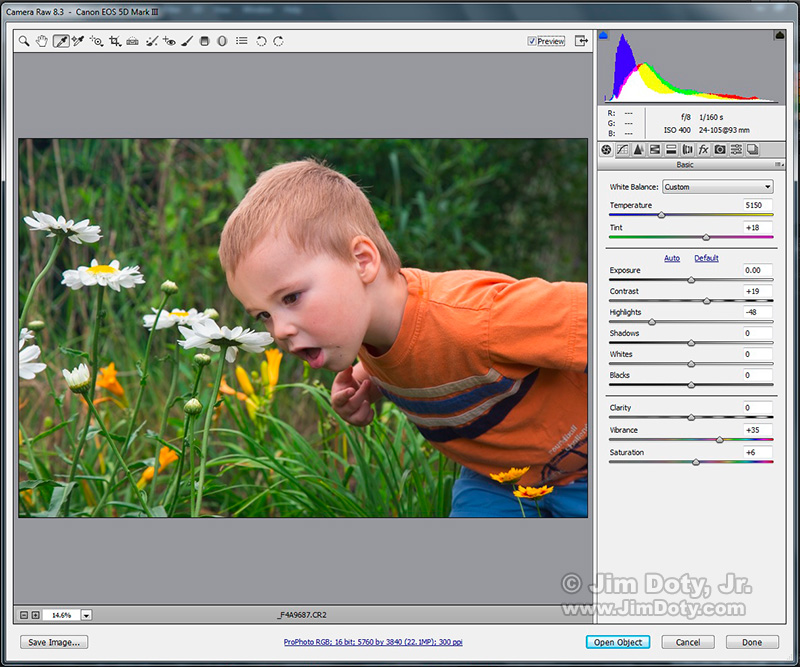
It was a simple matter to correct the white balance by choosing the white balance tool (it is the eye dropper, upper left corner next to the hand in the ACR window above) and clicking on a white daisy petal. With the white balance set (which you want to do first), it was time to correct the color.
I have my camera set to “bland” (which means I don’t boost the color saturation, contrast or sharpening in the camera) so I can get better color quality after the fact using ACR. This is especially important if you are shooting JPEG files, but it also speeds things up if you are shooting RAW files. I increased the Vibrance and Saturation sliders (lower right) in ACR to make up for having the color controls set so low in the camera.
I exposed for my grandson’s face so the much lighter daisies are close to being blown out. I compensated for that by pulling the Highlights slider to the left (center right in the above ACR window) which toned down the highlights. To expose for light Caucasian skin, get in close and meter just the skin, and add one stop (+1) of exposure compensation, and lock in that exposure setting. Then back up and take pictures. You don’t need to meter again unless the light changes. If you are metering for medium or dark toned skin, the exposure compensation is different.
ACR is a really valuable tool that comes with Adobe Photoshop. Adobe Lightroom, and the inexpensive (less than $100) Adobe Photoshop Elements.
After making these adjustments in ACR, I opened the image in Photoshop and used an adjustment layer to retouch the image. I eliminated some skin scratches and removed some dirt and a bit of grass from his face. I also used a “soft light” adjustment layer (checking the box for “fill with soft light neutral color”) to paint over (10% opacity brush) and brighten the whites in his eyes. After saving my full sized master image with the adjustment layers intact, I cropped the image, flattened the layers, converted the color space from Adobe RGB (1998) to sRGB and resized the image for the web. Adobe RGB (1998) has a wider color gamut and it best for making your own prints, but the sRGB color space is best for the web. The final corrected image is at the top of this article.
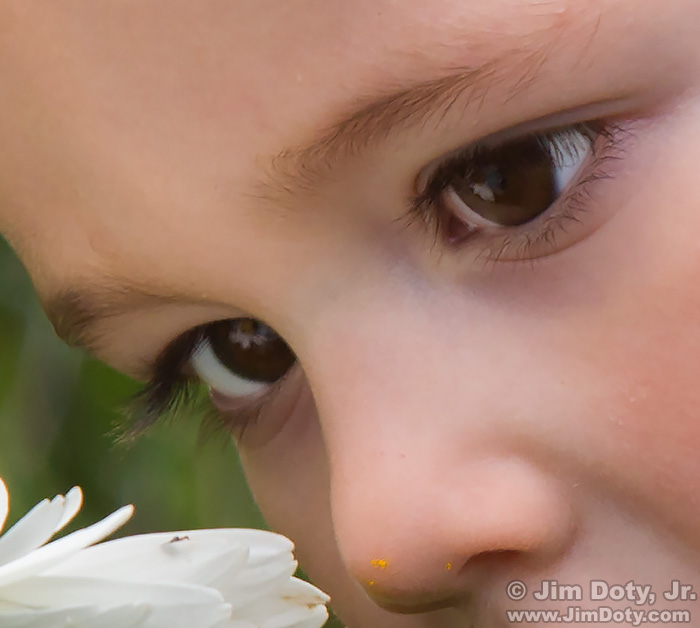
To give you an idea of the detail in this image, this is a tight crop of the face and part of the flower, pollen on the nose, and the daisy reflection in the eyes.
Photo Data: Canon 5D Mark III. Canon EF24-105mm f/4L IS USM lens at 93 mm. 1/160 sec, f/8, ISO 400.
Links
To learn more about how to create memorable portraits, depth of field, lens apertures, metering human skin, choosing the best ISO settings, getting the best color in your images, and a whole lot more, read Digital Photography Exposure for Dummies, one of the highest rated photography books at Amazon.com. Writing it was a labor of love. To see the many ways it will improve your photography, read this article. You can order it at a discount at Amazon.com.

