
Jack Ergo and Friends Recital, Carol Hall, Shaw Center, Graceland University, Lamoni Iowa
I went looking for a photo of my friend Jack from several years ago and the one I found needed some basic work. I will take you through my process of optimizing this photo.
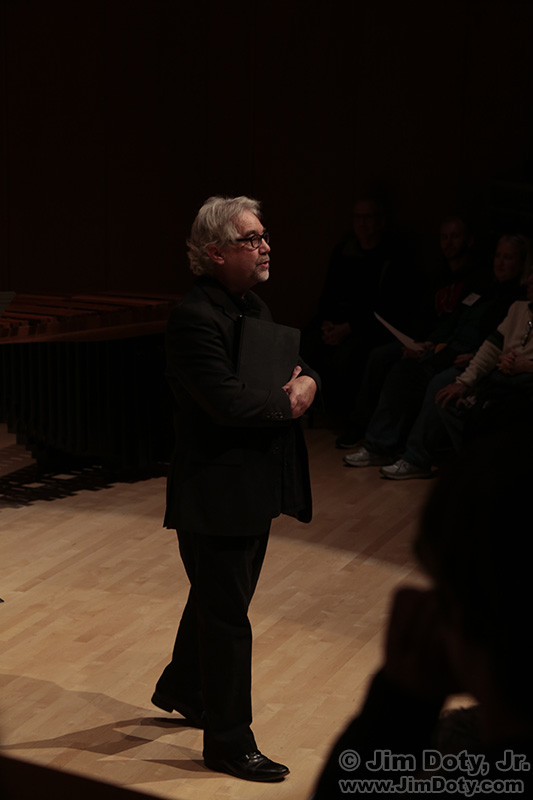
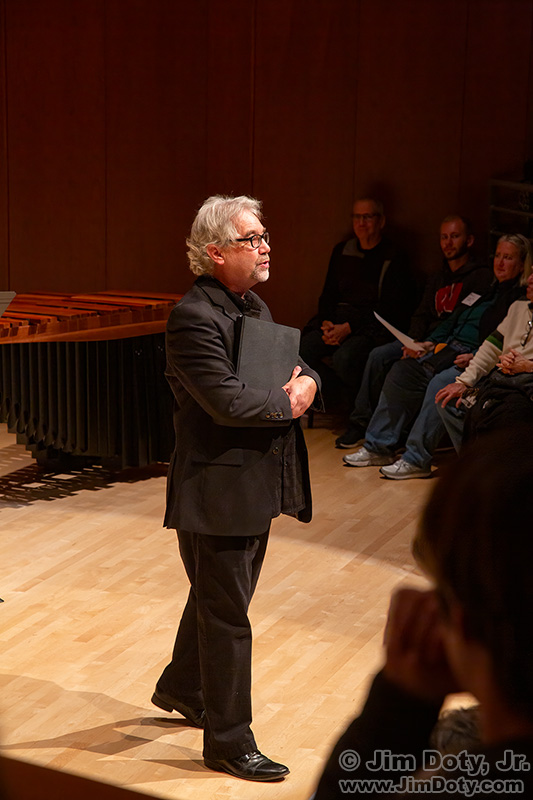
Original photo.
This is what the original photo looked like. It is too dark. His suit has no texture and the audience has mostly disappeared in the shadows.
Adobe Camera Raw
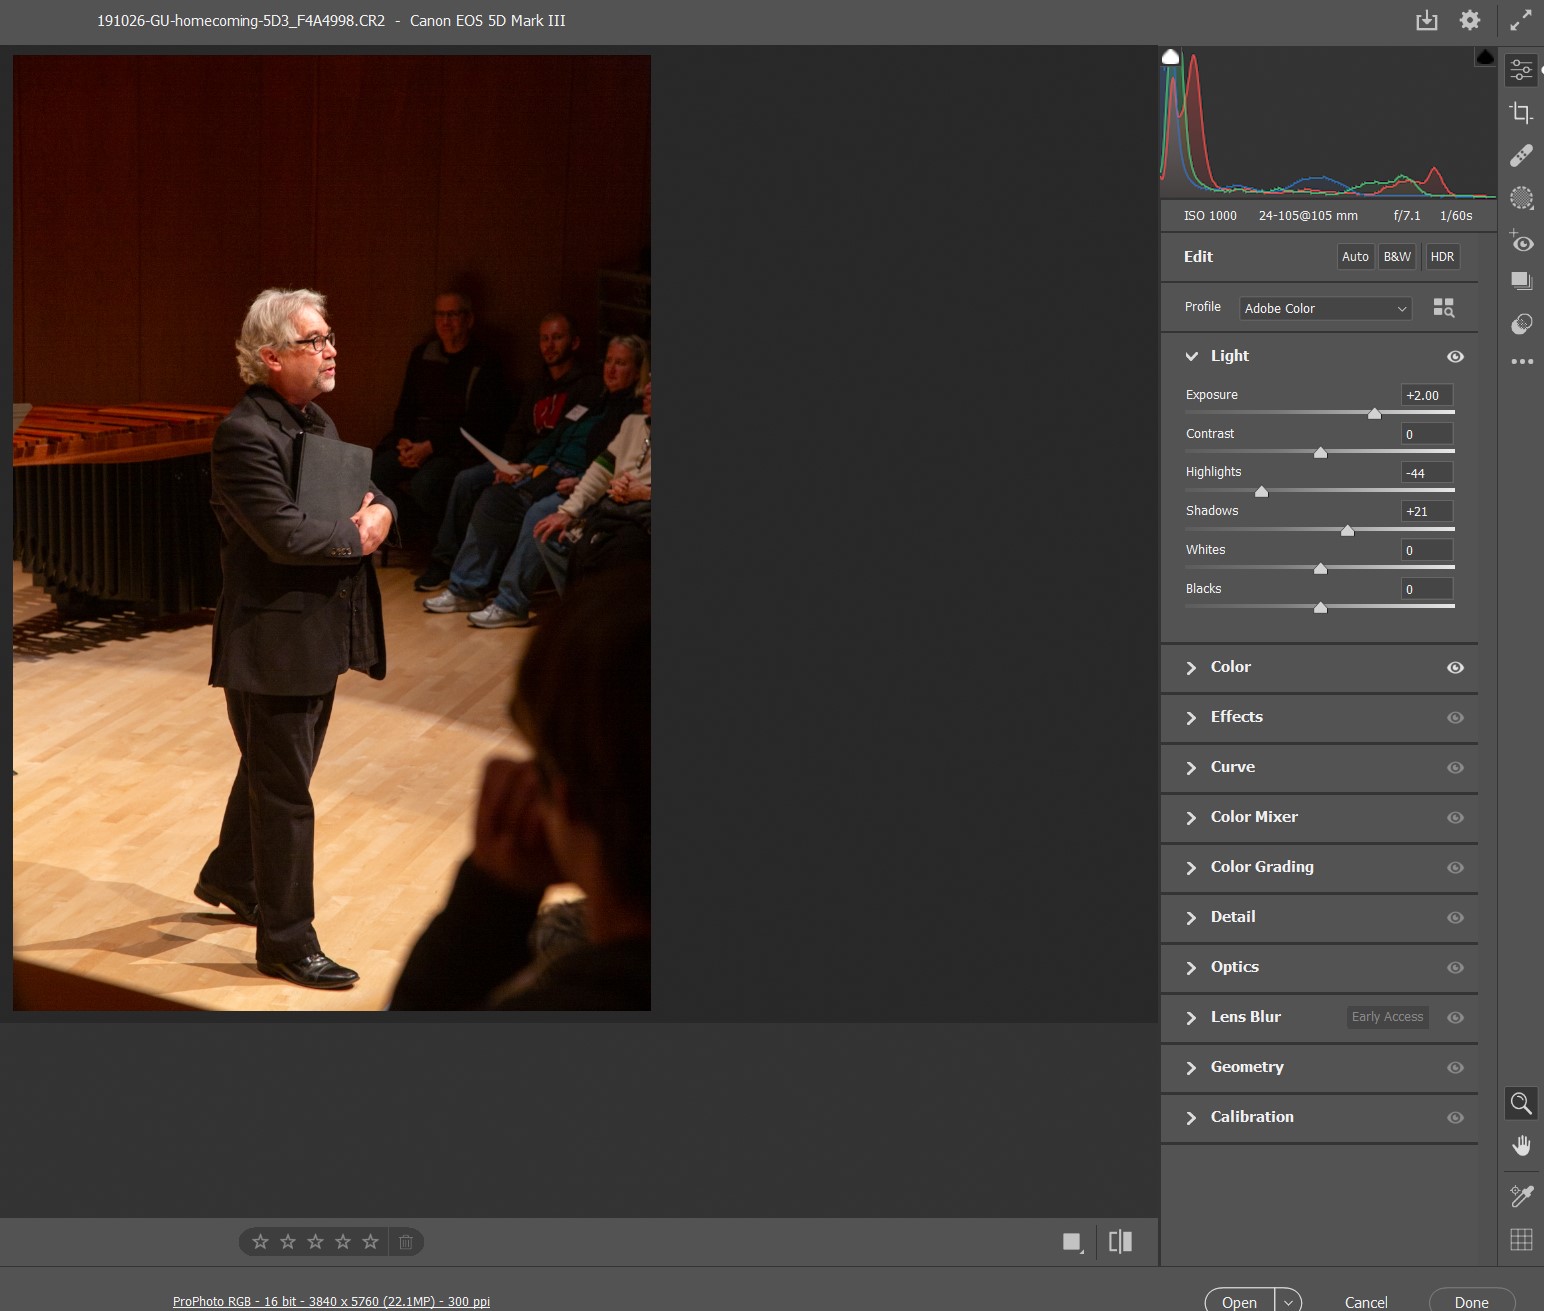
Photo in Adobe Camera Raw. Click to see a larger version.
I clicked on the original RAW file and Photoshop opened it in Adobe Camera Raw (ACR). ACR has groups of sliders (Light, Color, Effects, and more) on the right side of the screen. I opened the “Light” group of sliders and pulled the Exposure slider to the right to lighten the image. That made the overall photo better, but the spotlight on Jack’s head was now way too bright. I pulled the Highlights slider to the left to tone down the spotlight. The people in the shadows were still pretty dark so I pulled the Shadows slider to the right.
FYI: ACR comes with Adobe Photoshop, Adobe Lightroom, and Adobe Photoshop Elements.
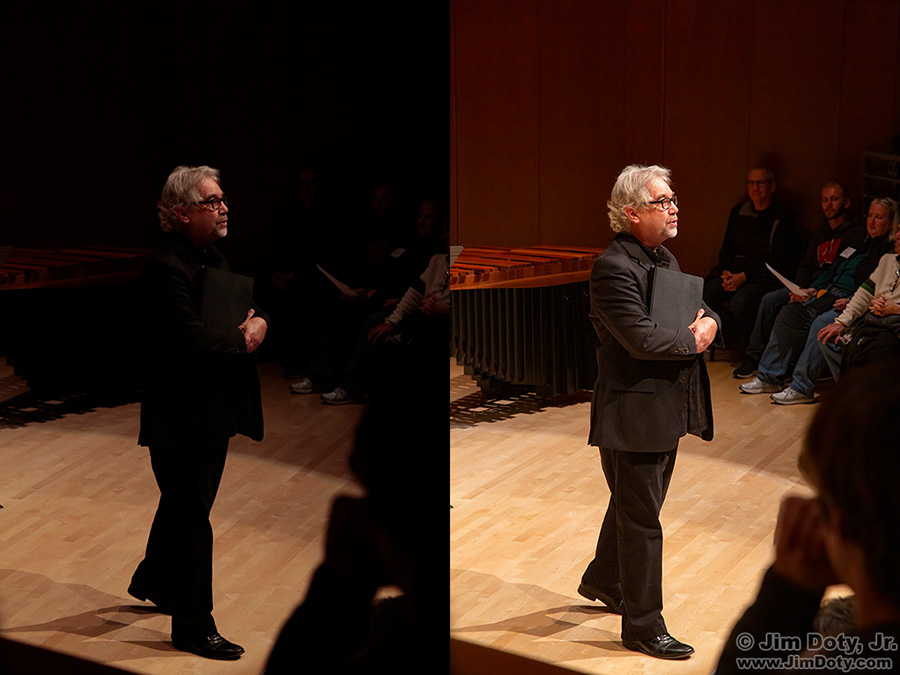
Before and After ACR.
Now my photo was looking like I wanted it to look, at least in terms of light and dark tones in the image. I saved the ACR improved image.
TOPAZ Sharpen AI
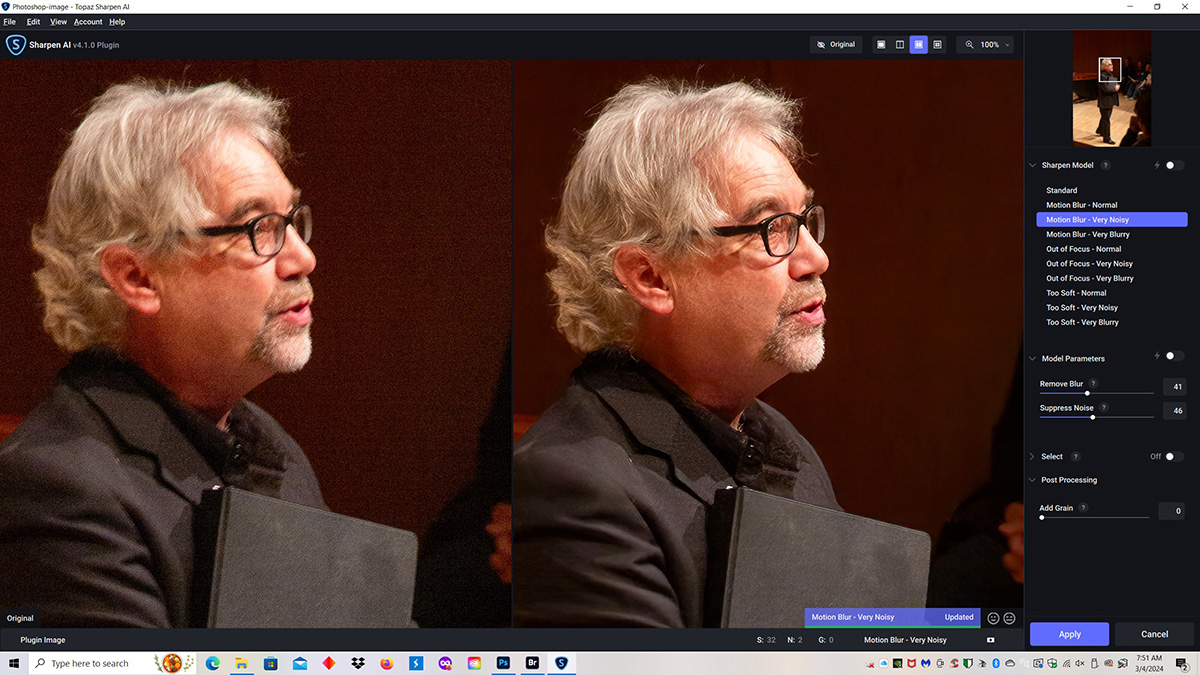
Topaz Sharpen AI. Click to see a larger version.
Due to the high ISO and low light levels there a lot of digital noise in the image. There was also a bit of motion blur. To fix both of those issues I opened the image in Topaz Sharpen AI. On the far right you can see the settings I chose. Of the various options I chose “Motion Blur – Very Noisy”. Then I moved the “Remove Blur” and “Suppress Noise” sliders until I liked the results in the image on the right. Don’t over do the sliders or your image will look weird and clunky. When I liked what I saw on the right, I clicked “Apply”. It will take 30 seconds to a minute or more for Topaz to do its thing.
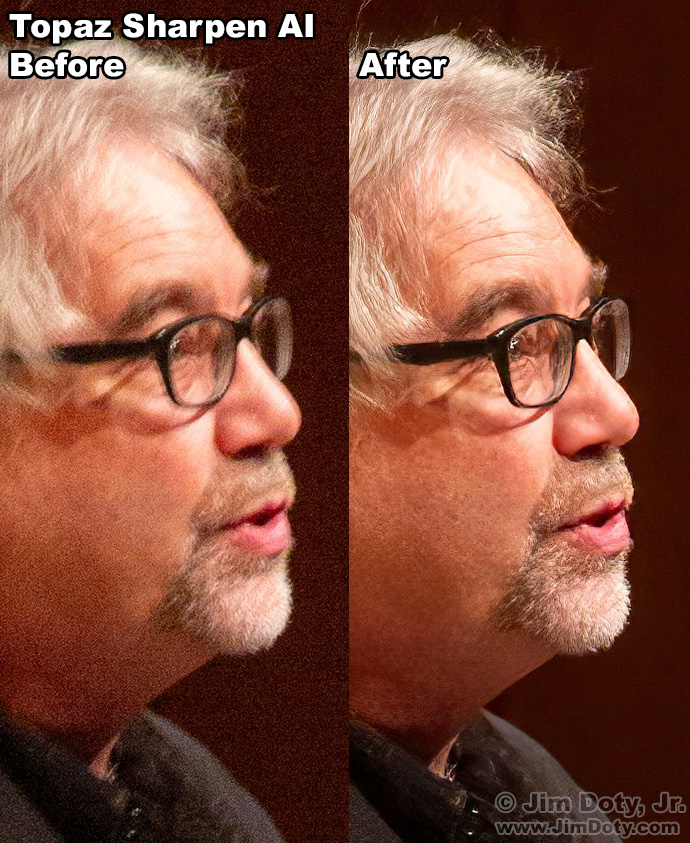
Before and After Topaz. Click to see a larger version.
You can see the difference Topaz made in removing noise and fixing most of the motion blur in the original image. You are looking at 100%, “actual pixels” magnification of Jack’s face. It is not perfect, but it is much better than the original image.
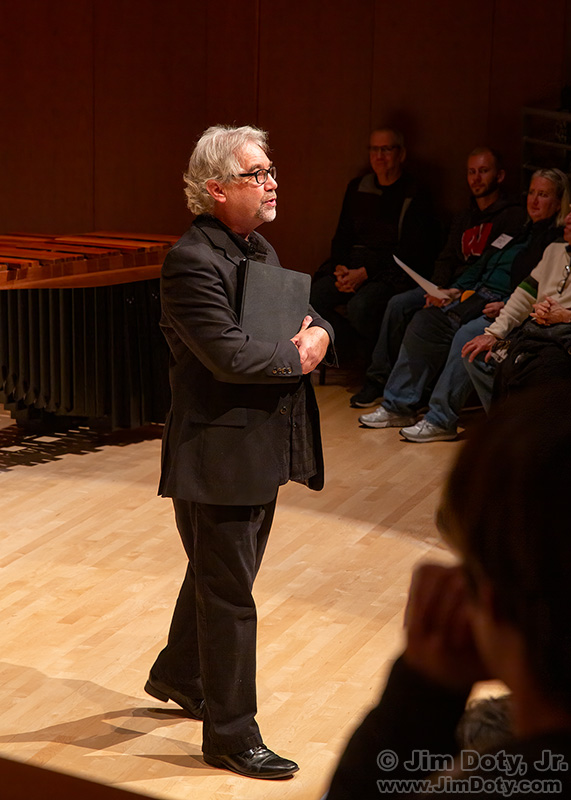
Jack Ergo after ACR and Topaz.
Now my image looks like I want it to look. I saved the Topaz version. (I now have three versions: the original image, the after ACR version, and the after Topaz version.) If at some later date I want to go back a step or two and change things without starting at the beginning, I can.
Cropping
I decided the image had too much space above Jack’s head and I wanted to remove part of the left side of the frame.
Jack, first crop.
I like this cropped composition better. I always make a basic framing decision right before I click the shutter, but I often do a crop in the computer. Lots of photographers do that. Landscape photographers usually come as close as they can get to the final look (framing) when they click the shutter. They may also do several alternate versions, including horizontal and vertical. In comparison, magazine photographers often shoot pretty loose so the editor has multiple cropping options as they do the cover and page layouts.
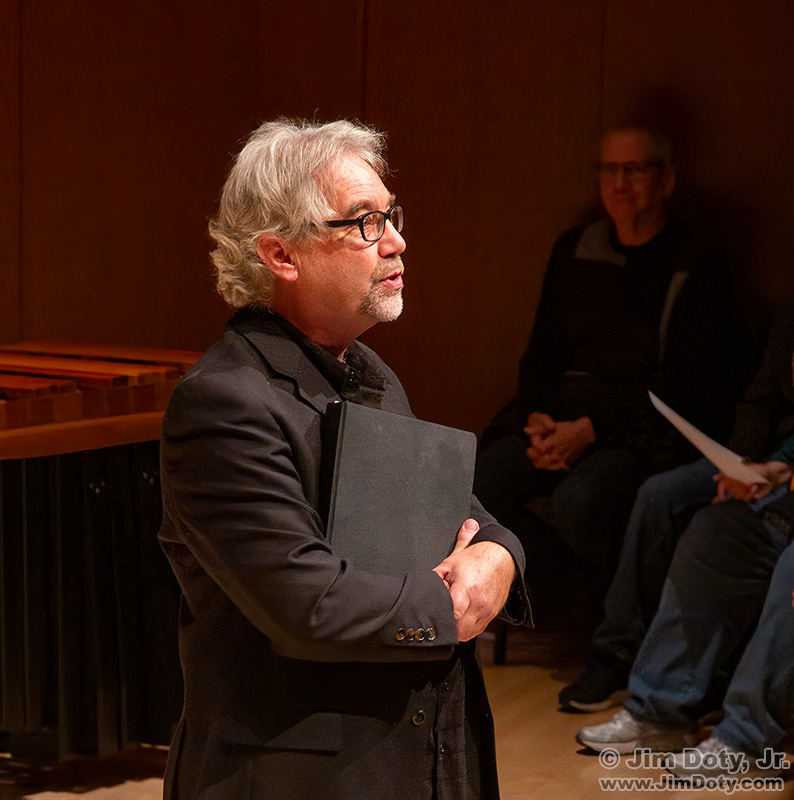
Jack, second crop.
I also wanted a tighter version of Jack so I did a second crop. This is the version I used at the top of this article.
This is a photo that was simple to optimize. In a difficult lighting situation I would use the Color sliders in ACR to color correct the image. Sometimes I need the Effects or Curves sliders in ACR. Plus, some images require some digital retouching. If someone is having a bad skin day, I remove pimples and other temporary skin outbreaks.
Links
Fast and Simple Adjustments with Adobe Camera Raw, with illustrations of the “sliders” used in ACR.
Color Correction with ACR, a Portrait Example
Your Camera Does NOT Capture Reality! – And what to do about it