
How do you make your subjects “pop” by blurring the background when you are using an iPhone? To get the maximum amount of blurriness there are several step involved, most of them after you click the shutter. I will take you through the process, step-by-step- complete with illustrations. I used an iPhone 11 for this step by step guide. If you have a different model the options and screen layouts might look different.

This article started with a conversation this morning. How do photographers get those wonderful blurred backgrounds behind wildlife? With an interchangeable lens DLSR or mirrorless camera, these are the steps: 1. Choose a lens with a long focal length, 2. Use a wide lens aperture, and 3. Get as close to your subject as its comfort zone will allow. If it is possible to control the background: 4. Choose a background that is farther away.
But what if you are using an iPhone? If you have a good quality telephoto lens for your iPhone, use it. If you don’t have an add-on telephoto lens for your iPhone and want to get one, be careful. There are some real rip offs being advertised out there (see the Chinese Lens Rip Off Series linked below). To get a good quality lens for your iPhone, read How to Choose the Best iPhone Lenses
Whether or not you have a telephoto lens for your iPhone, here are the steps to follow.
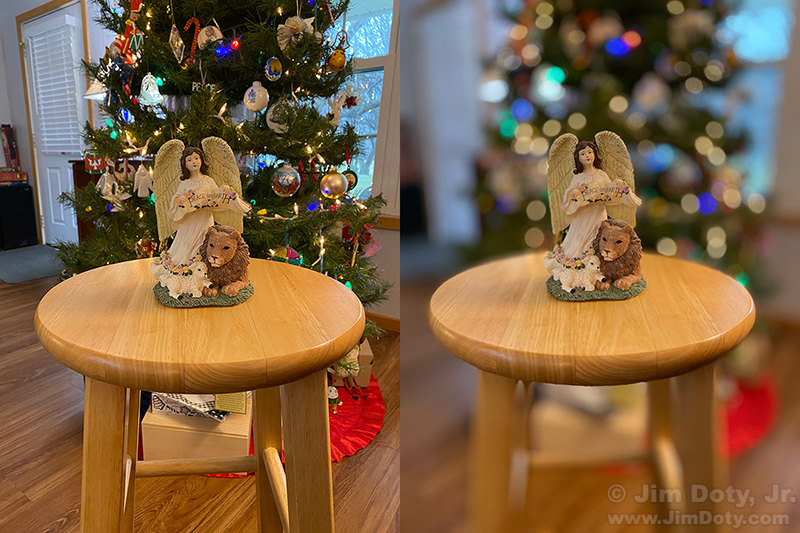
This photo was taken with an iPhone in PHOTO mode. The tree behind the angel looks relatively sharp. We can make it look much blurrier. I suggest you set up a test subject in front of a busy background and follow along by doing these steps with your phone. You can do it in the comfort of your home. A lighted tree makes a good background because the lights make the degree of blurriness more obvious.
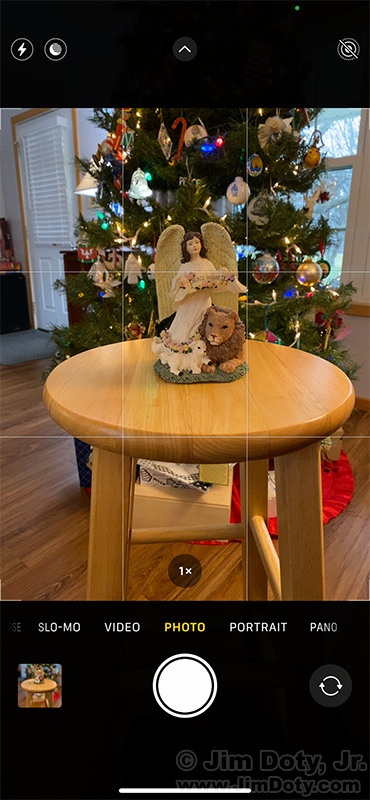
This is what the back of your iPhone looks like when you are about to take a picture in PHOTO mode. Go ahead and take a comparison picture in PHOTO mode.
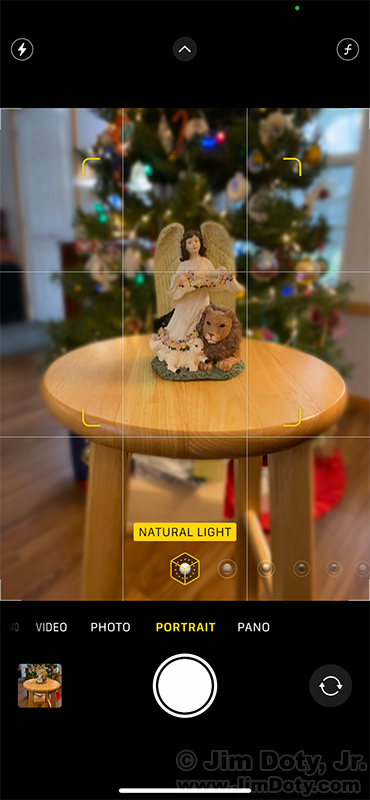
Tap on PORTRAIT and this is what you should see. There are several options across the bottom of the image area. Make sure the NATURAL LIGHT option is selected with the Natural Light Cube right below it. The tree and lights are already more blurry. Take a picture in the NATURAL LIGHT version of the PORTRAIT mode. You now have a blurrier background, but we can make it even more blurry.
There is a catch to using PORTRAIT mode. Your subject can’t be more than 8 feet from your iPhone or PORTRAIT mode can’t work its magic. Your subject can’t be much closer than 2 feet away either. I wanted to get close to the angel and my iPhone kept warning me to back up. So I backed up and decided to crop the image when I was all done.
You can still take a picture from too close or too far away, but you wont get the background blurring magic from too far away and your iPhone won’t give you access to the background blurring controls if you are too close when you take the picture.
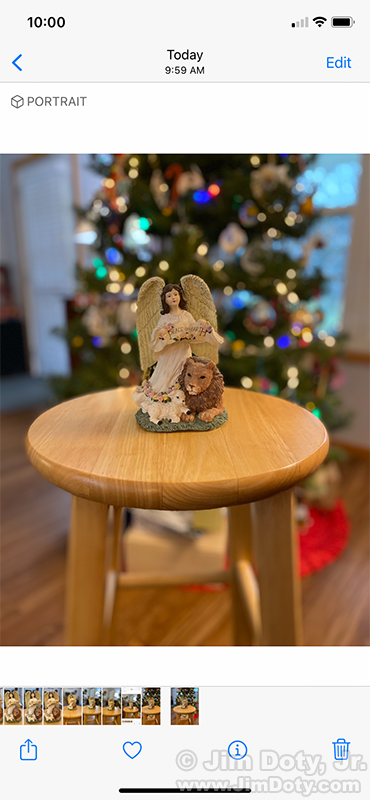
Go to the Photos folder on your iPhone and click on the PORTRAIT mode (NATURAL LIGHT) photo that you just created. Then tap the blue “EDIT” in the upper right corner.

You should get an edit screen that looks like this. It will say PORTRAIT at the top and you will see the NATURAL LIGHT cube under the image.
In the upper left you will see “f2.8” or some other “f” number. That is the “f-stop” setting the camera chose when you took the photo. By changing the f-stop you can make the photo blurrier. Tap the f2.8 (or whatever other f number is there).

You should see a screen like this with an aperture scale across the bottom and the aperture (f-stop) your camera used. In this case, my iPhone’s camera used f2.8.
This is where the digital magic happens inside your phone. By dragging the aperture scale with your finger you can make the background sharper or blurrier by changing the f-stop.
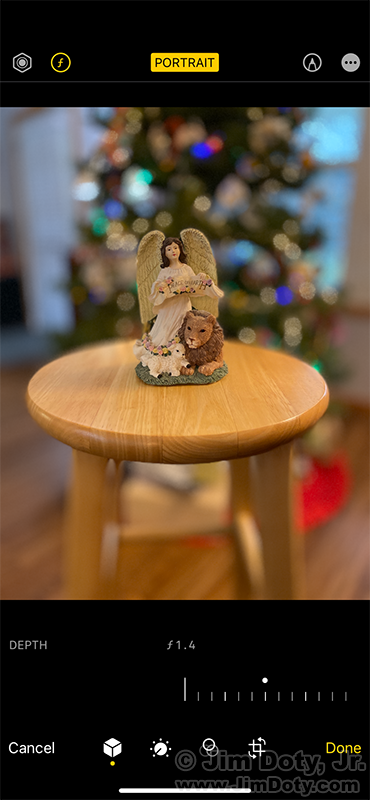
I dragged the aperture scale to the right to select the far left f1.4 aperture. This is as blurry as the iPhone can make the background of this image.
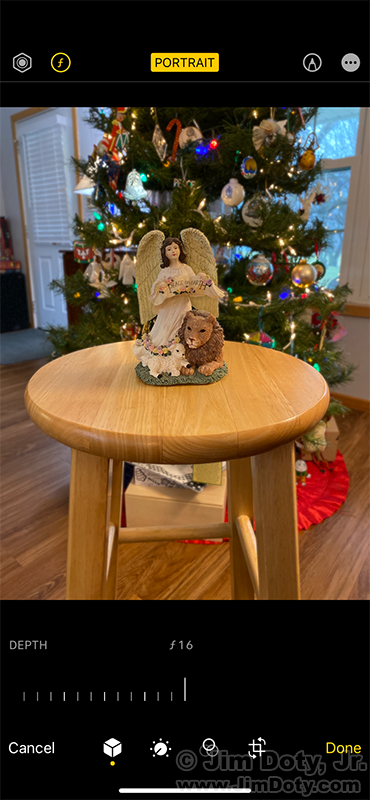
I dragged the aperture scale to the left to select the far right f16 aperture. This is as digitally sharp as the iPhone can make the background of this particular image.
Go head and drag the aperture bar left and right and watch the background. You can pick any setting you want.

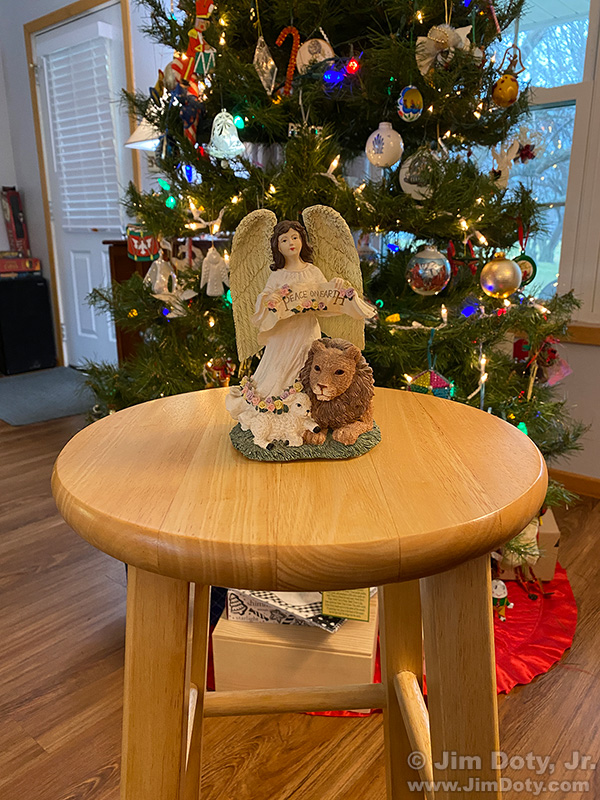
Let’s go back to the f1.4 aperture to get the blurriest possible background. Tap the yellow “Done” in the lower right corner and your iPhone will save this version to your Photos folder.
That is how it is done. Once you know how, it is simple!
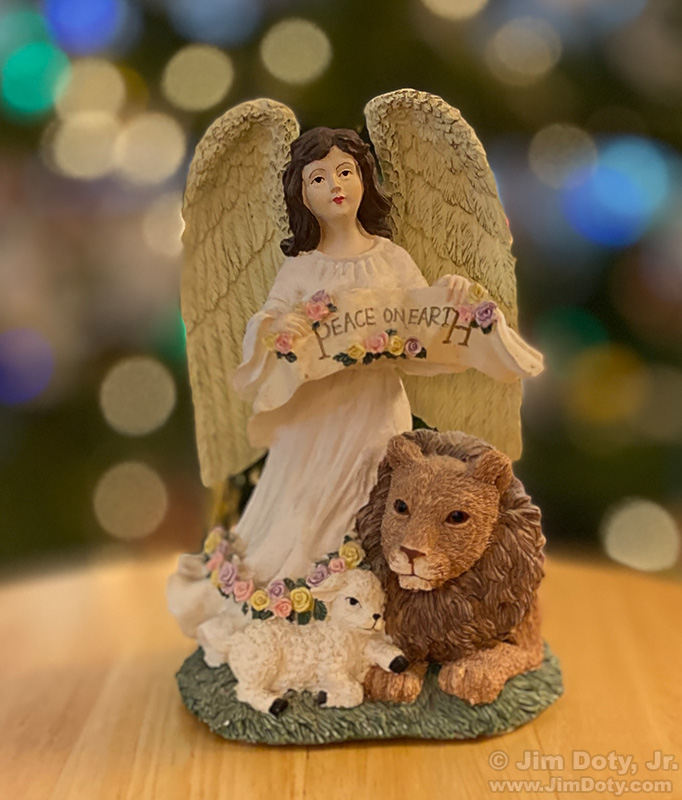
If you want to, you can crop your edited image to get the final look you want.
Links
How to Choose the Best iPhone Lenses
Lens Apertures and Depth of Field
The Chinese Lens Rip Off Series – Overpriced Camera Phone Lenses