
 Most digital cameras give you a choice of several pre-set white balance settings (daylight, tungsten, cloudy, shade, and others), but they won’t give you the most accurate white balance in a mixed lighting situation. If you choose a pre-set, the colors in your images will be off.
Pre-sets have their place of course. If you are outside on a sunny day, choosing daylight (the little sun icon) will give you a great match for the color temperature of the light. If you are in a room with all tungsten light bulbs, choosing tungsten (the little light bulb icon) will give you a pretty good match to the light.
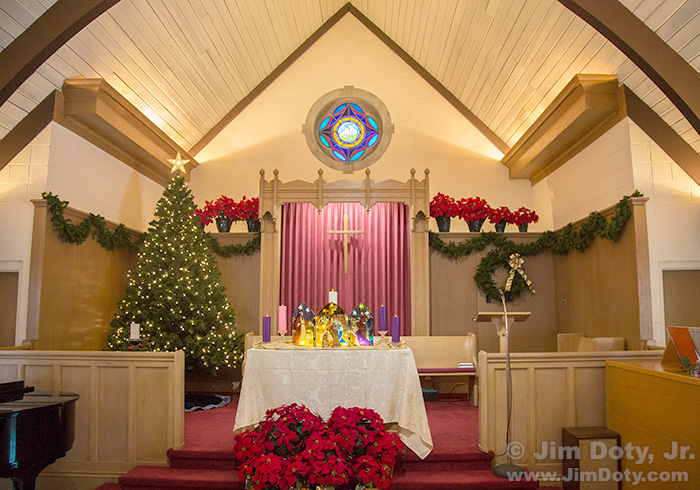
But in mixed lighting situations you have lights sources with several different color temperatures. In the case of this sanctuary there are three different light sources with three different color temperatures. If you choose a pre-set white balance on your camera, you are choosing a specific color temperature of light, but no matter which pre-set you choose, it won’t match the blend of color temperatures in your real world situation.
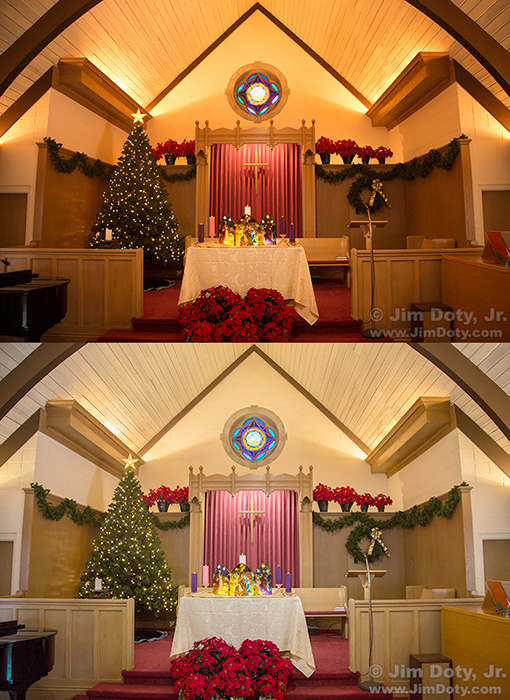
Sanctuary. Camera set to “daylight” white balance.
There is a lot of daylight coming in to this sanctuary through the windows, but setting the camera’s white balance to daylight doesn’t account for the other lights which mostly are warmer in tone than daylight. All the colors in the photograph are shifted to a yellow/gold direction. That is most obvious in the cloth under the manger scene and candles in the lower center of the photo.
The simple solution in a mixed lighting situation is to do a custom white balance. To do this, take a picture of something that is a true neutral gray, or something that is pure white with no color tint whatsoever. I carry a small, collapsible 18% gray card in my camera bag, which is usually the best option. Some scenes don’t have anything that is truly neutral gray with no color tint. And you can use an 18% gray card as a powerful metering tool.
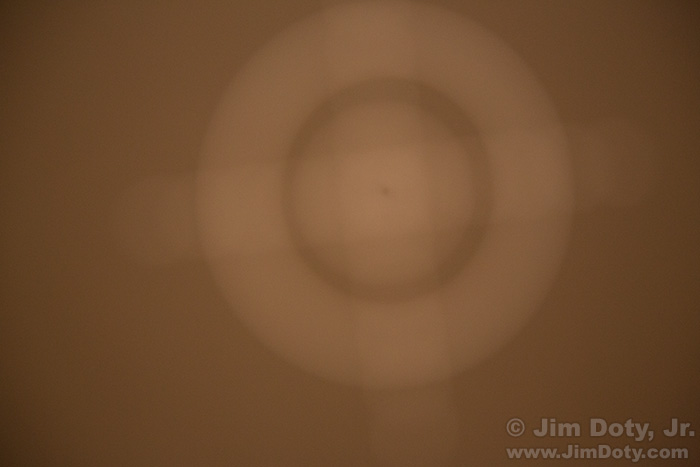
18% Gray Card. Camera set to daylight white balance.
Just put your gray card in the same light as your subject (I put my gray card by the table with the glass manger scene and candles) and take a picture. The important thing is to fill the frame with your 18% gray card or pure white object so the photo you take only has neutral gray or pure white. You do not need to focus on the 18% gray card. The white balance you have set on your camera does not matter. As you can see, the gray card does not look gray in this photo.
Now that you have a photo of your 18% gray card, you tell your camera to work its magic. How to do this varies with every brand and model of camera so you will needs to check your camera’s manual.
Generally it works something like this. Find “Custom White Balance” in your camera’s menu system. Then tell the camera to choose the photo you took of your gray card and use it to create a custom white balance. The camera will then use your gray card photo and choose the correct color temperature to make the gray card actually look gray. By doing that all of the other colors in your scene will look correct.
After your camera works its magic, go to the white balance options and choose the icon for “custom white balance”.
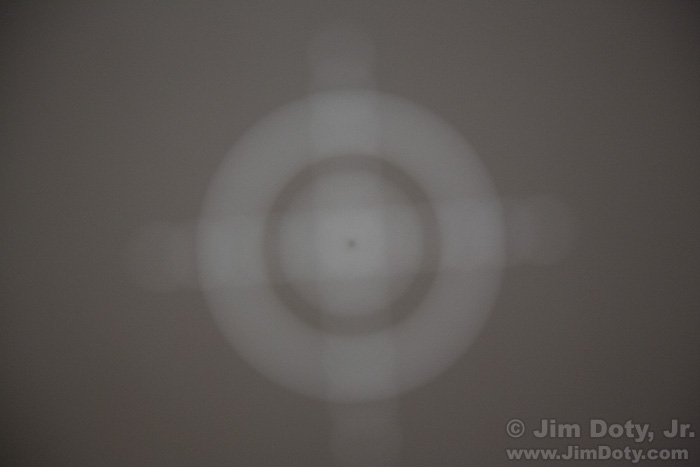
Gray Card. Camera set to custom white balance.
To make sure you did everything correctly, take another picture of your gray card. If you did everything correctly the photo of your gray card should look gray. If it doesn’t you did something wrong or left out a step. Go back and try again. If you gray card looks gray, your are all set. You can now take pictures of your subject/scene.
When you create a custom white balance by taking a picture of a gray card and telling your camera to use that photo to create a custom white balance, what you are really doing is telling the camera to memorize the specific color temperature of the light in that situation and digitally compensate for that color temperature to give you accurate colors.
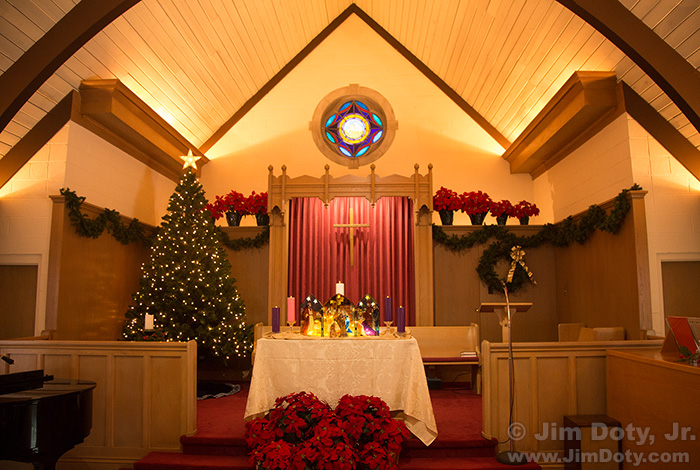
Sanctuary. Camera set to “custom white balance”.
With my custom white balance set, I took another picture. Now my sanctuary scene looks like it is supposed to look. The custom white balance setting is set for the proper color temperature mix for all the light sources.
As long as the light doesn’t change, I can keep taking photos and get great colors. If I came back at night, there would be no daylight coming through the windows and I would need to do a new custom white balance for the two remaining light sources.
Your camera will remember your custom white balance setting until you change it. I could go outside, change the white balance to daylight and take pictures outside, then come back inside and change back to the custom white balance setting and take more pictures inside the sanctuary.
Article Links

Before and after setting a custom white balance.
Setting A Custom White Balance Will Save You a lot of Time
Using a Gray Card, Incident Light Metering on the Cheap
Purchase Links
There are chapters on working with different qualities of light and using your camera’s white balance settings in my book, Digital Photography Exposure for Dummies. It is one of the highest rated photography books at Amazon.com. You can learn all about my book here, and order it here.
My favorite, collapsible 18% gray card is 12×12 inches unfolded and folds down to about 4 1/2 inches to go inside its own zippered cloth case. You can find it here.