Exposure compensation is one of the most important keys to good exposures, great images, and the best colors your digital camera is capable of producing. Knowing your camera’s snow exposure latitude is one of the keys to using exposure compensation in a winter scene. It is different for every camera model. You won’t find it in your camera’s manual but it is easy to determine with a simple test.
This is the eighth in an ongoing series of articles on winter photography (links below).
Snow exposure latitude is the amount of plus exposure compensation (+1, +2, +3) you can add when metering snow in a scene before the pixels begin to wash out. It is important to know when you have a dark toned subject in the snow. It is easy for a dark subject (like wildlife) to become a dark, texture-less shape in a winter scene. Knowing how much snow exposure latitude your camera has will tell you how much you can lighten the snow so you can see more texture in your dark subject without washing out the snow. And it will also let you know how much you need to lighten the snow if you WANT it to look washed out, like the background for a head and shoulders portrait.
First you need to set up your camera. If your camera LCD has the “blinkies” feature, turn it on (parts of the photo on the LCD screen will alternately blink white and black to warn you those pixels are washed out). Turn on the histogram on the back of your camera. You will also need to know how to use your camera’s exposure compensation scale (check the camera manual if you don’t now where to find it or how to turn it on).
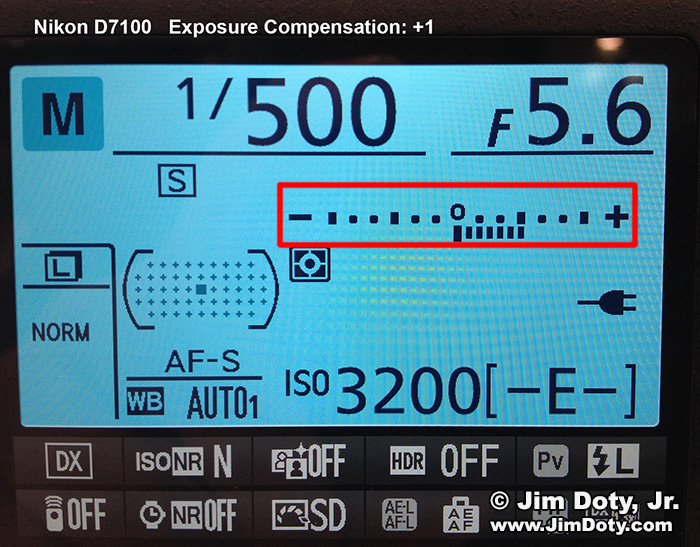
This is the LCD on the back of a Nikon D700. The exposure compensation (marked in red) is set to +1. The total range on this exposure compensation scale is -2 to +2, but if your camera is in manual mode you can go beyond 2 stops simply by changing the shutter speed or aperture. Each change of aperture or shutter speed beyond plus or minus 2 is an additional 1/3 stop change.
The LCD on the back of this Canon T5i shows an exposure compensation of minus one third (-1/3). The range on this exposure compensation scale is -3 to +3. If your camera is in manual mode you can go beyond 3 stops by changing the shutter speed or aperture. Each change of aperture or shutter speed beyond plus or minus 3 is an additional 1/3 stop change.
In the middle of a bright sunny day (you want the sun high in the sky) face south and point your lens at an area of clean, bright snow on the ground in front of you. You don’t want your camera meter to see anything but snow. Bright sunlight on snow is about as bright as it gets so it is a good test of your camera’s snow exposure latitude.
Put your camera in manual exposure mode. Set the ISO to 100 and the aperture to f/8. Turn the shutter speed dial until the exposure compensation reads zero. Take a series of photos beginning with no exposure compensation (0) and then increase the exposure compensation in 1/3 stop increments (+ 1/3, + 2/3, + 1, + 1 1/3 and so on) all the way up to at least plus three stops (+3). If the exposure compensation scale on your camera stops at +2, that isn’t a problem. Each time you increase the shutter speed by one click, you have added another +1/3 stop of exposure compensation, even if the scale on the camera doesn’t show it. It is a good idea to take notes on what you are doing. If your camera only does 1/2 stops increments, then do 1/2 stop increments from 0 to + 3.
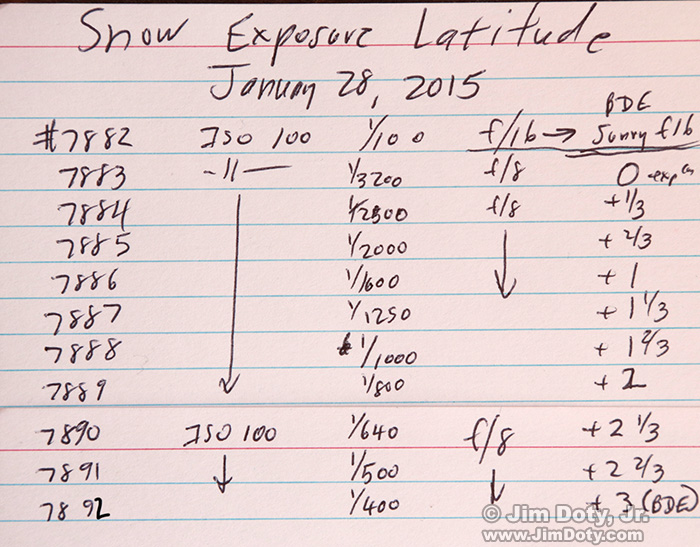
This is the 3×5 card where I kept notes on my snow exposure latitude test. Keeping notes is a good idea whenever you are doing a test. When you are done with the test, photograph your notes so a photo of your notes is always with the test photos.
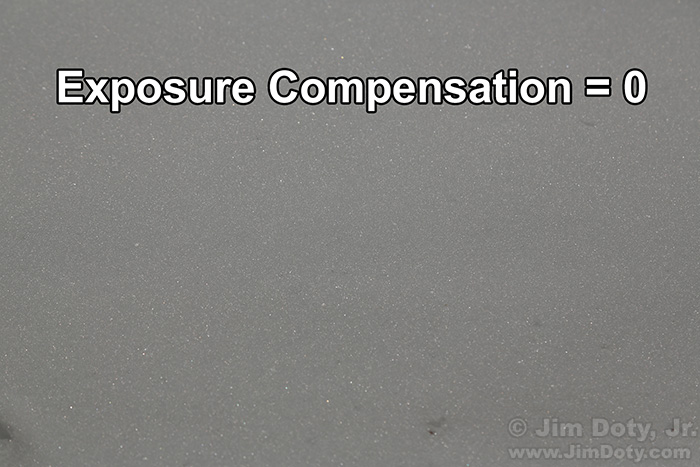
Your first photo (0 compensation) should look something like this. There is a lot of texture in the snow but the snow is gray. Your meter did exactly what it is designed to do. It is in love with middle gray. With each 1/3 stop increase in exposure compensation your photos will get lighter and look more like white snow.
Somewhere during this process the blinkies will kick in and the histogram will have a spike at the far right of the scale. Both are indications of blown out, feature-less, white pixels. The last exposure before the pixels are blown out is your camera’s snow exposure latitude limit. However, you may very well prefer an exposure before the camera reaches that limit.
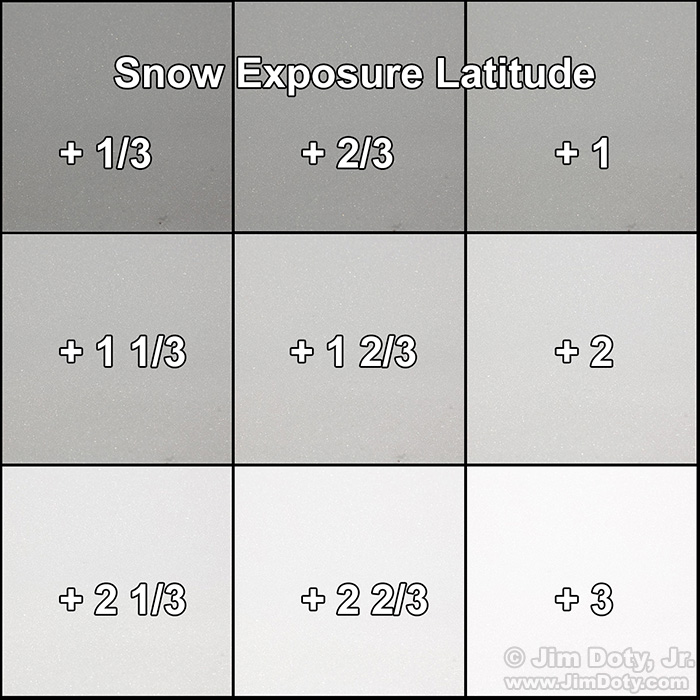
Here are my next nine exposures with a Canon 5D Mark III. It is hard to see on these tiny web sized images, but my camera hit its limit at plus 3. The blinkies were going crazy and I had a big spike on the right side of my histogram. Looking at the full sized images on my monitor, an exposure compensation of + 2 or + 2 1/3 gives me nice bright snow with lots of texture. + 2 2/3 is really pushing it. By + 3 it is pretty much all over. If you don’t have blown out pixels by + 3, keep on going (+ 3 1/3, + 3 2/3 and so on) until you do.
I’ve done this test with other DSLRs. Some of them have 1/3 to 2/3 stops less exposure latitude than the Canon 5D Mark III. With some DSLRs + 2 looks good and + 2 1/3 is pushing it or even too much. I tested a point and shoot digital camera and the blinkies kicked in at plus 1 1/3. Each camera model is a little different and the only way to know your camera’s snow exposure latitude is to go out and test it.
I generally recommend adding two stops of exposure compensation (+ 2) for daytime winter scenes since most (but not all) DSLRs can handle that. Lots of points and shoot cameras can’t. Their tiny digital sensors just don’t have the same amount of latitude as a DSLR.
If you are shooting RAW files, it is possible to exceed your camera’s snow exposure latitude a bit, and save the blown out highlights using Adobe Camera Raw, but in general it is a good idea not to push your luck.
Incidentally, the + 3 exposure compensation image in my test happened to be the Sunny f/16 Rule (Basic Daylight Exposure). Sunny f/16 isn’t a safe guideline for winter exposures because you can end up with blown out, featureless snow. A Sunny f/16 exposure is great for bright sunny days in the spring, summer, or fall, but not for winter scenes (or when your subject is a bright and white, no matter the season).
(Originally posted February 28, 2015. Revised and updated January 11, 2016.)
Series Links
“How To†Series: Winter Photography – An Overview
Metering Daytime Winter Scenes
Metering Wildlife in the Snow, Part One
Metering Wildlife in the Snow, Part Two
Metering Evening Winter Scenes
Metering Nighttime Winter Scenes
Protect Your Camera Gear in the Cold and Snow
The Sunny f16 Rule Isn’t Reliable in Winter
More Links
Why Is Exposure So Important? The first in a series of articles covering the basics of exposure with links to the rest of the articles.
Speaking Your Camera’s Language: Aperture, Shutter Speed, and ISO (thinking in stops).
Using Reflected Light Meters, Part One (with a section on exposure compensation).
Exposure Warning:Turn on the Blinkies
How To Use Your Camera’s Exposure Compensation Scale
The Best Colors Come From The Best Exposures
Mastering exposure is one of the first and most important steps to becoming a better photographer. One of the best ways to do this is to read Digital Photography Exposure for Dummies and do the exposure exercises in the book. This book will teach you the basics and then take you well beyond the basics. Digital Photography Exposure for Dummies is one of the highest rated photography books at Amazon.com (5 stars) and it is praised by amateurs, professional photographers, and photography magazines as one of the most helpful and comprehensive books on exposure currently available. You can learn more here and order it at Amazon.com.

