
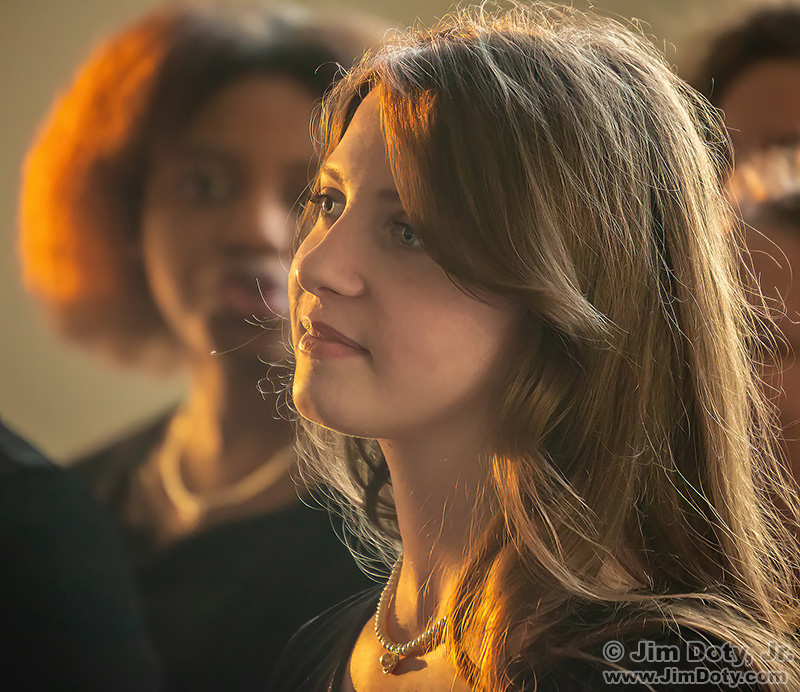
Nicole, casual portrait, Grove City Ohio, May 7, 2018.
Seven years ago, the Graceland University Choir (from Lamoni Iowa) was on tour and I caught their performance at a church in Grove City Ohio. I was in the lobby taking casual portraits of the choir. This young women happened to step into the sunlight that was streaming through a lobby window, making for wonderful, warm “short side” lighting. Short side lighting means the light is shining on the side of the face that is away from the camera.
This is one of my favorite casual portraits, so for seven years I’ve been curious who this person is. A few weeks ago a mutual friend (who was also in the choir) filled me in. I contacted Nicole and she gave me permission to use her name in this article.
I wanted to see what this image would look like without the background, so I opened the image in Photoshop to try one of the new AI tools.
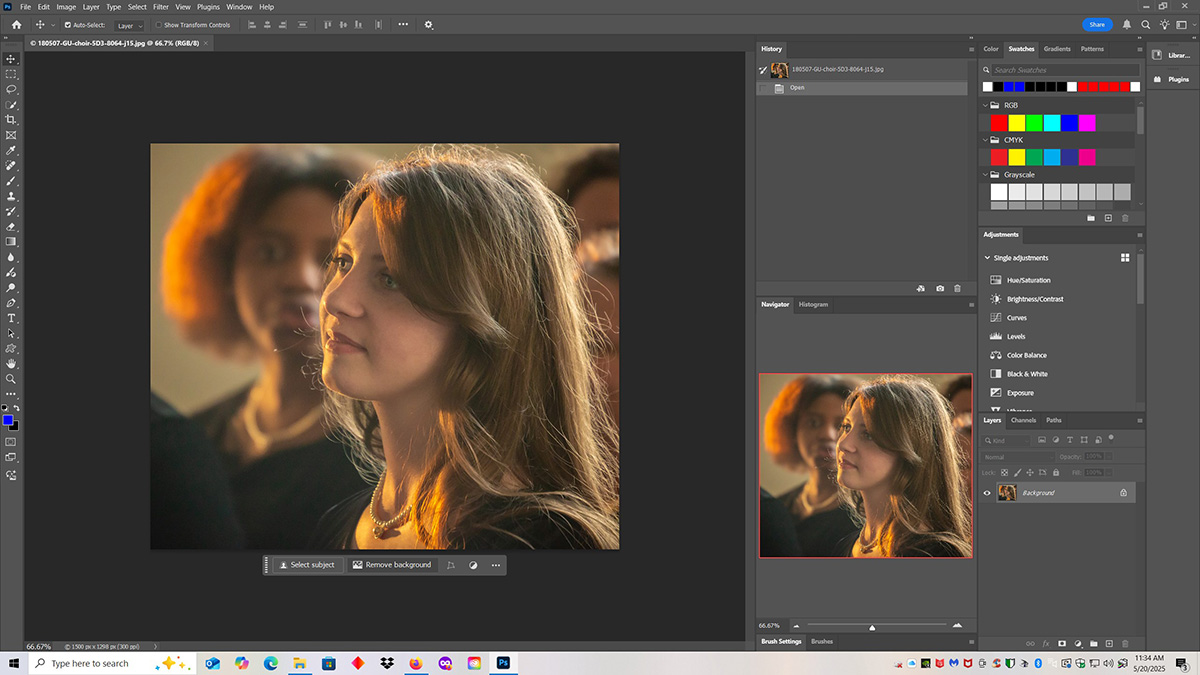
Photoshop and the Contextual Task Bar. Click the image to see a larger version.
In this screen capture from Photoshop, you can see the “Contextual Task Bar” underneath her image. I clicked “Remove Background”.
Note: If you don’t see the Contextual Task Bar, at the top of Photoshop click “Window”. In the drop down list put a check mark in front of Contextual Task Bar. If you don’t see it on the list, make sure you are updated to the latest version of Photoshop.
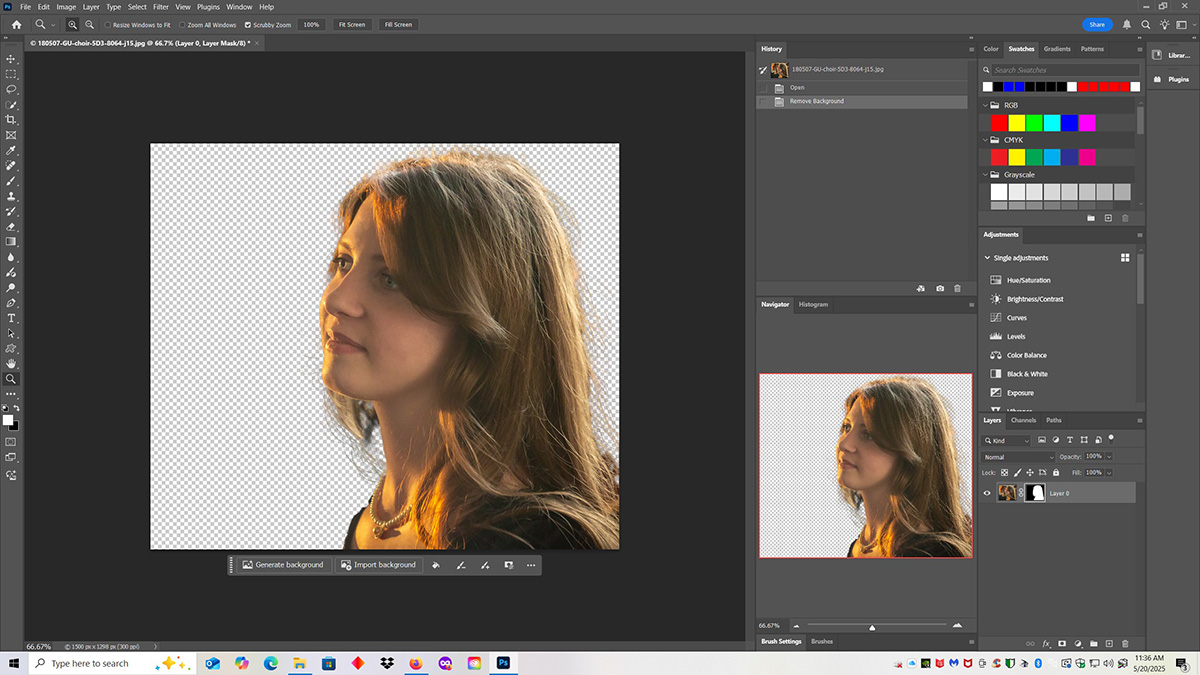
Photoshop: Portrait with the background removed. Click the image to see a larger version.
In a few seconds Photoshop showed me this image with the background removed. Photoshop did a great job except for removing part of her shoulder. Photoshop thought part of her shoulder was the background. More about that later. With the background removed, the Contextual Task Bar options have changed.
You can ask AI to generate a new background, or you can import a background of your own, or you can choose other options indicated by icons. I chose the paint bucket icon, picked the color black, and clicked the background with the paint bucket.
Nicole, black background, part of her shoulder missing.
In a few seconds Photoshop gave me this image with the background filled with black, but with the aforementioned shoulder flaw. Her shoulder is partly missing and it looks weird.
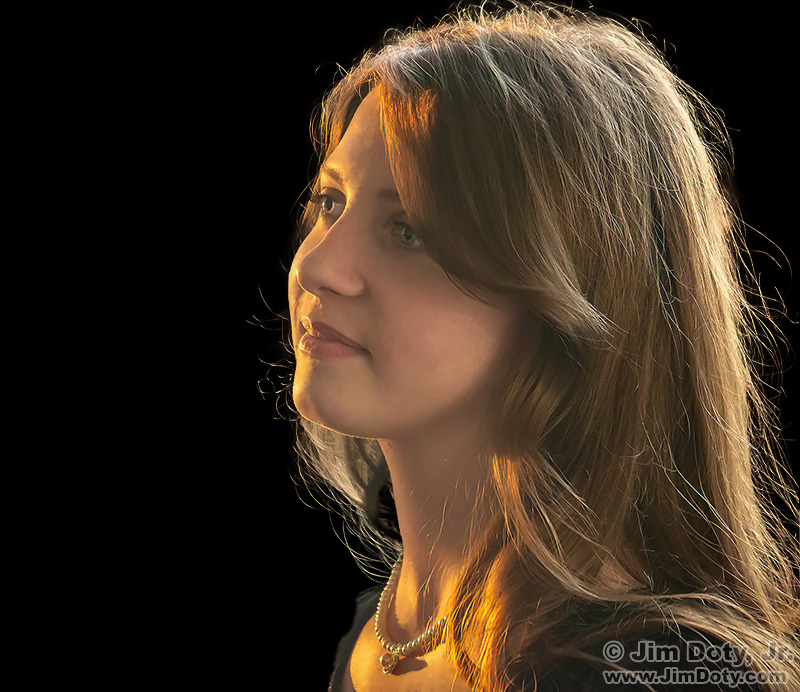
The fix was simple. I created a two layer image with the new black background version on top and the original image on the bottom. Then I erased enough of the top layer to reveal her whole shoulder in the bottom layer.
To learn how to use layer masks to erase part of one layer to reveal the layer underneath, read this tutorial (also linked below).

Nicole, black background.
Nicole with her shoulder restored.
Links
Selective Color Removal, How to Use Layer Masks to Remove Part of a Layer
It’s All About The Light, A Tale of Two Portraits