
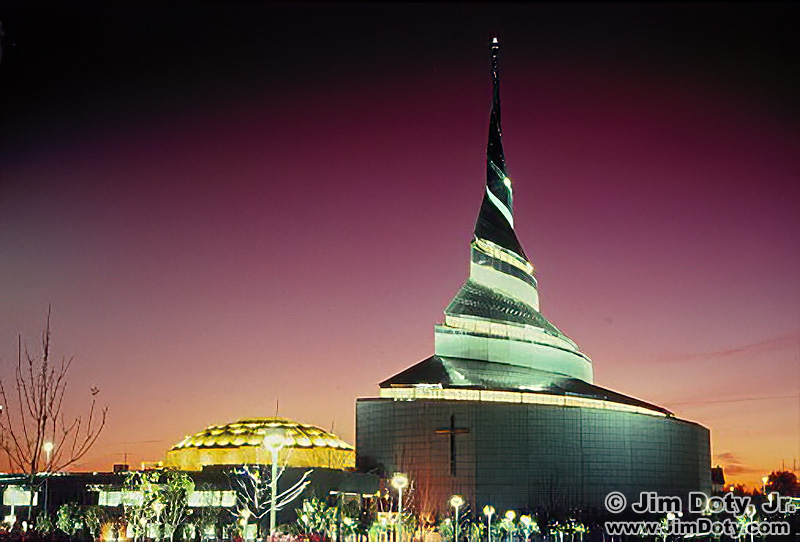
The Temple, Independence Missouri
Jewel Box Lighting is a name given to photos taken in the evening when lighted buildings, monuments, bridges, and Christmas lights look so nice against the deepening sky colors. This article will show you how to do it with a digital camera. If you are using a film camera, read this article.
There are two ways to do Jewel Box Lighting, one takes two evenings and is more precise, the other takes only one evening, but you will need to take a lot more photos.
If you aren’t used to thinking in stops, exposure compensation, and bracketing images, read this article and this article.
One Evening Procedure (Sky Priority)
Begin taking pictures when the sky is too light. In manual metering mode, meter just the sky near your subject and set that as your beginning base exposure. Recompose to include your subject. Begin with your base exposure and take a bracketed set of exposures from two stops under to two stops over your base exposure. For example, if your beginning sky meter reading is f/8 at 1 second, use that setting to make that your first picture, but take pictures from f/8 at 1/4 second to f/8 at 4 seconds in 1/2 or 1/3 stop increments.
Wait a few minutes and repeat. Meter the sky to the side of your subject and use that as your new base exposure. Recompose to include your subject and take another bracketed set of exposures.
Repeat this procedure every few minutes until the sky is too dark.
Back at your computer you can look at your sets of bracketed images and pick your favorites.
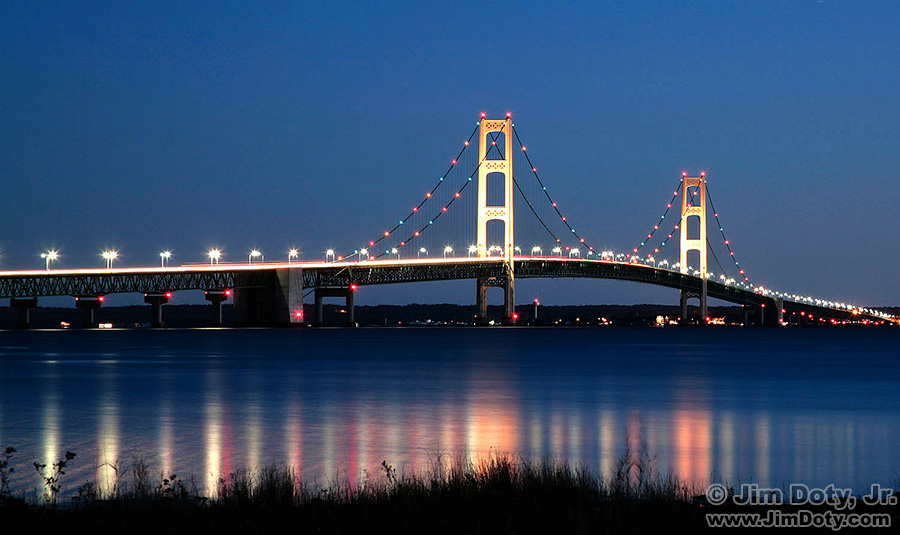
Mackinac Bridge at Dusk.
Two Evening Procedure (Subject Priority)
Night one:
Go out at night after the sky is dark to the building, bridge, monument, or Christmas lights you want to photograph. Put your camera meter in manual mode. If it is a building or monument you can get close to, walk up to the side of the building and meter it. If the building is lighter or darker than a medium tone, you will need to compensate for subject tonality, just like you would in any other kind of photography (see this article).
Once you have your starting exposure, back up so you can see the whole building or other subject and take a series of exposures, bracketing up to two stops on either side of your base exposure in 1/2 or 1/3 stop increments. Your LCD and will give you a general idea which exposures look best, but don’t trust it completely.
If you can’t get close to your subject, take a widely bracketed series of exposures that range from way too dark to way to light on your camera’s LCD.
Download the images to your computer and pick the very best exposure. This is the exposure you will use on night two.
Night two:
Pick an evening with good possibilities of giving you some nice color in the sky. You already know the best exposure for your subject from your testing on night one.
Start when the sky looks too light. Using your predetermined exposure from night one, take a picture every three or four minutes until the sky looks way too dark.
Download your images. The sky will get progressively darker in the images. Pick the exposure or exposures you like best.
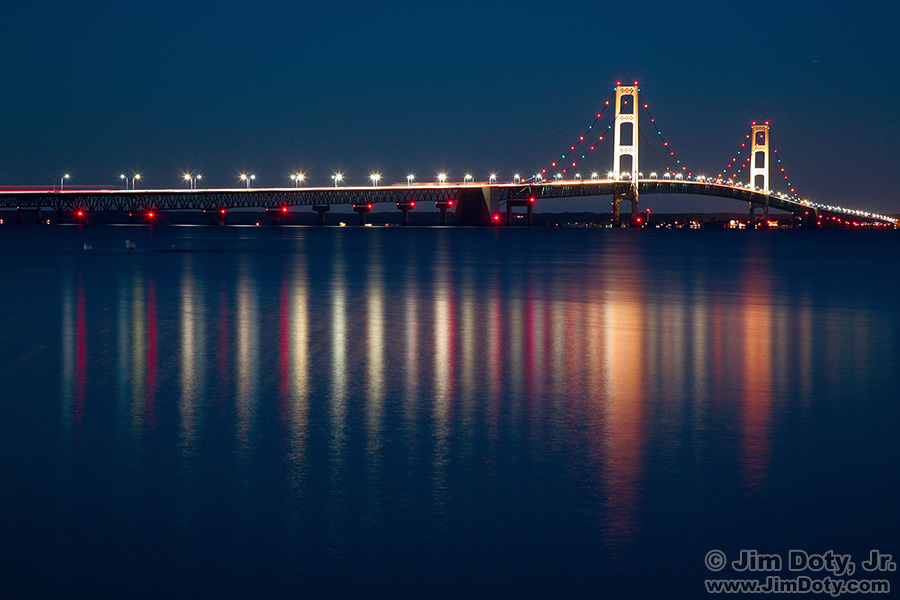
Mackinac Bridge at Night
Both of these procedures work. When I have two evenings, I do the first procedure. When I only have only one (like on a trip) I use the one evening procedure.
The two images of the Mackinac Bridge were taken four years apart.
Links
Speaking Your Camera’s Exposure Language: Aperture, Shutter Speed, and ISO