
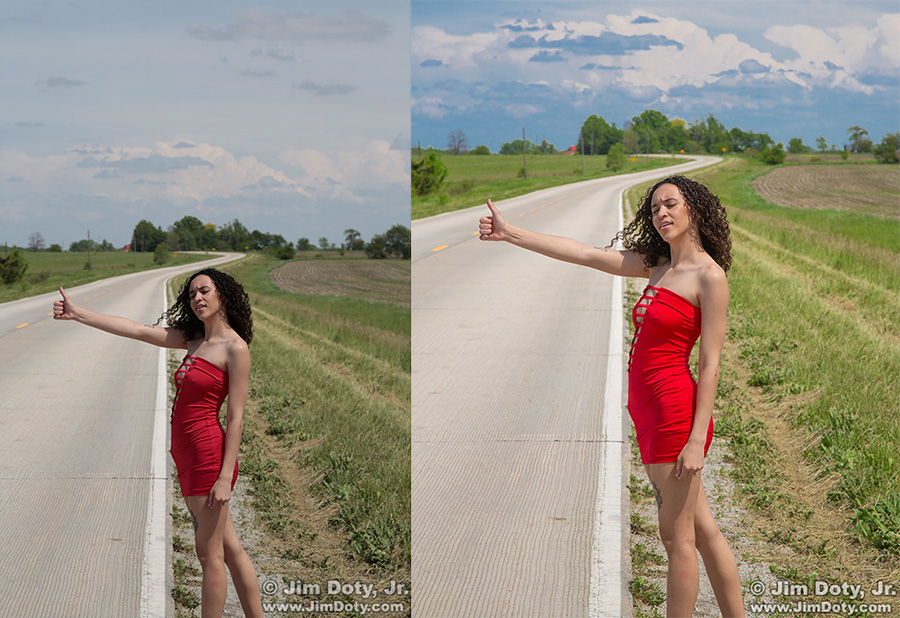
Soleece, before and after Adobe Camera Raw.
Cameras, no matter how expensive, do not capture “visual reality”. In other words, what you see with your eyes is not what the camera captures when you click the shutter. The photo on the right is what my eyes saw when I clicked the shutter. The photo on the left is what my camera gave me. I used Adobe Camera Raw (ACR) to turn the camera image on the left into the image on the right. Plus I cropped the final image. The process of turning the camera image into the image you want only takes a minute or two.
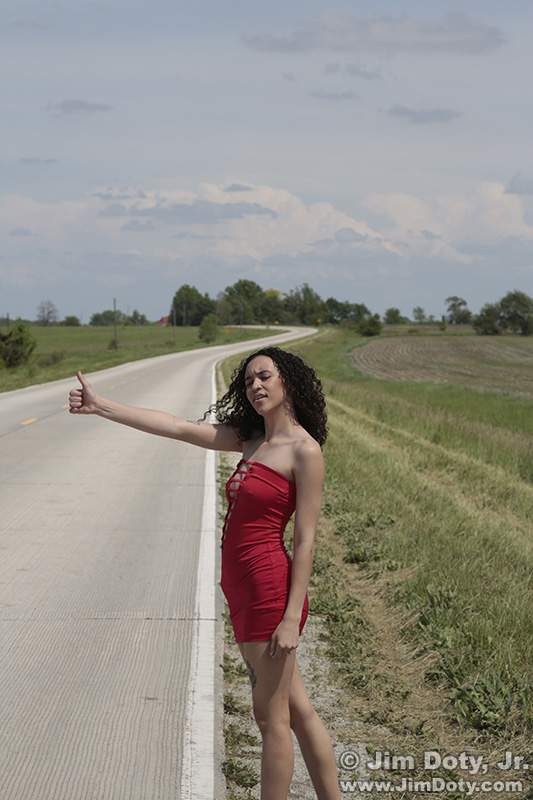
Soleece, original image.
This is the original image, right out of the camera and resized for the web. It is more contrasty than what my eyes saw. The dark tones are darker and the light tones are lighter. Cameras increase contrast. Sometimes that is good and sometimes it is not. It is also less colorful than what I saw with my eyes when I clicked the shutter. I will take you through the steps I used in ACR to optimize this image so it looks like I want it to look.
Click on the following images to see a larger version so it will be easier to read the slider panels on the right.
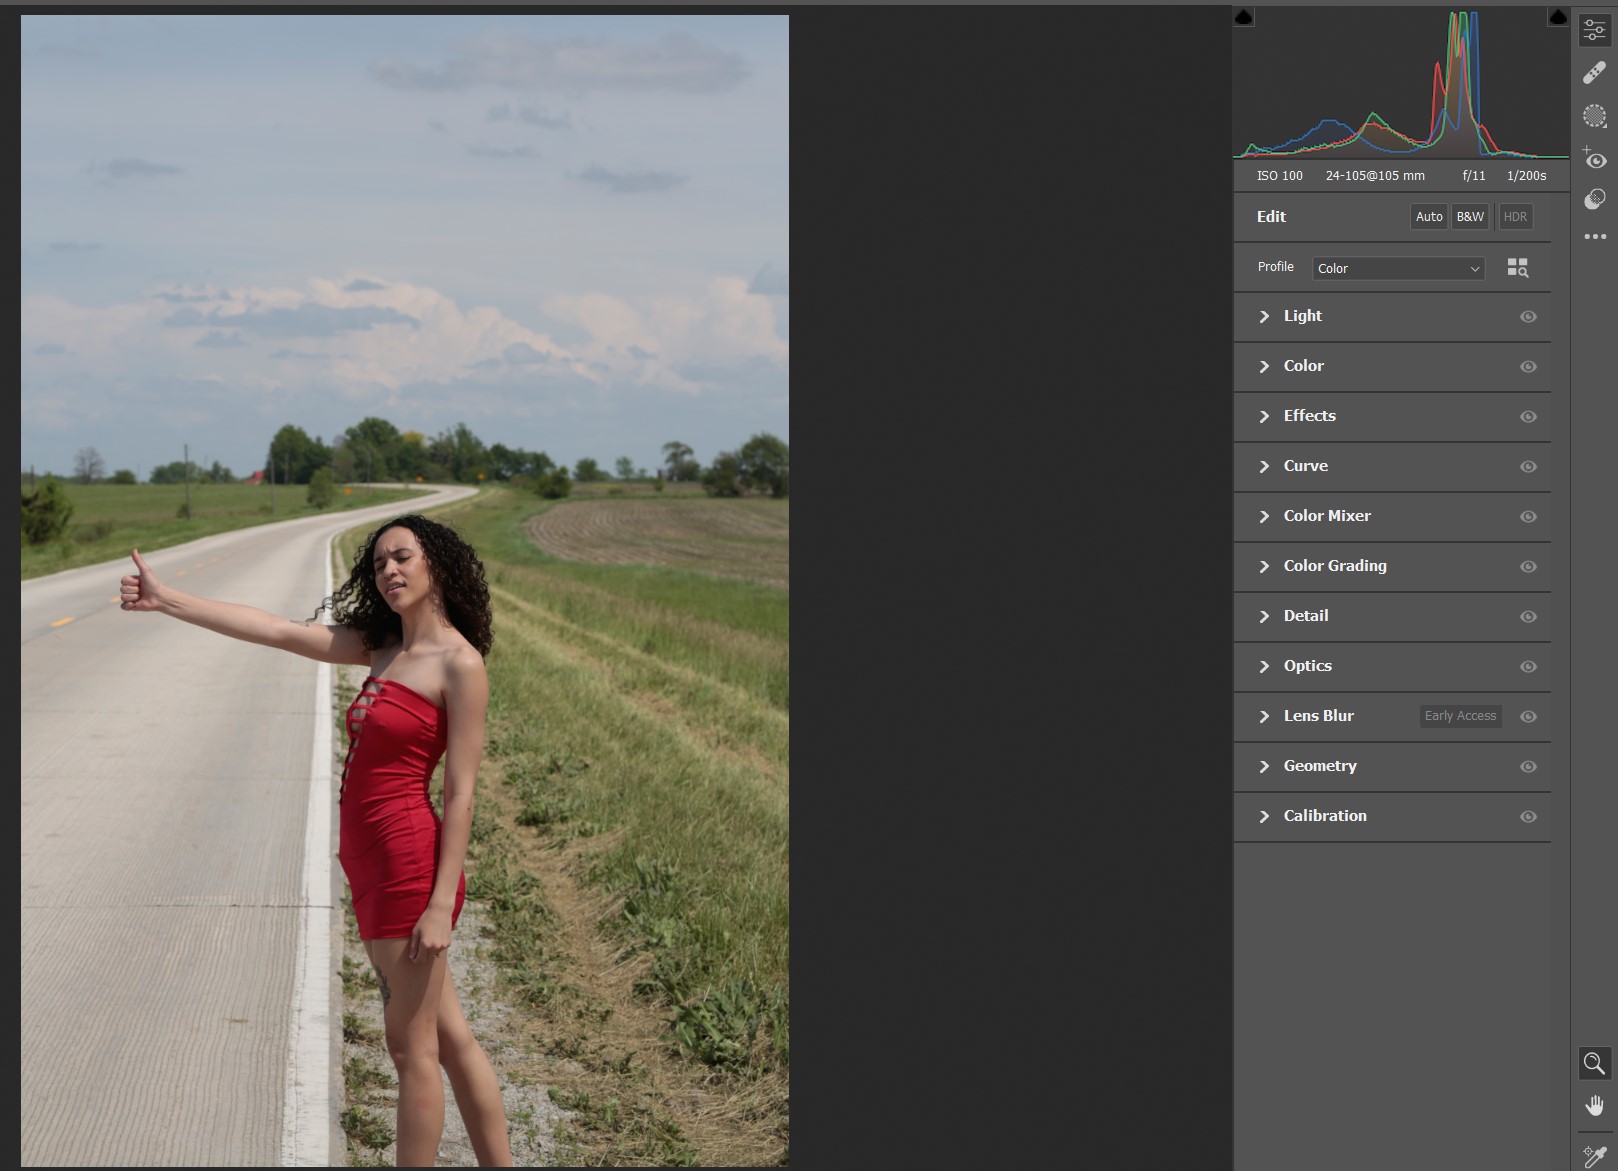
The original image and the ACR adjustment panels. Click the image to see a larger version.
When I click on the original raw file in Adobe Bridge, the image opens in the ACR window in Adobe Photoshop or a similar version (with less options) in Adobe Photoshop Elements. This is a screen capture of just part of the ACR window, showing the original, uncorrected image on the left and the adjustment panel on the right. There are a lot of adjustment options. I will use three of them on this image, Light, Color, and Color Mixer. I will click on the arrow just to left of “Light” to open the Light options and make two changes. (To learn more about Adobe Bridge, a free download, check out my Adobe Bridge Series.)
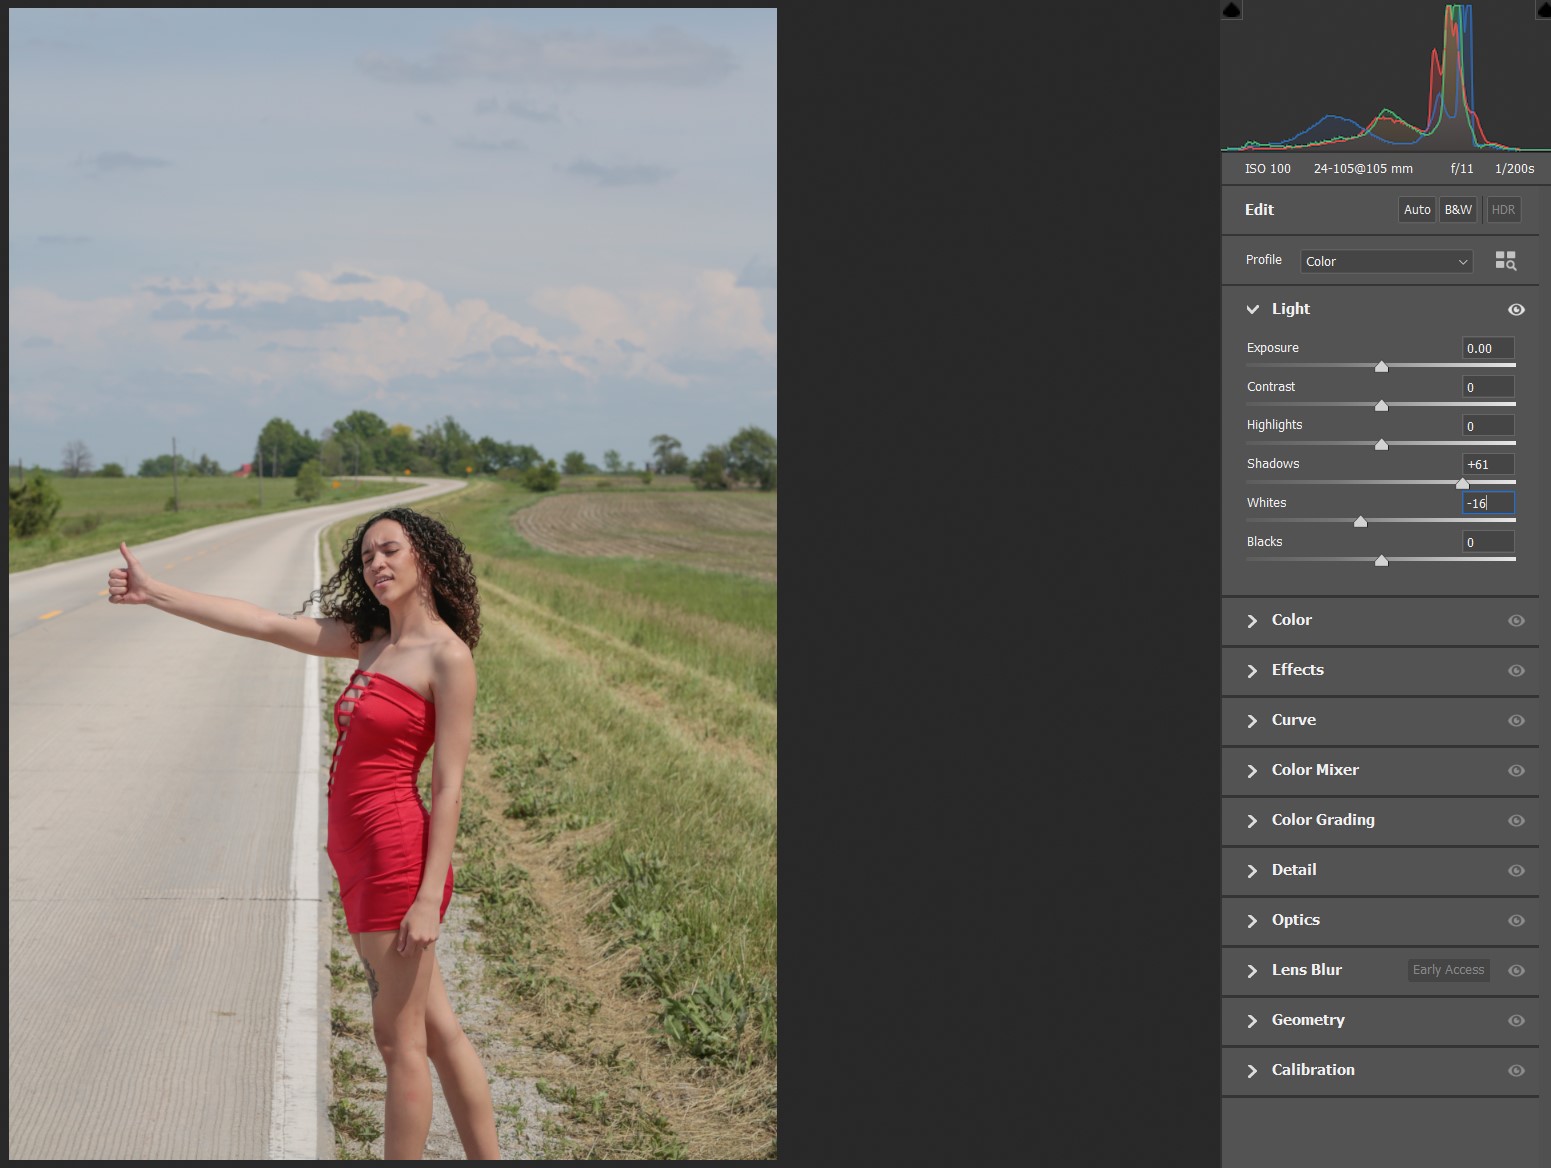
Soleece after Light changes. Click the image to see a larger version.
In the Light section I grabbed the Shadows slider with my mouse and dragged it to the right to lighten the shadows on the side of her face. Then I grabbed the White slider and dragged it to the left to darken the overly white clouds a bit.

Soleece, after Color changes. Click the image to see a larger version.
Next I chose the Color section and grabbed the Vibrance slider and dragged it to the right to boost the colors in the image. If this was a landscape photo with no people in it, I would drag the Vibrance slider farther to the right to boost the colors even more and I would be done optimizing the image. But if I boosted the Vibrance enough to make the greens and blues look natural, it would over-saturate Soleece’s skin. I don’t want to do that. So I boost the overall color just enough so her skin looks natural and I will fix the other colors individually using the Color Mixer.
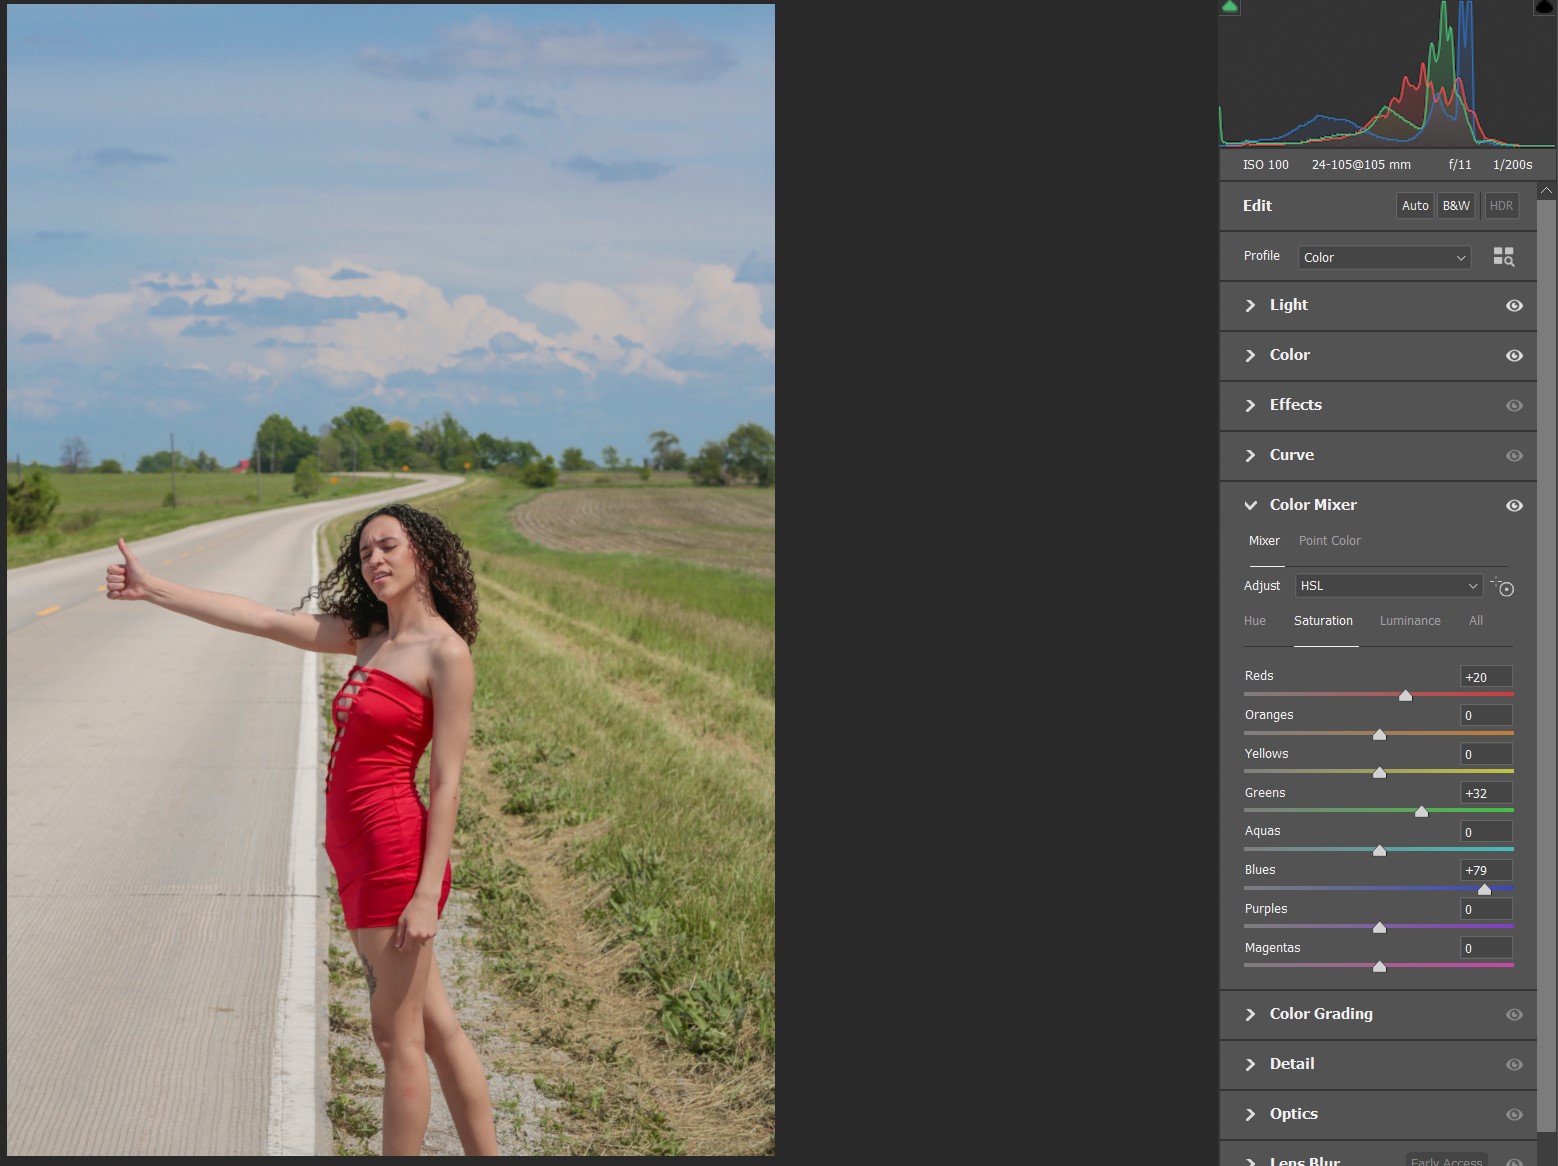
Soleece, Color Mixer, after Saturation changes. Click the image to see a larger version.
I opened the Color Mixer section and under the word “Adjust”, I chose Saturation. (If you don’t see Saturation, make sure the Adjust drop down menu is set to HSL which stands for Hue, Saturation, and Luminance.) By dragging the sliders to the right, I increased the Red saturation for her dress, the Green saturation for the grass, and the Blue saturation for the sky. We are almost there.
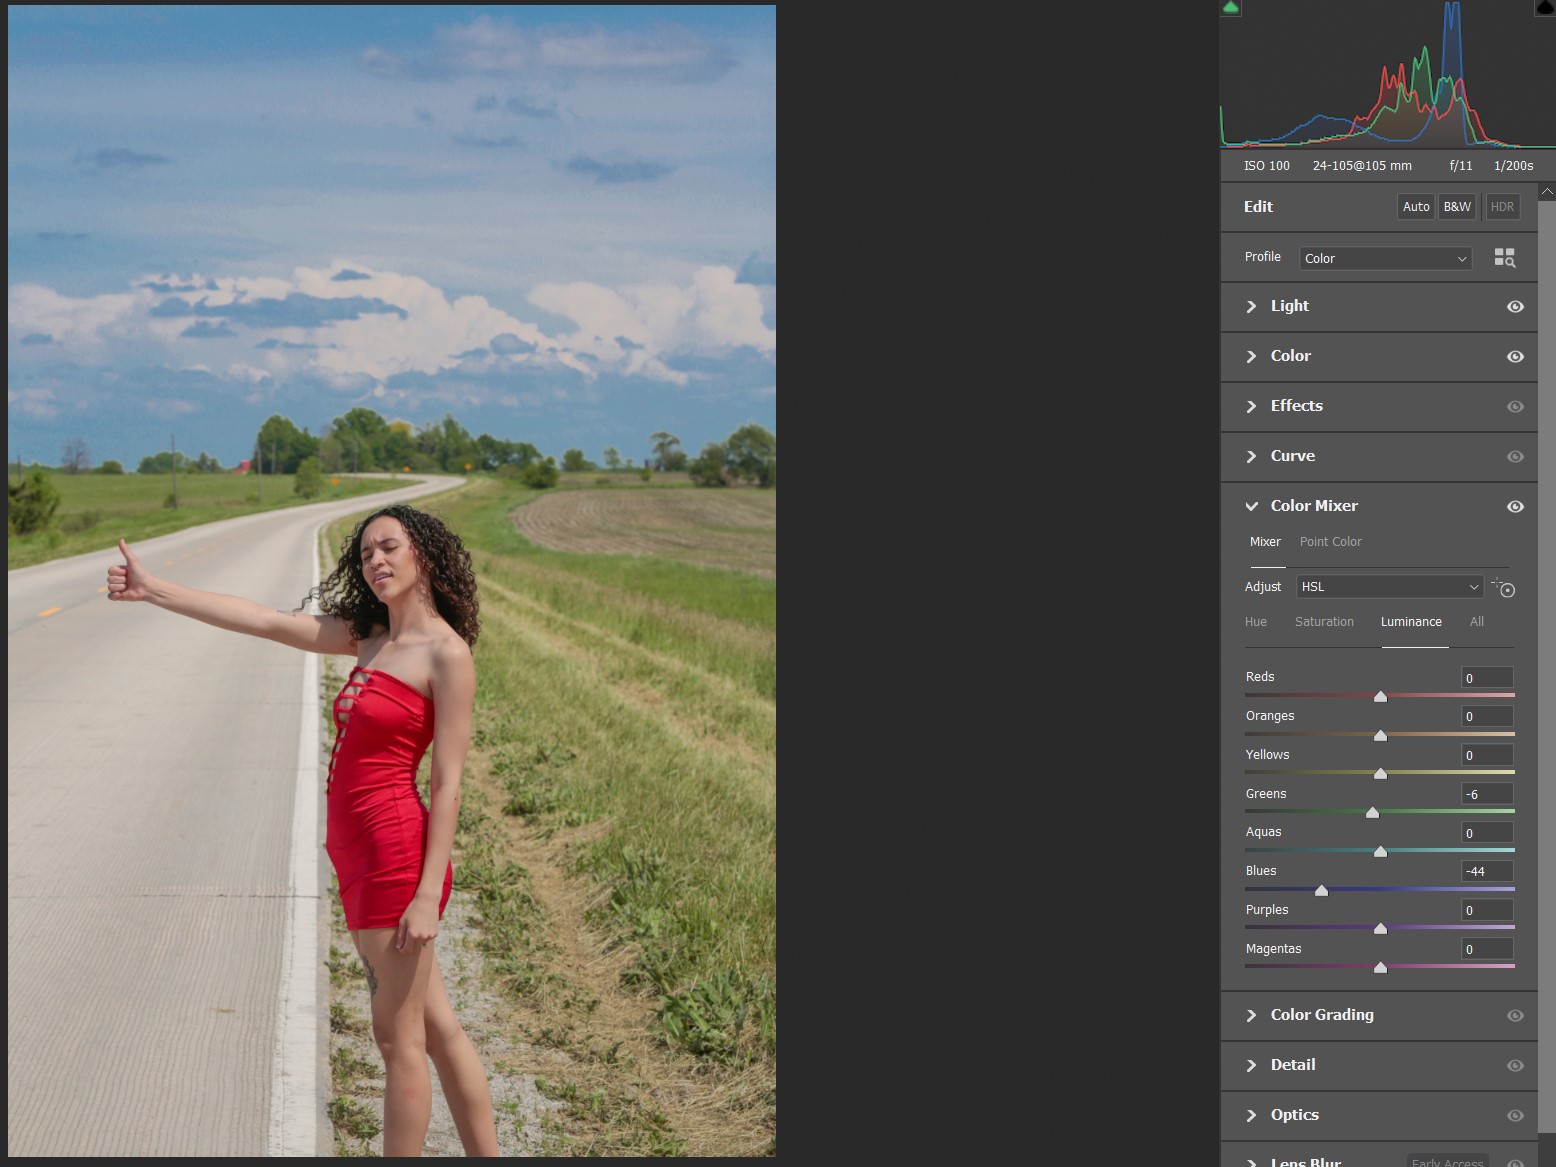
Soleece, Color Mixer, after Luminance changes. Click the image to see a larger version.
In the Color Mixer section under Adjust, I chose Luminance. I want to darken the green grass a bit and darken the blue sky quite a bit. I grabbed the Green slider and dragged it to the left just a bit and I grabbed the Blue slider and moved it quite a bit to the left.
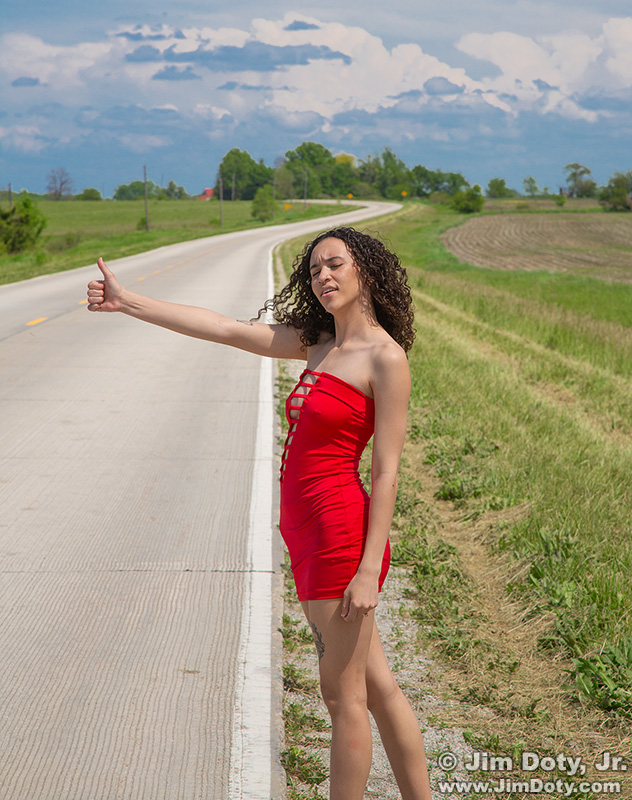
Soleece, final cropped image.
My image now looks like I want it to look. I cropped off some of the top of the image to have less sky. That gave me a composition that was more pleasing to my eyes. The whole process of optimizing this image in ACR took less than two minutes. Most landscape photos with no people in them take a minute or less to optimize.
Optimizing an image with ACR is really simple. Open the various sections and drag the sliders to the right or left until the image looks like you want it to look. You will catch on very quickly to what the different sliders do. You will use some sections and sliders a lot, and some not nearly so much or maybe not at all. ACR comes with Adobe Photoshop, Adobe Lightroom, and Adobe Photoshop Elements (the inexpensive version of Photoshop).
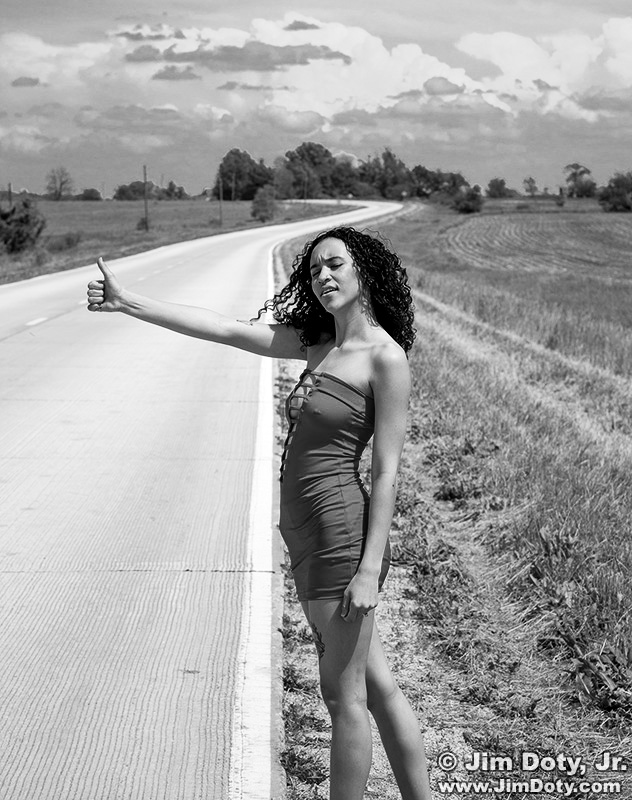
Soleece, B&W image created with ACR using the Saturation and Contrast sliders.
What if you don’t want visual reality? They are your images, you can do anything you want to them. Drag the Saturation slider (under Color) to the left to get less color, or all the way to the left for a fast B&W image. (FYI: My preferred way of creating B&W images is to use a Black and White adjustment layer in Photoshop. It has a lot more options than creating a B&W image using ACR, and you have more control over your final image.) Under Light, play with the Contrast and other sliders to make an ultra-contrasty image. Drag any of the Color sliders or Color Mixer sliders way over to the right for DayGlo colors. Do whatever you want. It’s your image. The Photoshop police won’t come and take you away.
But when you want visual reality and your camera does not capture what your eyes see, ACR will give you want you want.
Link
“How To” Series: Adventures with Adobe Bridge