
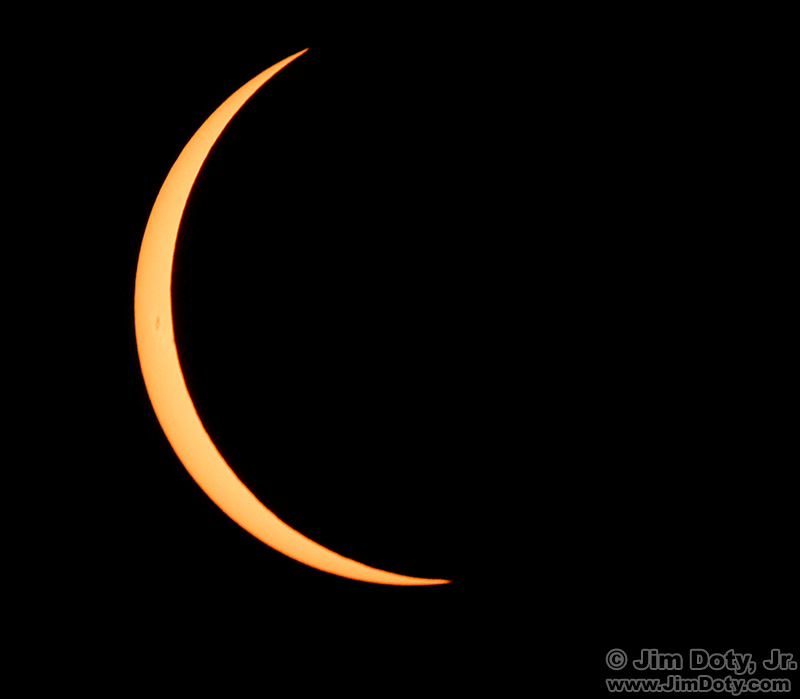
Partial phase of the eclipse.
This is updated from the February 22, 2024 article. If you have your solar filter ready to go, this is what you need to do to photograph the eclipse. If you don’t have a solar filter, you might still be able to get one. Check out the White Light solar filters (my first choice) from Thousand Oaks Optical or the Lee high density solar filters.
This is your guide to photographing the Second “Great American Eclipse”, April 8, 2024. The path of totality will cross the entire country from Oregon to South Carolina. This handy guide will help you photograph the eclipse. Planning ahead is key.
Originally posted Jun 26, 2017. Revised and updated February 22, 2024. Updated and re-posted March 30, 2024.
One of the best all around sites with general eclipse information and guides you can buy is GreatAmericanEclipse.com. This is the place to start for general information.
Viewing the Eclipse Safely
This is the most important paragraph on this page. Be careful! You can go blind as a result of looking at the sun during an eclipse. Unlike a normal day when it hurts to look at the sun, during the later stages of an eclipse the visible light from the sun will be dimmed so much that with your unprotected eyes you will be able to look at the sun with no pain. But invisible rays will still be ruining your eyes. Blindness won’t happen immediately. A few minutes to a few hours after looking at the sun your eyes will start to hurt. In about 24 hours you go totally blind. SO DO NOT LOOK AT THE SUN WITH YOUR UNPROTECTED EYES UNTIL THE SUN IS TOTALLY ECLIPSED. It is not even safe to look at the sun with the unprotected eyes during the Diamond Ring effect and Bailey’s Beads just before totality. All of this is especially true when using binoculars and looking through a telephoto lenses on a camera.
You will need special solar eclipse glasses and or binoculars to safely view the eclipse before and after totality. Buy them now. There is a huge rush on orders and dealers are expected to run out of stock before the eclipse.
How to Photograph the Eclipse
If you want to photograph the stages of the eclipse before and after totality, you will need a solar filter for your camera lens. One of the best sources for “White Light” solar filters is Thousand Oaks Optical. They range in price from $49 to $79 depending on the size filter you need to fit to the front of your lens. They also have solar filters for telescopes.
Use a long lens. The longer the focal length of your lens, the bigger the sun will look. I used a 100-400mm lens.
One very important focus tip for photography. Focus on something at infinity other than the sun. Then turn autofocus OFF and leave it off for the rest of the eclipse.
Put a solar filter on the very front of your lens. (Do NOT use drop in filters that slide in the middle or back of the lens.) Do not look through the viewfinder of the camera at the sun until the solar filter is in place on the front of your lens. After it is in place, put your camera in “live view” mode and tweak your focus on the sun using a magnified live view image on the back of your camera. Read: How To Get Critical Focus in “Live View” Mode with a Magnified Image.
Take lots of pictures and bracket your exposures by using different shutter speeds. During totality you can take off the filter to photograph the sun’s corona.
Here are the camera settings that worked best for me. I used ISO 800 and an aperture of f/11 for all of my eclipse photos. The only thing I changed was the shutter speed setting.
For the partial phases of the eclipse with a White Light solar filter from Thousand Oaks Optical on the lens, my shutter speeds were bracketed around 1/400 second (which means I also used 1/200, 1/100, 1/800, and 1/1600. But my 1/400 second shutter speed images were the best. YOUR MILEAGE MAY VARY, so bracket.
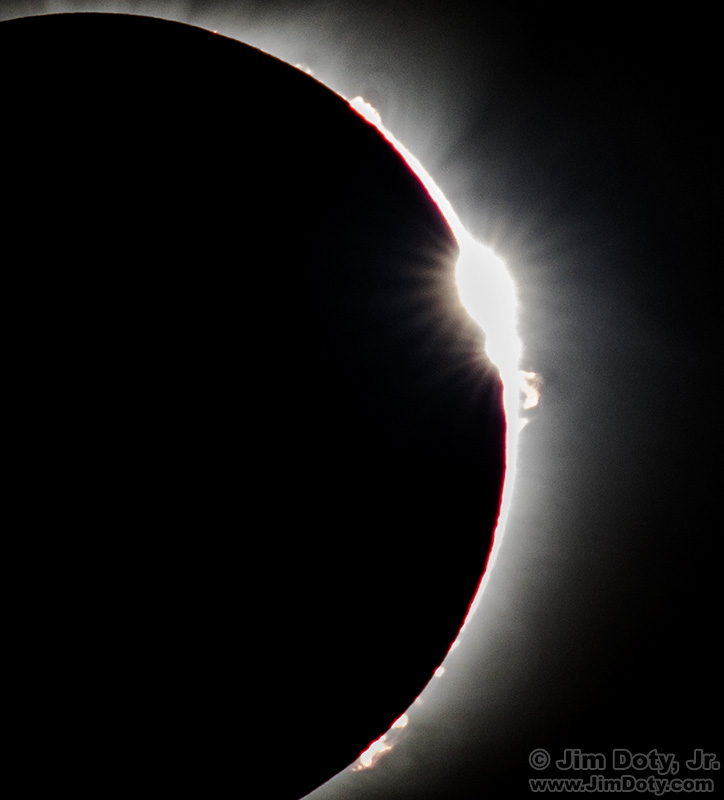
Diamond Ring and Solar Flares.
As the Diamond Ring effect began at the beginning of totality, I took off the solar filter. My best diamond ring photos had shutter speeds around 1/400 second.

The Sun’s corona during eclipse totality, August 21, 2017.
After the Diamond Ring effect ended, I wanted to capture the corona. I dropped my shutter speeds down to 1/50 second.
At the end of totality, the Diamond Ring affect appeared again. I took a few quick photos around 1/800 second. Don’t wait too long to put your solar filter back on your lens!

Sunspots at the end of the solar eclipse, August 21, 2017.
Then I put the solar filter back on again, and went back to bracketing around 1/400 second.
WARNING: If you do not have a true solar filter, you should only photograph totality and the Diamond Ring effect at end. Do not look through your camera during the partial phases if you don’t have a solar filter on the front of your lens. Do not point your camera at the sun during the partial phases without a solar filter. You can ruin your camera and lens.
There are articles all over the internet on how to photograph an eclipse of the sun. Start this article at Adorama. Another article to read is How to Photograph A Solar Eclipse by Fred Espenak.
If You Don’t Have A Solar Filter
You can still photograph totality.
Focus on something at infinity other than the sun. Then turn autofocus OFF and leave it off. Put your camera in “Live View” mode. Wait for the Diamond Ring effect at the beginning of totality. As soon as the Diamond ring is over, point your lens at the sun and focus in live view mode. If you can, magnify the image of the sun. Read: How To Get Critical Focus in “Live View” Mode with a Magnified Image. Take pictures using the recommended totality camera settings earlier in the article. Be sure to bracket. As soon as you see the Diamond Ring at the end of totality, look away, grab a couple of photos without looking and quickly point your camera lens away from the sun.
Practice Before the Eclipse!
Don’t wait for the eclipse to take pictures of the sun with your solar filter. Practice taking photos of the sun before eclipse day. The more you do, the more confident you will feel when the big day arrives.
Not Traveling to the Totality Path?
You can still have fun photographing the partial phases of the eclipse using a solar filter.
Links
Thousand Oaks Optical – “White Light” solar filters for camera lenses and telescopes
Lee high density solar filters
How to Photograph the Total Solar Eclipse – article at Adorama
How to Photograph A Solar Eclipse by Fred Espenak
The Great American Eclipse Series
The Great American Eclipse Series – All of my articles written for the 2017 total solar eclipse. All of the safety and “how to” photography information applies to the April 8, 2024 eclipse except for the path of the eclipse.