When you create a digital image with your camera, your camera adds some digital information to the image file. This digital information is called “metadata” and it can be quite useful.
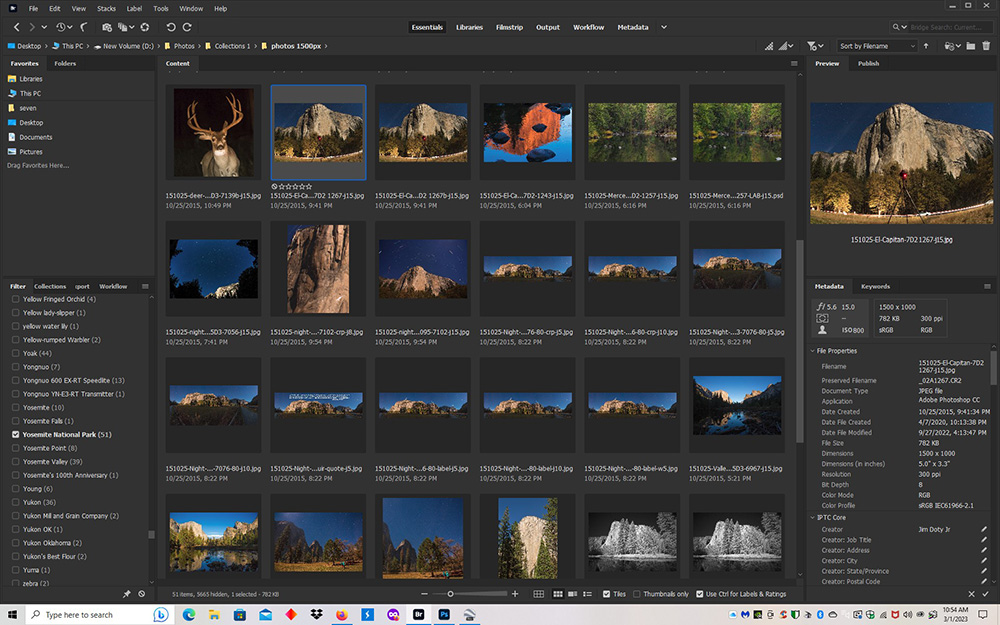
This is a screen capture of Adobe Bridge software. The images you see were all taken the same evening in Yosemite National Park. This is part of a folder of my most important images. In the column on the left I chose the keyword “Yosemite National Park” (a keyword can be a phrase) so I would just see Yosemite images, and then I scrolled down to this date. More about keywords later.
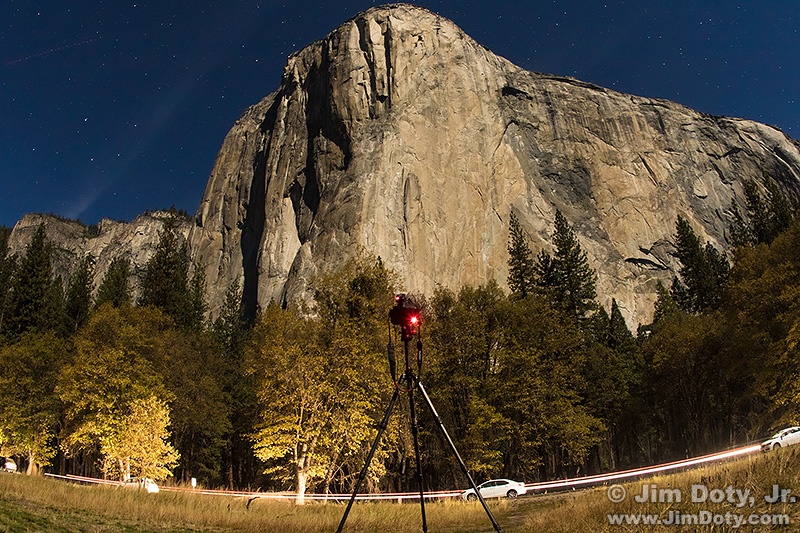
I highlighted the second image in the top row, which is the image at the top of this article. I used one camera to take a picture of my other camera while it was taking a time exposure of climbers moving up the face of El Capitan (see the photos at the end of this article). When you select an image in Adobe Bridge (which is a free download) you see a larger thumbnail at the upper right and in the column on the right side you see the metadata that is included with this image file. I will show you a bigger version of this column next.
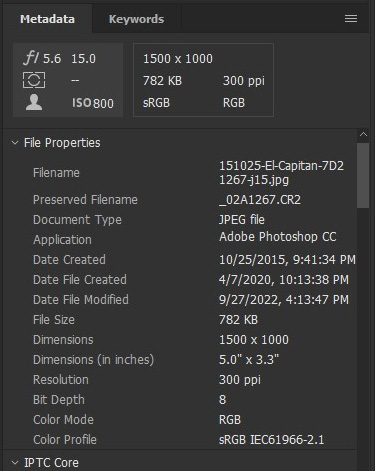
This is the top of the Metadata column on the right side of Adobe Bridge. At the upper left is the basic exposure information at the time you clicked the camera shutter. The lens aperture was f/5.6, the shutter speed was 15 seconds, and the ISO was 800. This photo has been resized from the original and that size info is at the upper right.
The “Preserved Filename” is the name the camera gave the original RAW file when the image was created. The “Filename” above the Preserved Filename is the new name that I gave to this version of the file. I has been converted to a JPEG image. As you can see, I kept the four digit ending (1267) of the original file name and added the date (151025, YYMMDD), the subject (El Capitan) and the camera (7D2) to the front of file name.
The “Date Created” is the date and time of the original image as determined by the camera.
“Dimensions” is the re-sized version of the image, not the size of the original file.
“Color Profile” is the profile for this resized image, sRGB. The color profile of the original RAW file was Adobe RGB (1998).
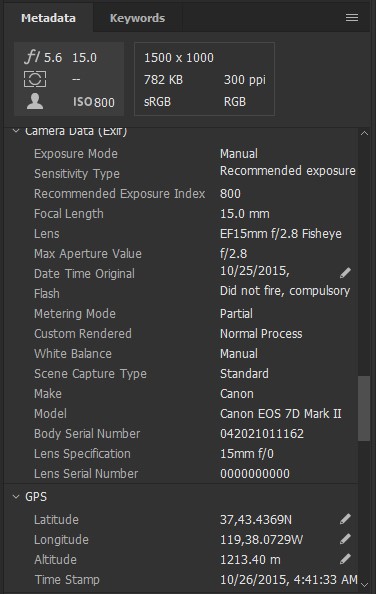
When you scroll down the left column you see more metadata attached to them image file. All of this information was created at the click of the shutter. The lens, the focal length, and the camera are usually part of the metadata most cameras provide. Some cameras are equipped to add GPS information to the image when it is created. The Canon 7D Mark II is one of them. Most smart phones add GPS information if you turn that feature on. GPS coordinates are handy for figuring out where a photo was taken, it you aren’t sure. See the GPS link below for more information. The GPS “Time Stamp” is from the satellite in UTC (Coordinated Universal Time), not the time zone the camera was in.
One note of caution. You may want to remove the GPS information from some of your photos before you post them online. Facebook hides the metadata of the photos you post, but many photo sharing sites do not. See the second article linked below.
You can use software like Adobe Bridge to add your own metadata to an image.
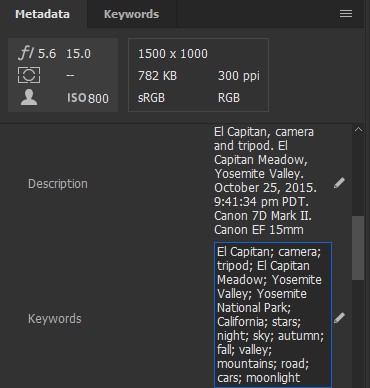
I add a “Description” to my images. It can be short or long. Like “Bob”, or “Bob at Bear Lake”, or “Bob at Bear Lake, Rocky Mountain National Park”. Whenever I send photos to the local paper they like a detailed description. The same is true for variety of publications. You can add the same description to a batch of photos at one time. Just select all the images you want, type in the Description box, and the description gets added to all of the selected images at once. Recently I selected a whole folder of images and typed “Canada Geese, Big G Lake” in the Description box and it was added to all the images.
“Keywords” help you quickly search for photos. I add keywords to my photos right after I re-name them and add descriptions. You can add a keyword to a batch of photos all at once. Once the photos have keywords added to the metadata, you can search for those photos by using software (like Adobe Bridge) that can search for photos with one or more keywords that you choose.
If I search for “elk”, the software will look through my photos and find all my elk photos, no matter what state or province they were taken in. If I search for the keyword “Yosemite National Park”, the software will find all the Yosemite photos. You can combine multiple keywords in a search. If I search for photos with both keywords, elk & Yosemite, the software will just find elk photos taken in Yosemite. If I want to find all my photos of Fred Smith taken in Texas, the software will search for photos that have all three keywords: Fred & Smith & Texas. If I leave out the “Smith” the software will find all of the Fred photos taken in Texas, no matter their last name.
I have over 5,000 photos in my most important photos folder. Once I choose the keyword or keywords I want to search for, the search takes less than a second.
You can also use Adobe Bridge to rate images with 1 to 5 stars. I usually go through and pick my favorites and give them three stars. I see no need to rate one and two star images.
Adobe Bridge can easily search through thousands of images in one folder or a nested group of folders. If you want software that can search through hundreds of thousands of images Adobe Bridge is not up to the task. You will need to pay for something like Adobe Lightroom.
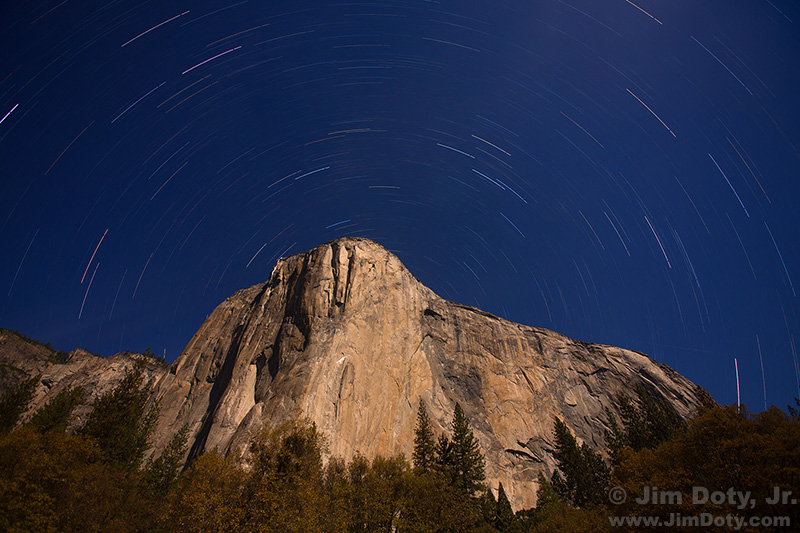
This is the image I was creating with the tripod mounted camera. Several images were combined to create the final image.
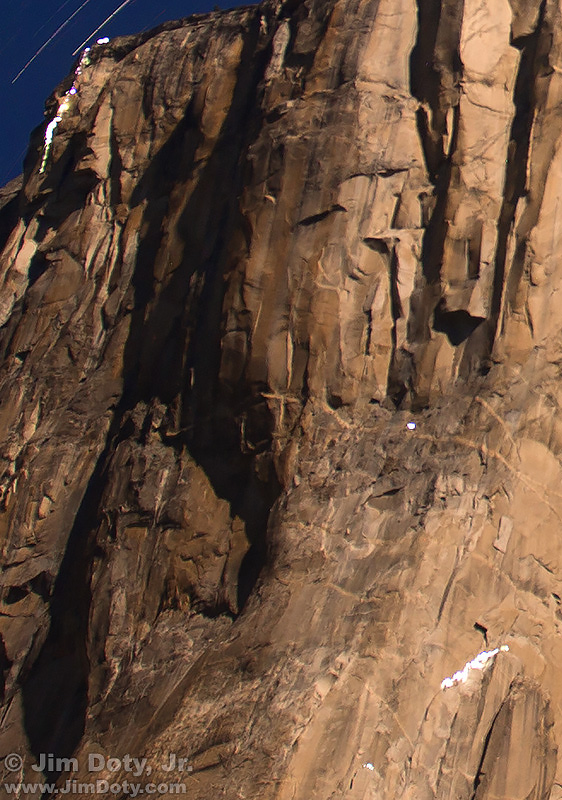
You can see the lights from the climber’s headlamps as they ascend El Capitan.
Link
“How To” Series: Using GPS in Photography
Geotagged Photos: Posting Photos Online Can Put Your Family at Risk