
Really Right Stuff makes an excellent, simple to use panorama set up that won’t take up a lot of room in your camera bag. After using bigger, more awkward panorama gear, switching to Really Right Stuff’s set up was like being in panorama heaven. It is compatible with the Arca-Swiss-System.
Finding an Arca-Swiss Mount
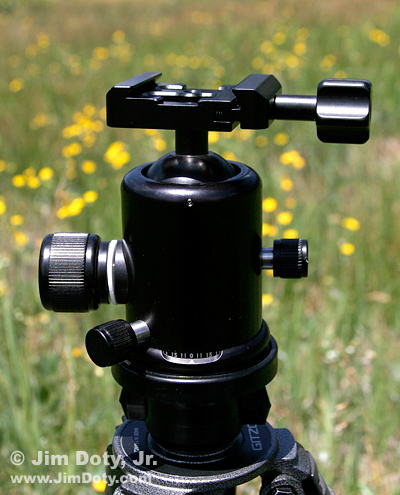
You will need an Arca-Swiss compatible tripod head or Arca-Swiss adapter with Arca-Swiss jaws (clamp). An example is this ball head from Kirk enterprises.
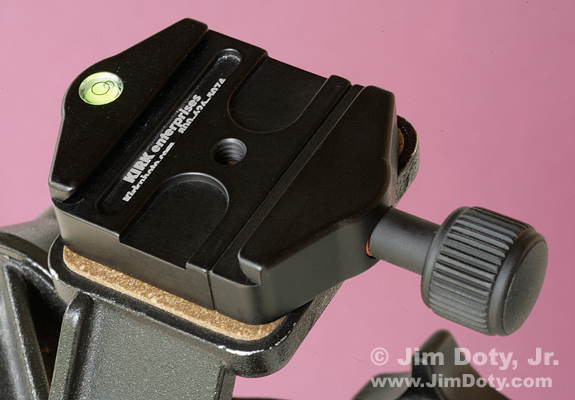
You can buy an adapter that has the Arca-Swiss clamp (jaws) like this one from Kirk enterprises and screw it on to your current tripod head.
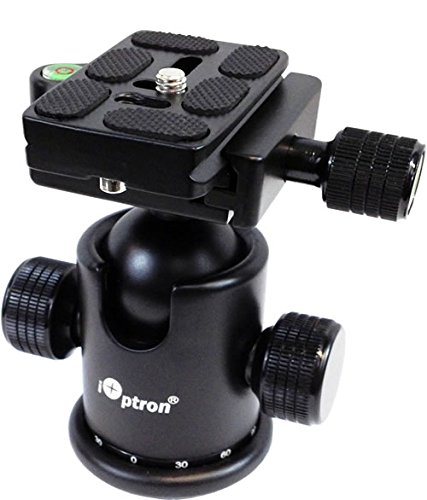
If you are looking for an inexpensive way to get in to the Arca-Swiss system, you can buy this iOptron ball head for $58. It comes with a camera plate. You can find it in the Astrophotography Gear section of my Amazon powered photography store.
Really Right Stuff Pano Set Up
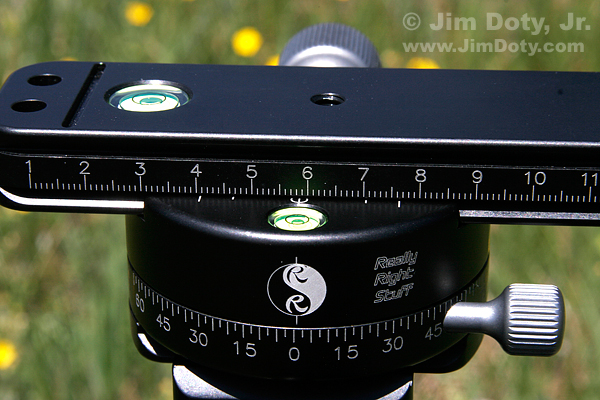
There are two pieces to the Really Right Stuff pano set up, a rotating “panning clamp”, marked in degrees and a “nodal slide” marked in millimeters. More about that later. The large silver knob on the back of the panning clamp holds the nodal slide in place. The small silver knob at lower right loosens to allow the panning clamp to rotate.
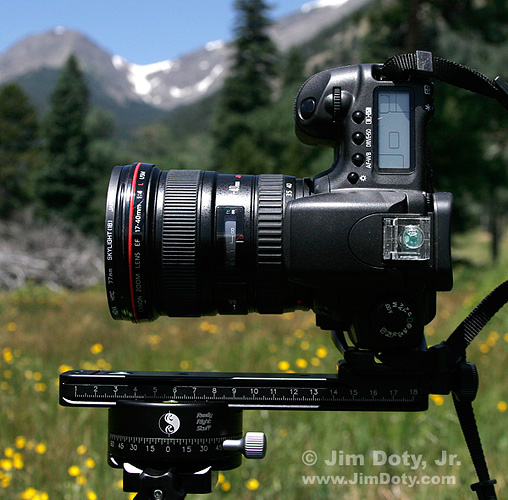
Here’s the system in use. The PCL-1 Panning Clamp drops in the jaws of your Arca-Swiss style tripod head or Arca-Swiss adapter. The MPR-CL II Nodal Slide slides in to the jaws of the panning clamp and tightens in place with the large silver knob on the panning clamp. Your camera mounts in the Arca-Swiss jaws at the end of the nodal slide. You can use a basic camera plate to mount your camera horizontally on the nodal slide, but I highly recommend getting an Arca-Swiss style L-bracket (L-plate) for your camera so you can mount the camera vertically to give more height to your panoramic images.
By loosening the small silver knob on the panning clamp, the camera and nodal slide rotate so you can take a series of overlapping images. You can stitch these images together in the computer software of your choice. I use Photoshop, but I also like The Panorama Factory from Smoky City Design (link below).
To avoid parallax, the camera and lens need to rotate over the nodal point of the lens (some people call it the “no parallax point”). Once you figure out where that is for the lens you are using, make note of where that is on the millimeter scale of the nodal slide. For this Canon EF 17-40mm f/4 lens it is 58.5 mm. For the Canon EF 24-105mm f/4 lens the nodal point is also at 58.5mm.

Finding the Nodal Point of Your Lens
How do you find the nodal point? Mount the camera vertically or horizontally in the clamp on the end of the nodal slide. Place the whole rig close to a vertical post (2 or 3 feet away from the lens) with another vertical post or line (like the side of a building) that is about 50 feet away. Line the rig up so both vertical lines, near and far, are lined up with each other. Loosen the small silver knob (not the big one unless you like the sound of bent metal and broken glass) and pan with the rig while looking at your vertical lines. If they move in relation to each other (and they almost certainly will), support the camera with one hand, gently loosen the big silver knob, slide the nodal slide a bit (either direction), then retighten the large silver knob, and try panning again. Repeat.
It will take several tries to find the nodal point unless you just happen to luck out. After a process of trial and error, you will find the point where the vertical lines don’t move in relation to each other. It helps if you move back and forth in large increments at first and then narrow things down as you get closer. Note: Both vertical lines will move as you pan with the rig, but you don’t want them to move in relation to each other. They should move together without moving apart. Once you find the nodal point, make note of the scale on the nodal slide so you can put the slide in the same place the next time you use that lens at that focal length. Keep in mind that lens designs vary so the nodal point for a 24mm prime (single focal length) lens won’t be the same as the 24mm focal length on a 24-105mm zoom lens, or even another 24mm prime lens with a different design.
I highly recommend Really Right Stuff and Kirk Enterprises for their Arca-Swiss equipment. They both make quality ball heads. I use the Kirk enterprises BH-3 ball head and the Really Right Stuff BH-55 ball head. See the tripod head article below.
Article Link
Tripod Head Recommendations: Some of the Best of the Best
Panorama Software Link
The Panorama Factory from Smoky City Design
Equipment Links
Astrophotography Gear section (with the iOptron ball head) of my photography store
Really Right Stuff
Really Right Stuff L-plates for your brand and model of camera
Kirk Enterprises Quick Release clamp to convert your tripod head to the Arca-Swiss system
Kirk Enterprises L-brackets for your brand and model of camera
Buyer’s Guide Series Link
This is one in a series of articles that will guide you to the best of all things photographic. The rest of the series is here: Buyer’s Guide: Recommendations For The Best Photography Equipment, Software, Books, Magazines, DVDs, Online Photo Labs and More.