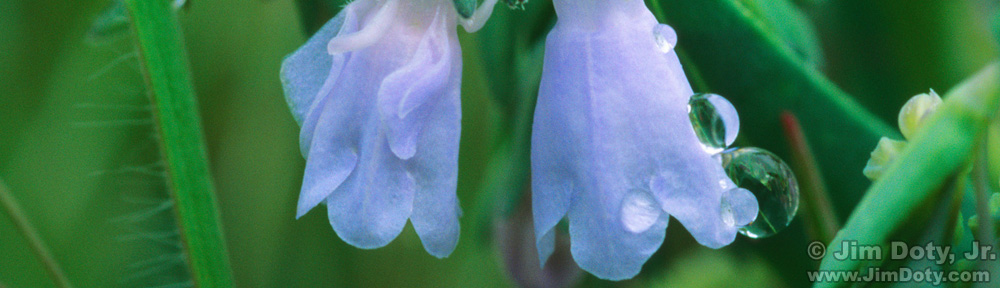

Twilight at Otter Cliff from Thunder Hole. Acadia National Park.
Our eyes have a much wider dynamic range that our digital cameras so we can see scenes with our eyes that our cameras can’t capture with a single click of the shutter. But there is a rather simple solution. Capture a matched set of digital images and process them with Adobe Camera Raw (ACR).
Getting Started with HDR Photography (also linked below) tells you how to capture a matched set of images. If the capture isn’t right in the camera, ACR can’t put together a seamless HDR (high dynamic range) image.
ACR is high quality software for developing your raw files. It comes with Adobe Photoshop Elements, Adobe Photoshop, and Adobe Lightroom. You also get a version of Adobe Bridge. If you have one or more of these three, you have ACR and Adobe Bridge. If you don’t have one of these three versions of Adobe software, you can get Elements for about $100 and you will be all set.
I will take you through a simple processing example, start to finish, so you know how this works.
I was at Thunder Hole in Acadia National Park, shooting south along the shore toward Otter Cliff. My eyes could see the beautiful colors of twilight and the delicate light on the granite cliff right in front of me, but my camera could not, at least not in a single image. If I exposed for the granite in front of me, the sky was washed out. If I exposed for the sky the granite became a dark silhouette. Time for an HDR solution.
I created a matched set of images as described in the article linked above (and in the Links section below). Then I changed the composition a bit and did another set of matched images.
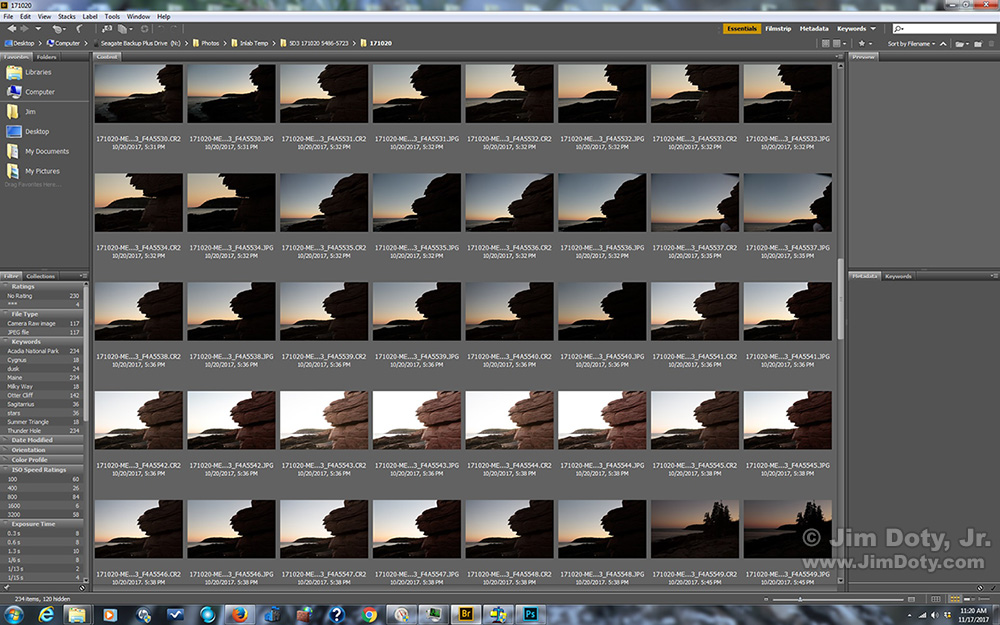
Adobe Bridge, Otter Cliff images. Click for a larger version.
This screen capture in Adobe Bridge shows some of the images.
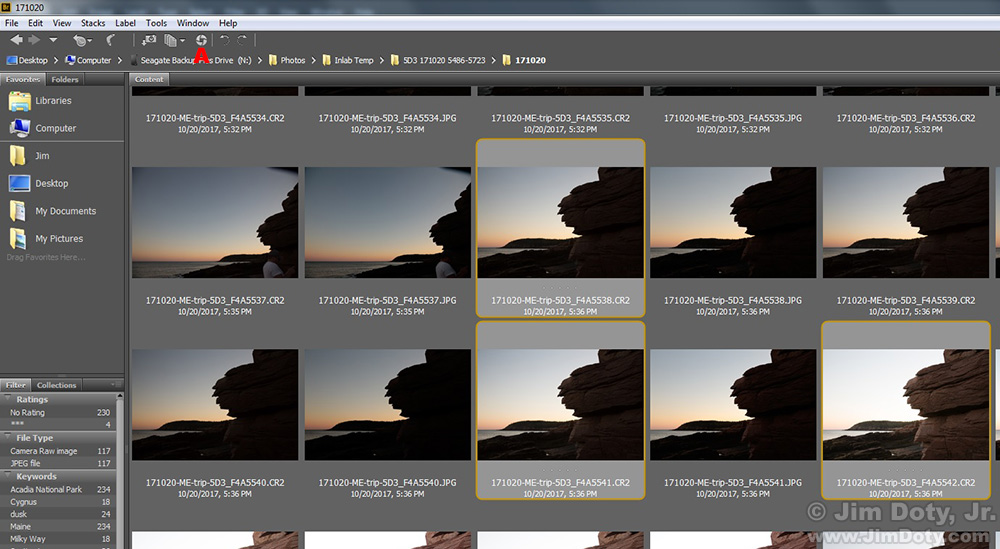
Adobe Bridge, partial screen capture. Click for a larger version.
With the images open in Adobe Bridge, I selected three raw files from one of the sets of matched images. I picked one image with good tonality in the sky, one image with a good exposure for the granite cliff right in front of me, and one image half way in between. (If your scene is really high in contrast you will need more than three images to cover it all.) To open all three images together in ACR, I clicked the small camera iris icon which is immediately above the red letter A in this screen capture.
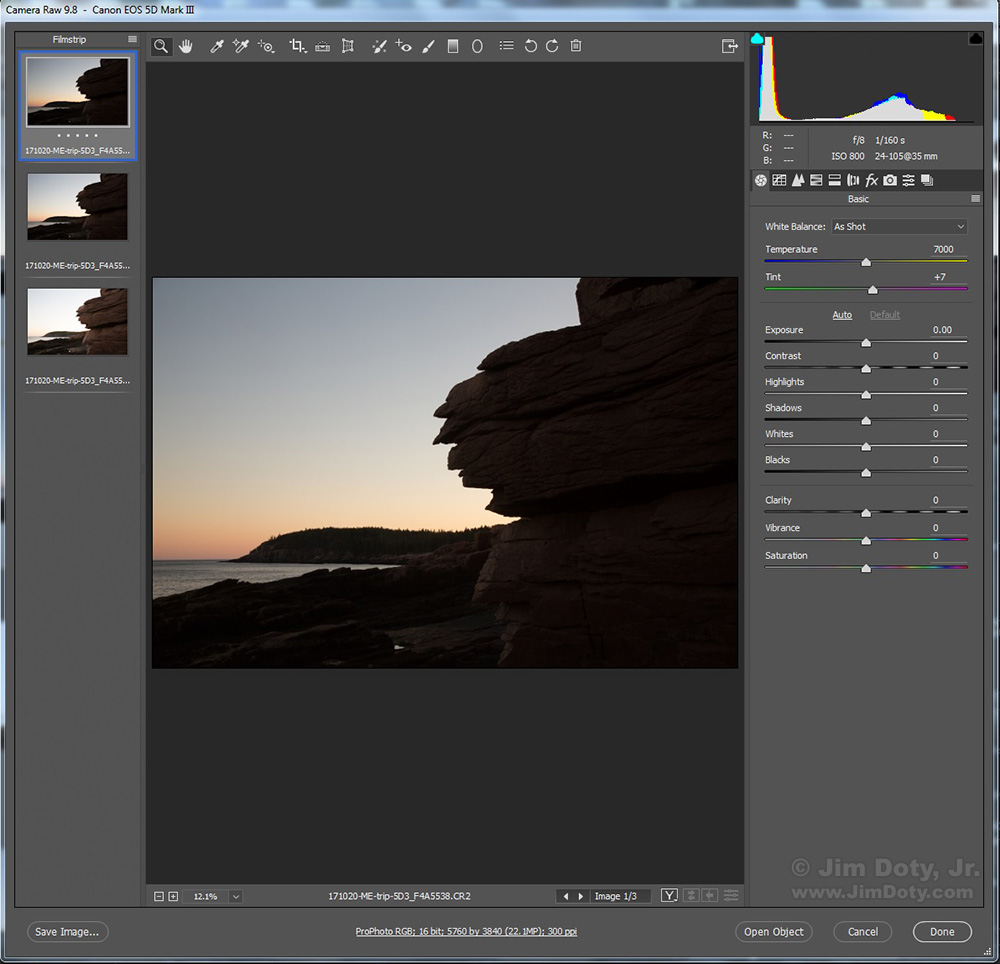
Selected images open in Adobe Camera Raw. Click for a larger version
The selected images will open in ACR.
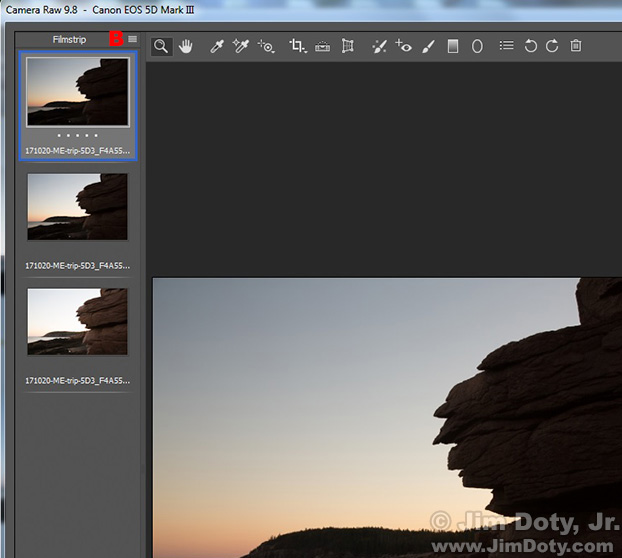
ACR, partial screen capture.
At the upper left corner of ACR, to the right of the word FILMSTRIP there is a set of menu bars which are indicated in this partial screen capture by the red letter B. Click on the menu bars to open a drop down menu.
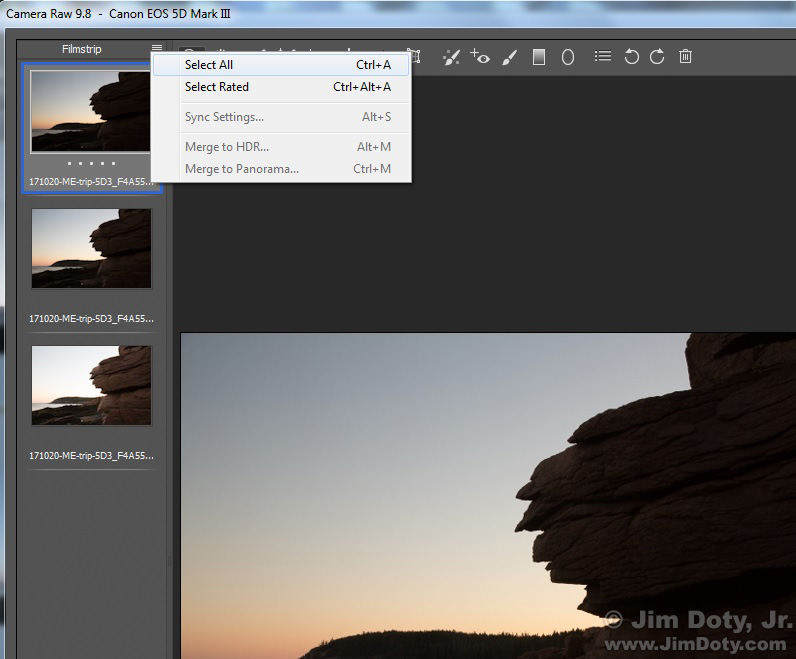
ACR, partial screen capture.
Choose “Select All” to choose all of the images. Then click the menu bars again and choose “Merge to HDR” from the drop down menu.
ACR will then got to work to create a preview of the merged images. Give it some time. This may take a while depending on the number of matched HDR images you selected.
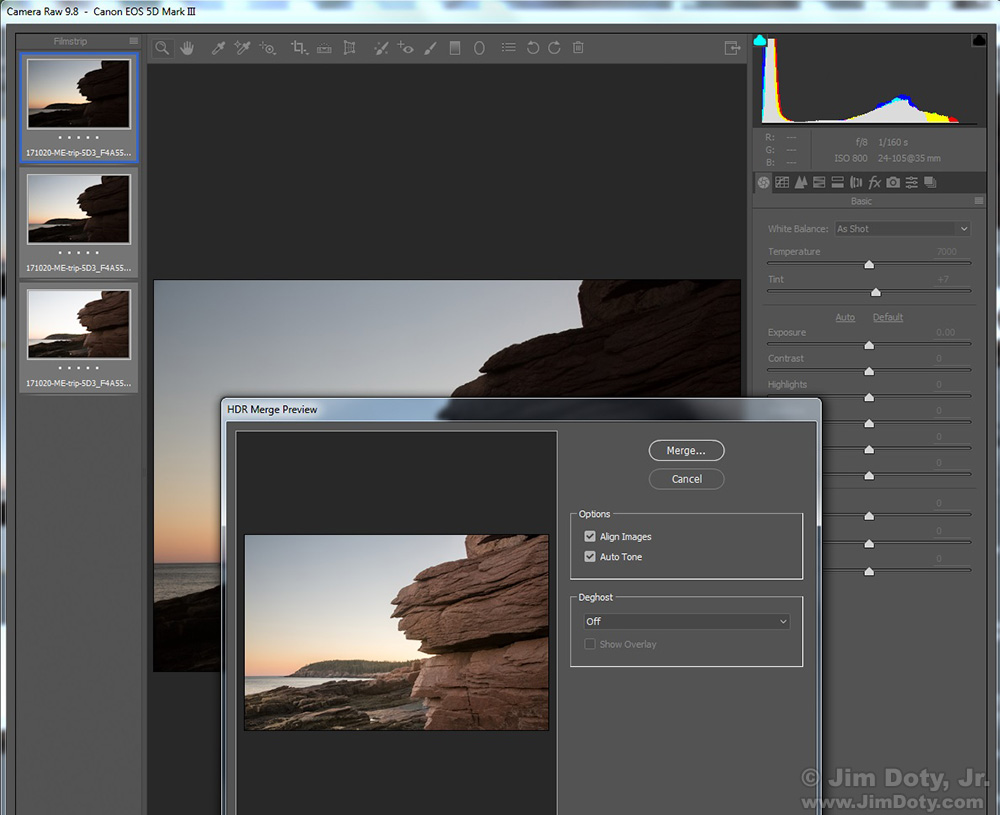
ACR, Merge Preview. click for a larger version.
Eventually you will be presented with this HDR Merge Preview window. I suggest you put a check mark in the Align Images box and the Auto Tone box. If you see some ghosting in the image due to subject movement between the individual frames, choose an option from the Deghost drop down menu. Now you can let ACR do its thing to create a raw file from your selected images.
Now you get to wait while ACR does its thing. It could take several minutes so be patient.
ACR, merged raw file, initial version. Click for a larger version.
When ACR finally gives you your new merged raw file, you probably won’t be pleased with the initial results. It won’t look like what your eyes saw when you were at the scene. There is a reason this photo looks kind of bland which we will get to in a minute. This is a raw file so it has all of the advantages for a raw file. You can tweak it until you get what your eyes saw when you photographed the scene.
This brings us to a side excursion on creating bland raw files in your camera and processing them with ACR.
One of the professional secrets to getting great color is to set your camera to “bland”, which means you want a toned down rendition of color, contrast, saturation, and sharpness. If you are using a Canon camera, I recommend setting your Picture Style to Neutral or Faithful. After a lot of testing I prefer Faithful. I like the colorimetric adjustment. But you should do your own tests and make your own choice.
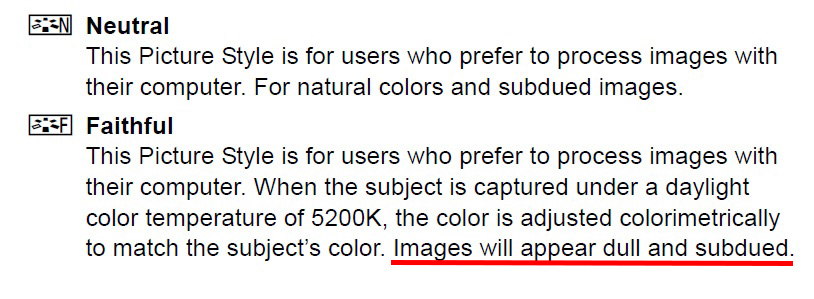
Canon’s Neutral and Faithful picture styles.
These descriptions are right out of the Canon manual for the Neutral and Faithful picture styles (I added the red underline). If you pick Faithful, your images will come out of the camera looking “dull and subdued”. Strange as it may seem, dull and subdued is exactly what you want.
If you are shooting Nikon, go into Picture Control and pick a tone down version. With Sony go to Creative Style. If you have a Pentax Camera go to Custom Image. With an Olympus it is Picture Mode.
No matter what camera you have, the secret is to choose a toned down image. You will fix the color when you open your raw files in ACR.
End of the side excursion. Back to processing your merged raw file in ACR.
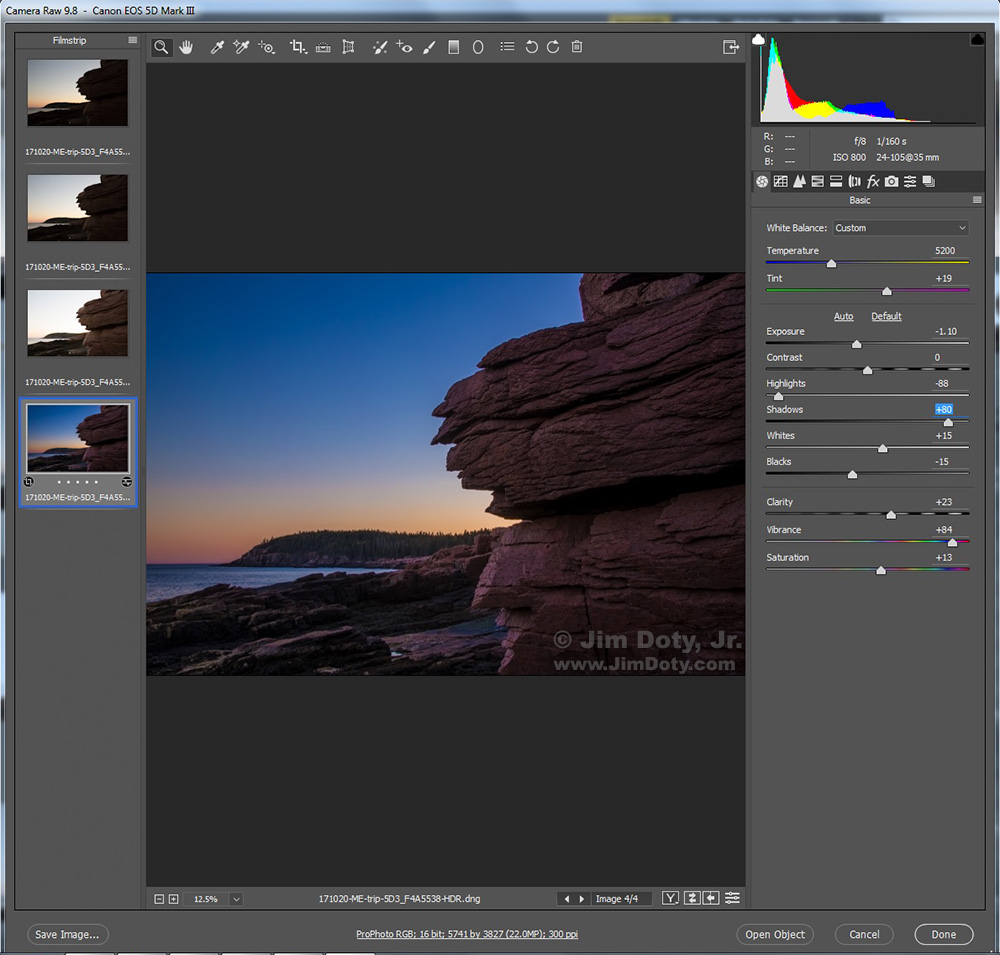
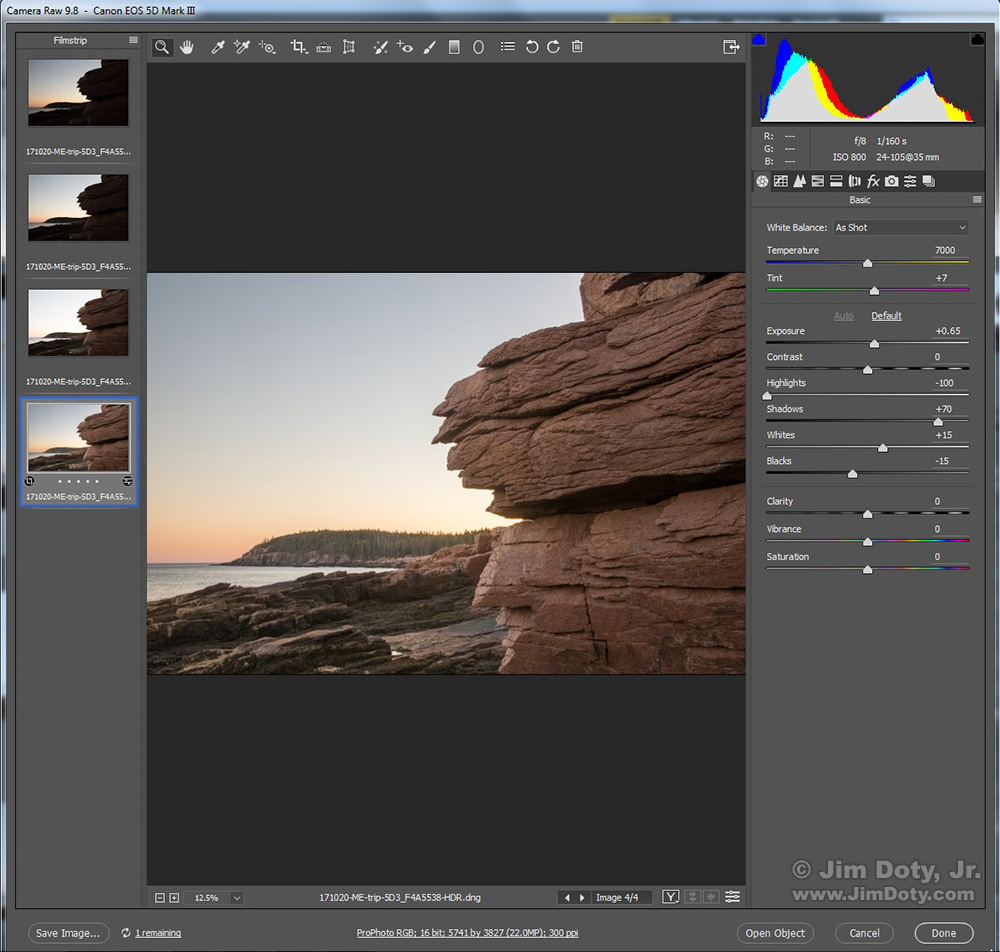
ACR, final version. Click for a larger image.
Starting at the top and working your way down you drag each slider to the right or left until the image looks like you want it to. I wanted an image that looked like what I saw when I was standing there at Thunder Hole. You can see what I did with each of the sliders to get the look I was after. There is a big contrast between my final version immediately above and the version ACR initially gave me (farther up the page).
Twilight at Otter Cliff from Thunder Hole. HDR merge of three images.
If you have ACR, (and you should for the sake of all of your images), it is a great way to create realistic HDR images that give you what your eyes saw when you were at the scene.
Links
Getting Started with HDR Photography
Giving Yourself Options: HDR Photography
The Best Image Editing Software
Buy Adobe Photoshop Elements 2018 at Amazon.