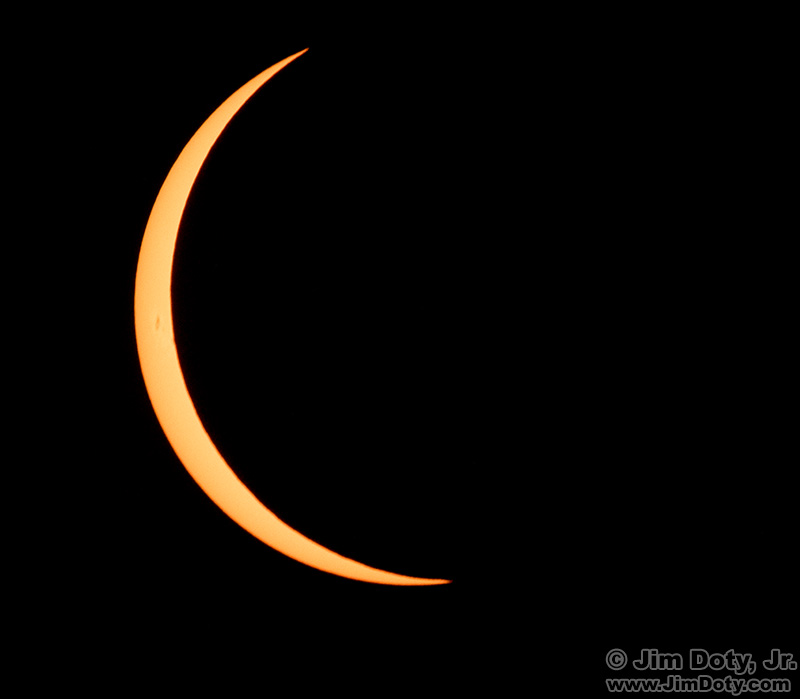
 In this photo taken just a few minutes before totality you can see a sunspot between the edge of the sun and the approaching edge of the moon. This is one of my favorite pre-totality images.
Fortunately for photographers everywhere, photographing the phases of an eclipse of the sun before and after totality is exactly the same as photographing the sun any other day.

A threaded “white light” solar filter from Thousand Oaks Optical on the front of a Canon zoom lens. (This photo was taken on a practice day long before the eclipse.)
The only special preparation was to put a white light solar filter from Thousand Oaks Optical on my camera lens. I used a Canon 100-400mm Mk II lens and a Canon 1.4x Mk III teleconverter on a Canon 7D M II camera body, giving me an effective focal length of 896mm. The teleconverter adds 40% to the the focal length and the field of view crop of the 7D sensor makes it look like you’ve added another 60% to the focal length. Read this article to see how focal lengths impact the image size of the sun..
My standard exposure when shooting through the white light solar filter is f/11 at 1/200 second with an ISO of 800.
With a “white light” solar filter on the lens it is safe to look through the viewfinder of the camera to get the sun in the middle of the frame. White light solar filters eliminate all UV light, all IR light, and all but a very narrow visible band of wavelengths that give you a natural, yellow-amber looking sun. The wavelengths you do see are reduced to 1/1000 of 1% of the normal intensity of the sun.
It is NOT safe to look through the viewfinder of the camera if you are using a high density solar filter. You must keep your camera in Live View mode when you use a high density solar filter. High density filters do not filter out UV and IR light.
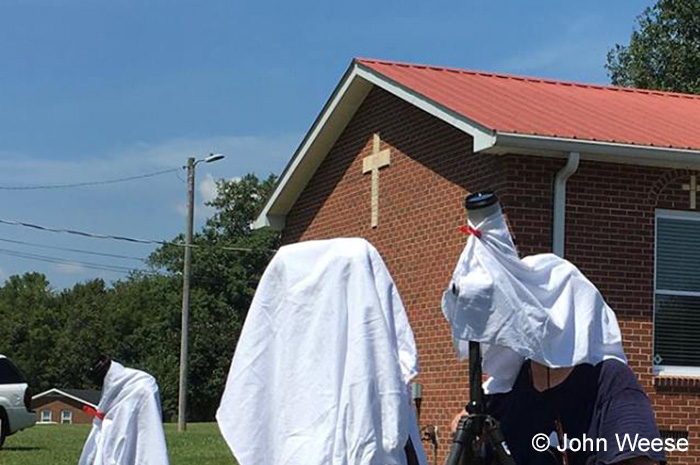 When the lens is pointed at the sun, sunlight is shining right down at your eyes. It is a good idea to wear a broad brimmed hat or use a white cloth to keep the sunlight out of your eyes. I use both. This photo was taken by my friend and fellow photographer John Weese.
Once I had the sun centered in the frame I dropped the center post of the tripod for more stability. From then on I tweaked the location of the sun in the frame from a sitting position. I would start with the sun toward the left side of the frame and take pictures as it moved across the frame to the right. Then I would re-aim the camera to move the sun back to the left and take another series of photos.
The camera at the far left is taking a timed series of photos every 5 minutes to create the image at the top of this article. The totally covered camera in the middle is ready for totality. the white cloth clipped in place keeps each black camera body from getting overheated.
For more information on photographing the sun with a white light solar filter read this article.
The Great American Eclipse Series
The Great American Eclipse Series  – All of my eclipse articles are listed at this link. This is the 39th article in the series.
More Links
How to Photograph the Sun (and an Eclipse) with a “White Light†Solar Filter
Do NOT Look at the Eclipse Through a High Density Solar Eclipse Filter! You Could Go Blind!
Timed Sequence, The Great American Eclipse, August 21, 2017
Photographing the Eclipse: How Big Do You Like Your Sun?
The Field of View Crop in DSLRs
White Light Solar Filters from Thousand Oaks Optical