
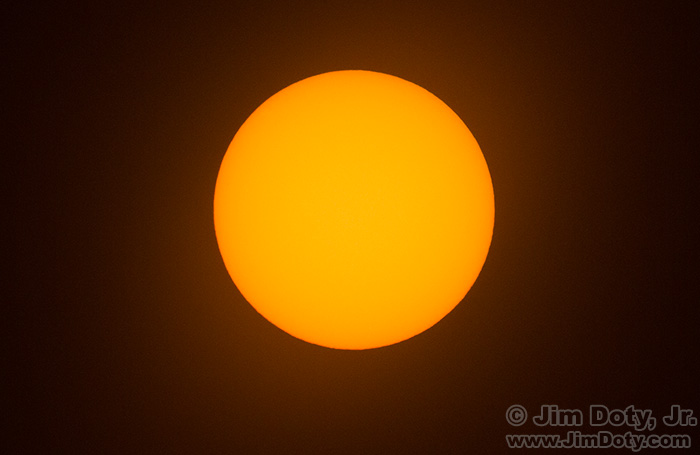
The Sun photographed with a White Light solar filter.
Unlike most other solar filters, a “white light” solar filter from Thousand Oaks Optical is visually safe (which is really important) and gives you a true color, yellow-amber looking sun (saving you processing time). A white light solar filter also makes it simpler and faster to photograph the sun.
Originally posted July 25, 2017. Revised and expanded August 16, 2017.
Why Use a White Light Solar Filter?
“White light” refers to the 580-630nm wavelengths that are allowed to pass through the filter. Total light transmission is 1/1000 of 1%.
This is why a white light solar filter from Thousand Oaks Optical is so important. They make white light solar filters and solar filter materials that are visually safe as well as photographically safe. You can not safely look through solar filters with materials made by other companies. Thousand Oaks Optical’s ISO 12312-2 certified solar filter materials are also used in eclipse glasses that are sold by Celestron and Meade Instruments, two of the leading telescopes and astronomy equipment companies in the United States. They also make the solar filter material for the inexpensive ($25), cardboard mounted solar eclipse filters that I recommend. They make solar filters for NASA, National Geographic, the major news networks, and most of the universities and astronomical observatories in the United States. They are as good as it gets.
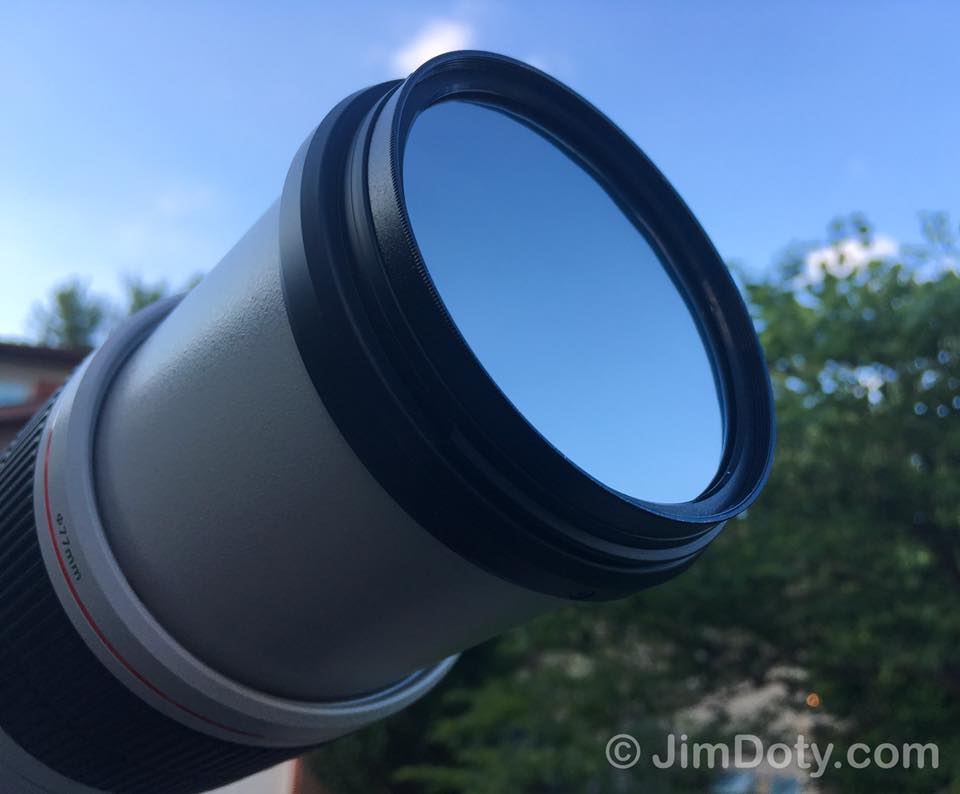
White light solar filter from Thousand Oaks Optical mounted on a 100-400mm zoom lens.
The reason solar filters and materials from Thousand Oaks Optical are visually safe is they filter out the harmful ultraviolet (UV) and infrared (IR) rays from the sun that are so damaging to your eyes. Solar filters from other companies darken the visible rays from the sun for photographic purposes, but let the UV and IR rays through. UV and IR rays during an eclipse can seriously damage your eyesight because you can look longer due to the diminished visible light. To protect your eyes you must use your camera in Live View mode if you use a solar filter from another company. This article will tell you how to use solar filters that are photographically safe but not visually safe. My favorite filter in this category is made by Lee Filters.
Basic Steps – Photographing the Sun with a White Light Solar Filter
First, set your camera to shoot RAW files at the highest resolution. You will get better results when you process your files.

Adobe Bridge Screen Capture
Use a long zoom lens like 70-300mmm, 100-400mm, or 150-600mm. This will make your life much easier. The longer the focal length at the long end of your zoom range the bigger the sun will look in your final image. In this screen capture (top row) you can see how big the sun is in the frame at 400mm. The darker image (top right) is due to clouds crossing in front of the sun. After the first few images, I added a 1.4X teleconverter (end of the second row), giving me an effective focal length of 560mm.
Put your camera on a tripod. Set the ISO to 800, the aperture to f/11, and the shutter speed to 1/100 second.
Zoom the lens to its longest focal length.
Focus the lens on something far away (other than the sun, DO NOT POINT YOUR CAMERA AT THE SUN). This will approximate infinity focus Turn autofocus off and be careful not to touch the focusing ring.
Put your white light solar filter on the lens. Zoom the lens to its shortest focal length (70-100mm with many telephoto zoom lenses). This will make it easier to find the sun. Find the sun by looking through your camera’s viewfinder. Being able to look through the viewfinder really speeds up the process of finding the sun. With solar filters from other companies you have to find the sun with the camera in Live View mode while looking at the LCD on the back of the camera. The sun is shining in your face all the time you are doing this. With a long telephoto lens on the camera this can take a bit of time to get right. If you don’t believe me, try it.
Center the sun in the frame and lock down your tripod head.
Turn on Live View mode. You should be able to see the sun in the LCD on the back of the camera.
Zoom the lens to its longest focal length (300-600mm with many telephoto zoom lenses). You may need to re-center the sun in the LCD.
Magnify the image in Live View mode to 5X or 10X and manually tweak the focus on the sun. If you haven’t done this before read How To Get Critical Focus in “Live View†Mode with a Magnified Image.
While still in Live View mode (which means the camera mirror is still up) turn on the two second self-timer so the camera and lens settle down before the shutter opens. The act of pushing the shutter button will make the camera and lens vibrate on the tripod. You need time for the vibrations to stop before the shutter opens. You might even need to switch to a 10 second self-timer to allow all of the vibrations to die down. Ideally you should use a cable release so you don’t need to touch the camera at all. I would still recommend the two second self-timer, even with a cable release.
Now you can take pictures in live view mode. Try several shutter speeds like 1/50, 1/100, 1/200, 1/400 in full stop increments. You will not be able to judge the proper exposure for the sun by looking at the images on the back of your camera. Try enough shutter speeds so the sun goes from way too bright to way too dark.
The sun will move quickly across the frame so work as quickly as you can while still being careful with your technique. Stop and recenter the sun in the frame as is needed and take more pictures. Turn on magnify in Live View mode periodically to check and manually re-tweak the focus. Do not use autofocus.
That’s the drill.
Post Processing
Thanks to the wavelengths of the white light solar filter, you will need to do very little post processing of your RAW files. Maybe a tweak to the exposure. If you want to darken the area around the sun, drag the Black Slider in Adobe Camera Raw to the right. I did no post processing of the image at the top in Adobe Camera Raw. In Photoshop I prepped this image for the internet the same way I prep all images for the internet: by going from 16 bit to 8 bit, converting the color space from Adobe RGB (1998) to sRGB, and resizing the file.
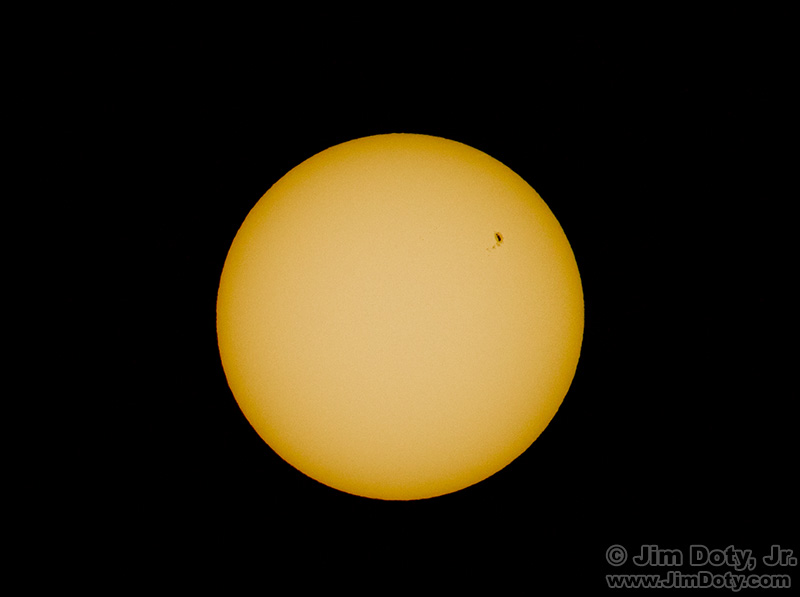
The sun photographed through a Lee 100mm solar filter. July 14, 2017.
The image at the top image isn’t quite as much fun as the photo I created July 14. It was my good fortune to have a major solar storm going on and nice sunspots. Last night there were no major sunspots. One of the fun things about photographing the sun with a solar filter on a long lens is looking for sunspots.
Be sure to read How to Photograph the Total Solar Eclipse by Dennis Mammana at Adorama. Another article to read is How to Photograph A Solar Eclipse by Fred Espenak.
So get out there and have fun! Practice before the eclipse rolls around August 21.
Photo Data for the top image: Canon 5D Mark III. Canon 100-400mm Mark II lens at 400 mm with a Canon 1.4X teleconverter Mark III (effective focal length of 560mm). White light solar filter from Thousand Oaks Optical. f/11, 1/100 second, ISO 800. Image is significantly cropped from the original.
The Great American Eclipse Series
The Great American Eclipse Series  – All of my eclipse articles are listed at this link. Check back for new articles as they appear.
More Links
Do NOT Look at the Eclipse Through a Solar Eclipse Filter! You Could Go Blind!
How To Get Critical Focus in “Live View†Mode with a Magnified Image
Don’t Wait Too Long to Get Your Eclipse Glasses or Binoculars!
Order eclipse glasses, goggles and binoculars at my Amazon powered photography store
Solar Eclipse Filters – Order Today Before It is Too Late
Make or Buy Your Own Inexpensive Solar Filter to Watch and Photograph the Eclipse – It is not too late. Do this today.
White Light solar filter from Thousand Oaks Optical -Â It is no longer possible to get these filters in time for the August 21 eclipse, but you can can order one of these filters to photograph the sun and sun spots when they occur.
How to Photograph the Total Solar Eclipse – by Dennis Mammana at Adorama
How to Photograph A Solar Eclipse by Fred Espenak