If you have never photographed a comet before, this is a great chance to practice. All you need is a camera with long shutter speeds, a reasonably fast wide angle lens, and a tripod. Most any recent model DSLR will do, plus a few high end point-and-shoot (all in one) cameras.
Comet Lovejoy is not as bright as some other comets that have come our way (think Comet Hale-Bopp which was one of the brightest comets), so it is a bit of a challenge, but one most photographers can meet with a little effort. Lovejoy is not as bright as the brightest stars so it won’t jump out at you, but it is one of the brighter comets to appear in recent years. Comet Lovejoy is a great photographic opportunity.
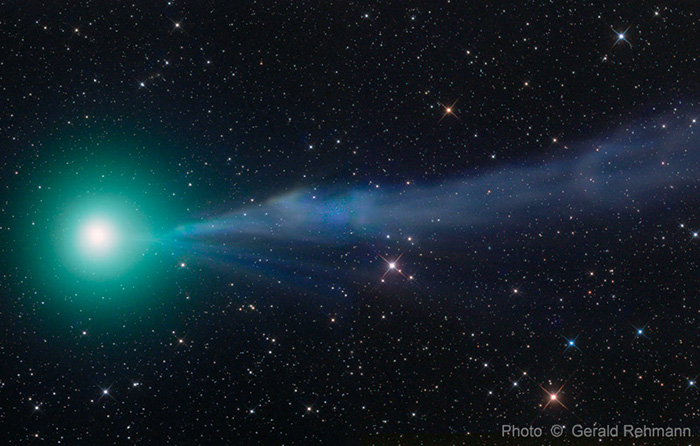
First, a reality check. Really big, beautiful comet pictures (like the one immediately above by Gerald Rhemann) come from long lenses or powerful telescopes used with computer controlled tracking devices to follow the motion of the comet and stars. If you are new at this don’t expect to get a comet photo like Rhemann’s.
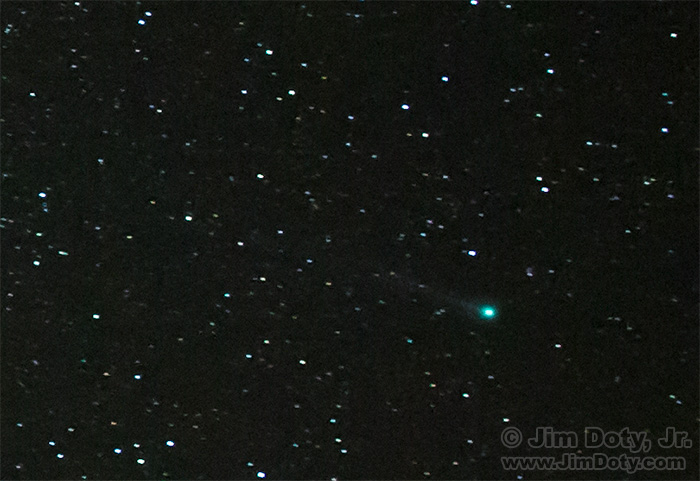
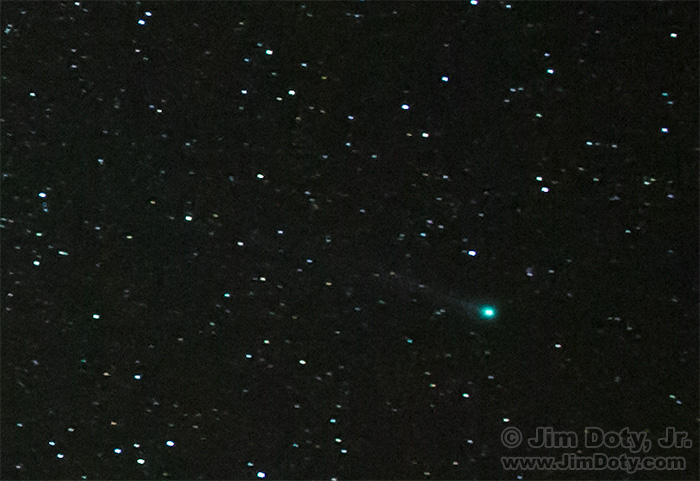
The photo at the top of this article was cropped from a much larger image captured with a basic 24mm lens. You can see the comet and just a hint of the tail. A photo like the one at the top is a more realistic expectation if this is your first comet.
If you want to capture extraordinary images like the one by Rhemann (more of his work is linked below), read the astrophotography books in the article linked at the end of this post, be prepared to spend a lot of time developing the special skills you will need, and be ready to shell out a modest fortune for the right kind of equipment.
But for now, lets start with the basics steps so you can get a comet image tonight (or whenever your next clear night happens to be). There is a certain sense of satisfaction and exhilaration that comes from getting your first good comet image, and now is a great time to do that.
Dark Skies
You will need to be as far away from city lights as possible. That means 50 miles away from a city of 50,000 population, and 100 miles away from a really big city. You will need dark skies (the darker the better) or sky fog will ruin your photos.
Equipment
You will need a camera with ISO settings up to 3200 and shutter speeds as long as 15 to 30 seconds or a “B” (for bulb) setting. You will need a wide angle lens (preferably 28mm or wider) with a reasonably fast maximum aperture (f/2.8 or f/4). Single focal length wide angle lenses work best because they have wider maximum apertures and they are easier to focus on infinity. You will also need a tripod. Put your camera on the tripod and point it at Comet Lovejoy (more about finding Lovejoy in the sky later on).
Exposure
Set the ISO to 3200, the lens aperture to f/2.8 or f/4, and the shutter speed to 15 seconds. Manually focus the lens on infinity. Be careful when you do this, since some lenses (and especially zoom lenses) focus past infinity (check the manual that came with the lens). Make sure you are focused on infinity. One way to do this with a zoom lens that focuses past infinity is to focus the lens on something very far away during the day, and then tape the focusing ring so it doesn’t move. Now take a picture. Change the ISO to 1600 (keep the aperture and shutter speed the same) and take another picture. Then ISO 800 (same aperture and shutter speed) and take another picture. Finally ISO 400 and take another picture. One of those photos should come out well, depending on how dark the sky is at your location. The darker the sky from your location, the higher the ISO you will be able to use, and the higher the ISO the brighter the comet will be.
Results
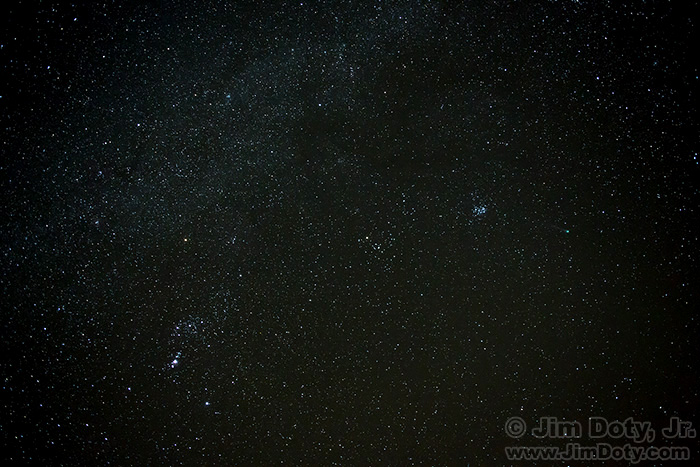
Orion, Hyades, Pleiades, Comet Lovejoy, and the Milky Way. The cropped image of Comet Lovejoy at the top of this article was taken from this image. Click to see a larger version.
You should end up with a photo something like this. That is a lot of sky and a lot of stars. Your naked eyes will only see the brightest of these stars. Your camera will capture thousands of stars your unaided eyes can’t see. Where in all of this is Comet Lovejoy?
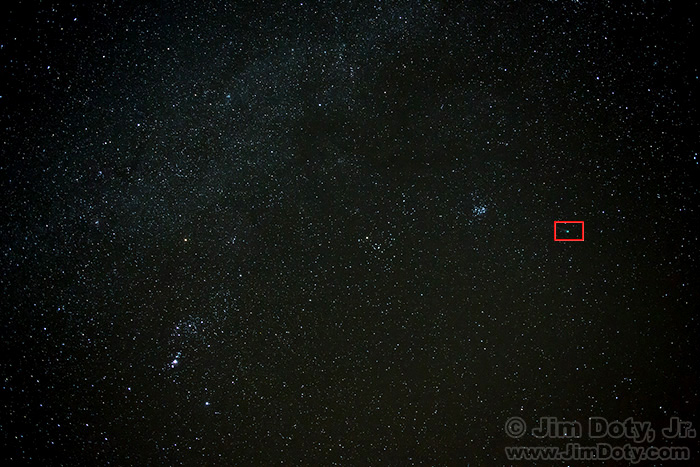
Comet Lovejoy in the red box, Orion, and the Hyades and Pleiades Star Clusters. Click to see a larger version.
This is Comet Lovejoy, marked with a red box. Lovejoy will look like a fuzzy green star. The problem with a web sized image is you don’t get a really good idea what the image looks like. If you could see an 8×10 inch or larger print from the original file, you would see what the photo REALLY looks like.
This will help give you an idea what a small section of a large print would look like. This is Comet Lovejoy cropped from the original image.
Finding Comet Lovejoy in the Sky
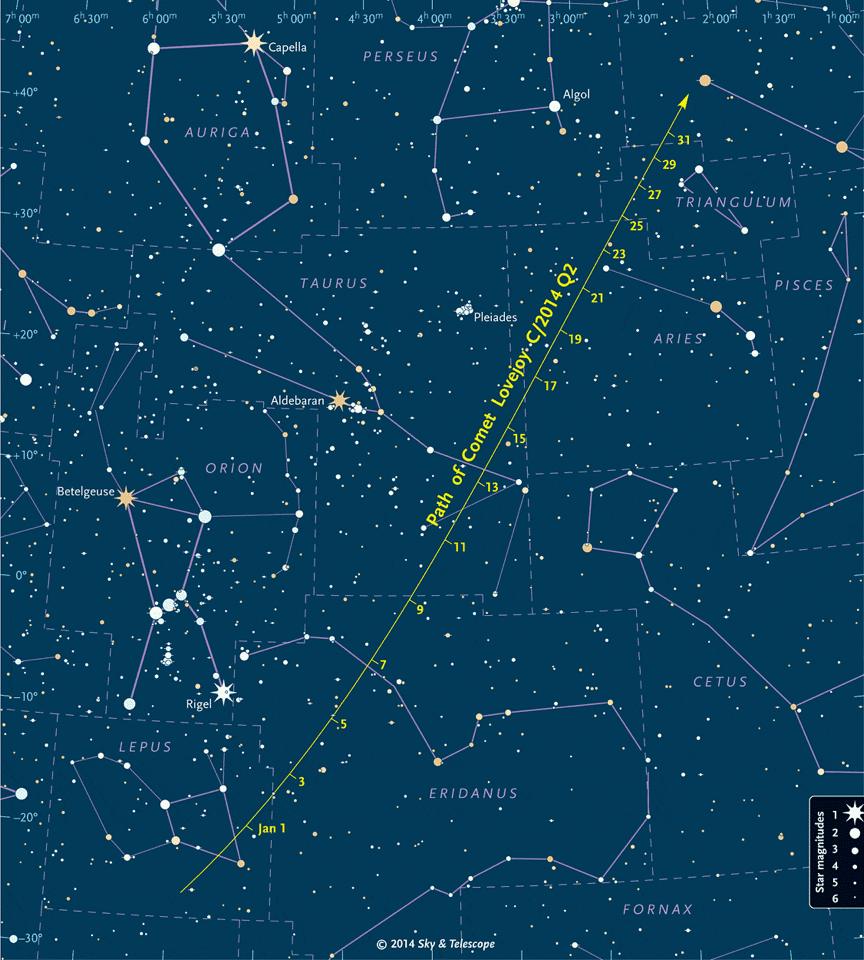
How do you find Comet Lovejoy? This is a chart from Sky and Telescope. Find Orion first, then go across to the V shaped group of stars known as the Hyades, then to the right to the tightly packed cluster of stars known as the Pleiades. From there you can jump to the current location of Comet Lovejoy.
Without all of the markings, the actual night sky will, of course, look different from the star chart. Orion is easiest to find. It is a tall rectangular box with three stars in a row across the middle of the box. As I write this, if you live in the N. Hemisphere in the middle latitudes, you will see Orion up in the southeastern sky at 7 pm local time, high in the southern sky by 10 pm, and in the southwestern sky by 1 am. You can be out shooting as soon as the sky is dark. At the latest I would suggest you need to be out and shooting by midnight or you will risk the comet getting too low in the sky. Each night Orion is in these positions a little earlier. By the end of January you need to be out shooting by 11 pm.
Moonlight will interfere with comet photography and the moon sets later each night. That means your window of opportunity shrinks each night.
Once you have a pretty good idea where Comet Lovejoy is located in the sky, point your camera in that direction as best you can. If you try to look through your camera’s viewfinder to see Comet Lovejoy, you will be out of luck. At best you might be able to see only a few really bright stars, but not dimmer stars, and certainly not Comet Lovejoy. At the worst you won’t see anything at all. One reason for using a wide angle lens is to increase the odds you will actually capture Comet Lovejoy in your image, since you are aiming the camera in the approximate direction and pretty much “shooting from the hip” rather than actually seeing through the camera’s viewfinder or on the LCD on the back of your camera.
There are a few cameras that will give you a decent idea what will be in your photo using the LCD on the back of the camera but not many. For most of us it will be point and pray.
Maximum Shutter Speed and Lens Focal Length
The stars will move across the sky during the long exposure and be a bit streaked in your photo. That is a simple fact of life when shooting from a tripod instead of having your camera mounted on a device that tracks the stars across the sky. You can minimize the star trails by using the “Rule of 600”. Divide 600 by the focal length of your lens to get the longest useable shutter speed. If you are using a 20mm lens you can use a shutter speed as long as 30 seconds (600/20). If you are using a 50mm lens, you longest shutter speed will be 12 seconds (600/50). In an 8×10 or 11×14 inch print from the full size image above, star trailing will be minimal. In a really large print, the trailing will be more obvious (like the cropped examples above). If you are using a really wide angle lens (20 – 15mm or wider) repeat the above exposure suggestions, but with a 30 second shutter speed. Start with ISO 3200, 30 seconds, and an aperture of f2.8 or f/4. Then ISO 1600, 30 seconds, f2.8 or f/4. ISO 800, 30 seconds, f2.8 or f/4. And finally ISO 400, seconds, f2.8 or f/4.
Lens Aperture and Lens Aberrations
All lenses have some optical flaws, called aberrations, that show up the most at the widest apertures. If you take a picture of the night sky with a lens at its widest aperture, don’t be surprised if the stars at the edge of the frame look distorted. If you stop the lens down by one stop, there will be a big improvement in image quality. If the widest aperture on your lens is f/2 and you stop down to f/2.8, you will get a better image. If the widest aperture on your lens is f/2.8 and you stop down to f/4, you will get a better image. If the widest aperture on your zoom lens is f/4 and you stop down to f/5.6 you will potentially get a bitter picture, but f/5.6 is awfully slow when doing astrophotography. So it is best to just leave the lens at f/4 and live with the aberrations. Shooting at f/5.6 instead of f/4 means doubling an already long shutter speed which is not a good idea.
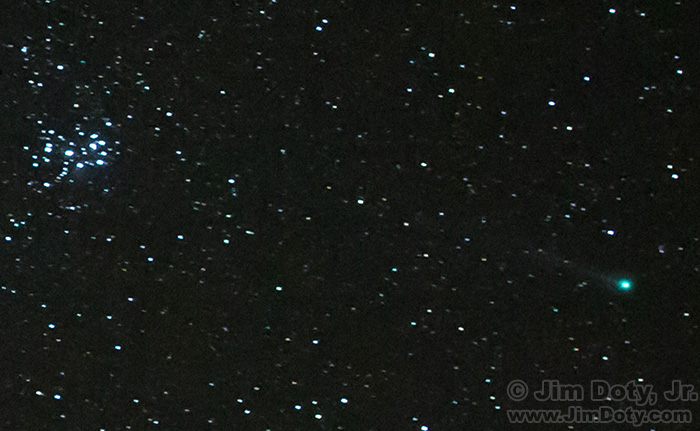
Comet Lovejoy and the Pleiades star cluster, cropped from the full size image. Click to see a larger version.
Post Processing
You may need to do some adjustments to your photos with image editing software. Soem overall adjustments to exposure night be necessary. You can use the sliders in Levels to make the stars brighter (pull the slider at the bottom right corner of the Levels panel to the left) and to make the sky background darker (move the slider at the bottom left corner of the Levels panel to the right). If the sky is too red (due to city lights, you may need to adjust the temperature and tint sliders, or de-saturate the color red. I highly recommend shooting RAW files in your camera and using Adobe Camera Raw (ACR) to adjust your images. ACR comes with Adobe Photoshop Elements, Adobe Lightroom, and Adobe Photoshop.
Get Out There!
So go out, give it a shot, and have fun. The practice will pay off when a really bright comet with a really big tail heads our way, or even another not so bright comet.
Comet Lovejoy Photo Data: Canon 5D Mark III. Canon EF24mm f/2.8 lens. 15.0 sec, f/3.5, ISO 3200.
(Originally posted January 20, 2015. Revised, expanded, and new links added January 22, 2015.)
Links
The Best Astronomy and Astrophotography Books. If you really like photographing the night sky, whether it is the simplest stuff or the most complex, this article will introduce you to the books that will guide you along the way.
If you just like to look at the night sky and want to know what’s up there and where to look, I recommend some books for that too. My favorite is Nightwatch: A Practical Guide to Viewing the Universe by Terence Dickinson, Adolf Schaller, Victor Costanzo, and Roberta Cooke. Any recent version of Nightwatch will do. This is my favorite guide to viewing the night sky with naked eyes, binoculars, or a telescope. It is not a photography guide.
Comet Lovejoy, Sky and Telescope magazine.
Comet Lovejoy, Astronomy magazine.
Planets is a good iPhone app to show you where the stars and planets are in the night sky (but not comets). The default setting is to show you the sky from your current location and time. You can go into Options, turn Automatic Date and Time off, and then change the date and time so you can check out the night sky in the future or past. You can also turn Automatic Location off and enter the GPS coordinates of your choice.

