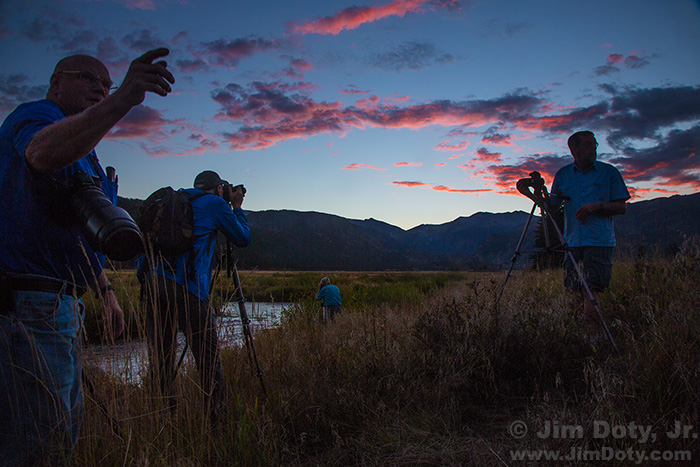
These are some of the photographers at my photography workshop this past weekend in Rocky Mountain National Park. I processed the original RAW camera file with Adobe Camera Raw (ACR) to pull details out of the dark shadows.
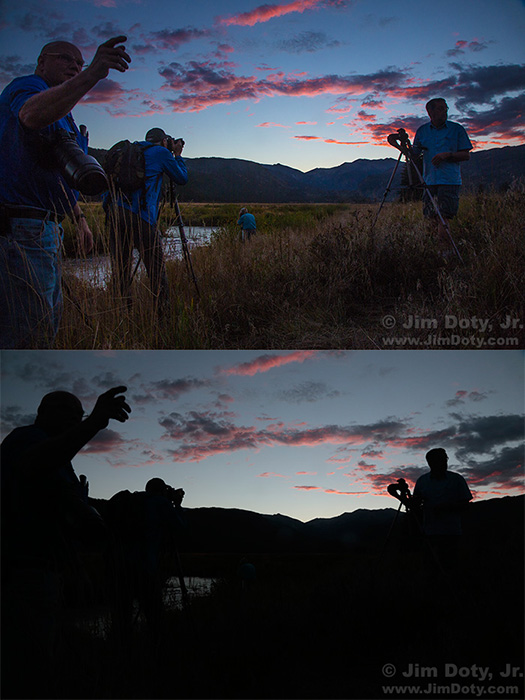
This is a comparison of the corrected RAW file (top) and the original JPEG file (bottom). The contrast range, light to dark, is too much for the camera to capture in a single exposure. In a situation like this, I expose for the sky and let the shadows go dark, rather than expose for the shadows and let the sky burn out. With a non-moving subject you can take more than one exposure and combine them later in the computer, but that doesn’t work with moving subjects.
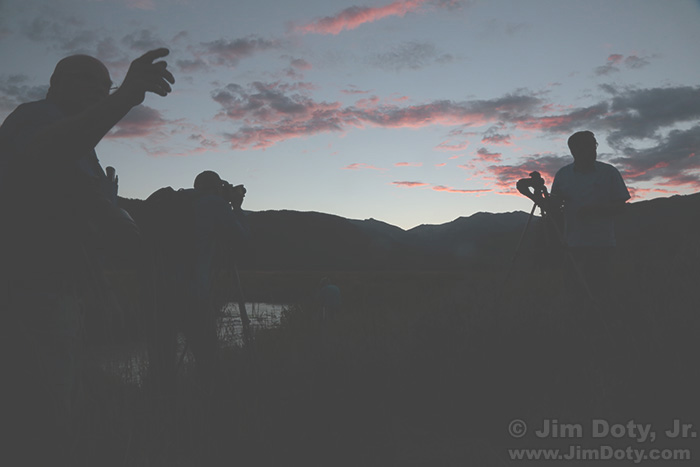
So what happens if I try to correct the JPEG file? The results aren’t pretty. The two most common tools for recovering the shadows in most image editing software are Levels and Curves. Curves is the more powerful tool with more control, so I used Curves to bring up the dark shadows. As you can see from the image immediately above, the result is not good. I used the Levels tool and the results were just as bad.
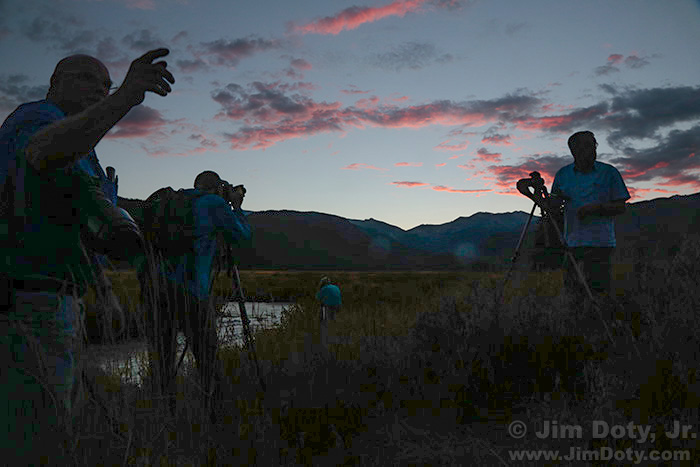
If you happen to be working with Adobe software, you have the added option of correcting a JPEG with the Camera Raw Filter. So I gave that a go. The results are much better then using the Curves Tool (or the Levels Tool), but nowhere near as good as using ACR with a RAW camera file.
As I have pointed out in prior articles, shooting RAW files and opening those files on the computer with ACR is far superior to working with JPEG files. ACR comesw free with Adobe Photoshop Elements, Adobe Photoshop Lightroom, and Adobe Photoshop.
I am doing this on the road with a laptop computer. I don’t completely trust any laptop screen for optimum color and exposure decisions, so they may be a bit off in these images. I will revisit this image again when I get home to my color calibrated monitor.
Photo Data: Canon 5D Mark III. Canon EF24-105mm f/4L IS USM lens at 24 mm. 1/50 sec, f/16, ISO 800.
Links
Fast and Simple Adjustments with Adobe Camera Raw, with illustrations of the “sliders” used in ACR.
Color Correction with ACR, a Portrait Example.
There are lots of good reasons for shooting RAW files:
The RAW versus JPEG Exposure Advantage
The more adept you become at using ACR, the better your images will be. Read the article Mastering Photoshop & Lightroom: Adobe Camera Raw (ACR)
The Best Image Editing Software
Order Adobe Photoshop Elements or Adobe Photoshop Lightroom at Amazon.


