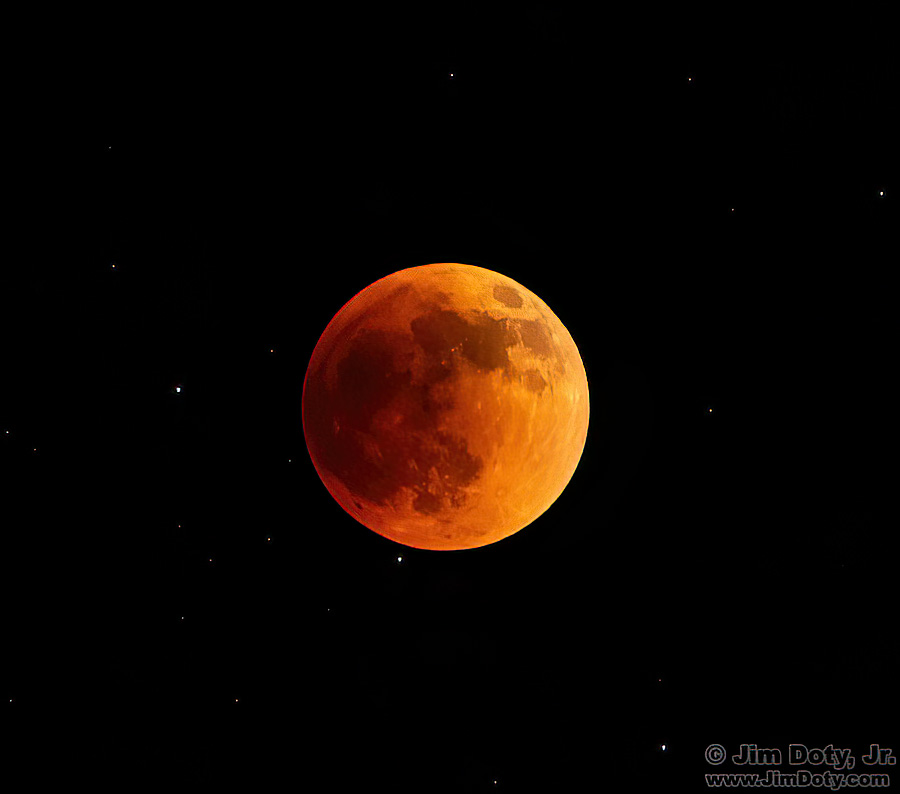
Lunar Eclipse from Lamoni Iowa
Don’t miss it. This nearly total eclipse happens this Thursday-Friday, August 27-28 (depending on where you live). This article will show you how to photograph it. To see it, just grab a lawn chair, a warm blanket, a cup of hot chocolate, and go outside and enjoy the show. A pair of binoculars adds to the show.
What is the Blood Moon Eclipse?
Blood moon refers to the yellow-orange-copper color of the moon during eclipse totality. This happens with almost all lunar eclipses unless there are unusual atmospheric circumstances. The intensity of the color varies with each eclipse, due to the amount of moisture and dust particles in the air.
The term blood moon is mostly used as a modern form of hype to promote moon and eclipse watching.
Some people flood the internet with weird blood moon memes with no basis in scientific fact and sometimes outright nonsense (“this blood moon will activate the psychic powers of your liver”). And finally blood moon is used by some people to promote weird religious prophecies, usually of impending doom.
Where Can You See the Eclipse
Part of the eclipse will be visible all over North America and the deepest part of the eclipse (96%) will be visible from the eastern half of North America.
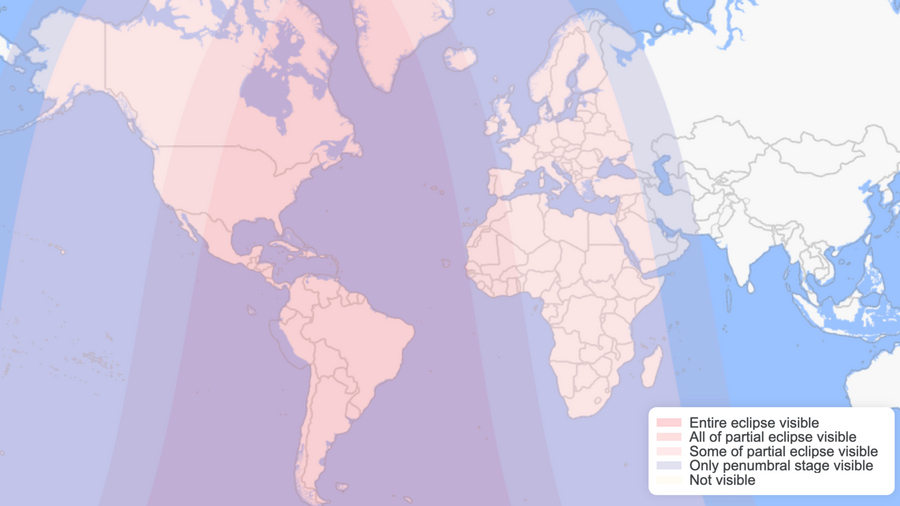
The darkest area in this map indicates the area that can see the deepest phase of the eclipse. More at TimeandDate.com.
Eclipse Phases
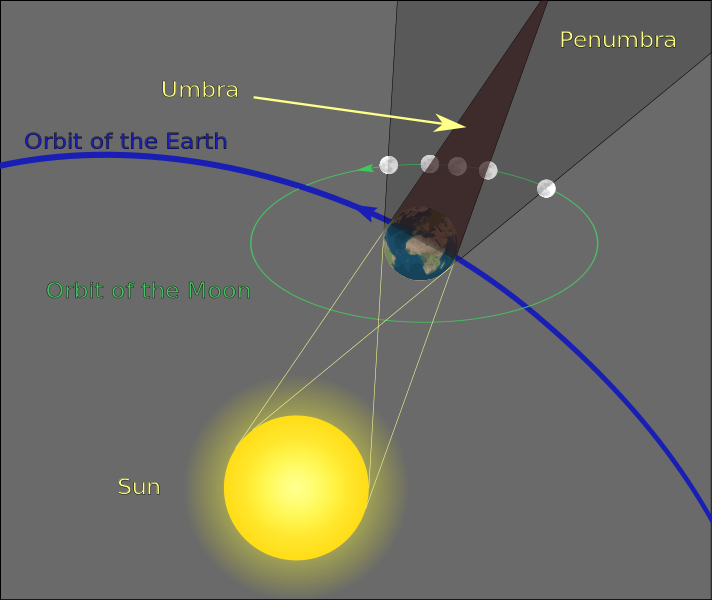
In any umbral (total) lunar eclipse, the moon always passes through the very light penumbral shadow before and after its journey through the dark umbral shadow. From Earth and Sky.
When is the Eclipse?
Unlike a solar eclipse where the moon’s shadow races across the continent and the eclipse happens at different times, in a lunar eclipse the phases happen at the same time everywhere. The earth gradually blocks sunlight on the moon’s surface as the moon passes into the penumbra and then into the umbra. If you live in the right area (the darkest part of the map above) the moon will be 96% eclipsed at maximum.
Eclipse times, EDT:
Be sure to convert these times to your time zone.
- The moon enters Earth’s faint outer shadow at 9:23 p.m. EDT on Aug. 27 (0123 GMT on Aug. 28).
- The partial eclipse begins when Earth’s dark umbral shadow starts to creep across the moon at 10:33 p.m. EDT (0233 GMT).
- Maximum eclipse occurs at 12:12 a.m. EDT (0412 GMT) on Aug. 28.
- The partial phase ends at 1:51 a.m. EDT (0551 GMT), with the penumbral eclipse concluding at 3:01 a.m. EDT (0701 GMT).
Photography Equipment
You will need a camera with a long lens. The longer the focal length of your lens, the bigger the moon will be. If you have a lens that is 200-400mm in focal length or longer you will get a relatively nice sized moon. Much shorter than 100mm and the moon will look disappointingly small compared to the nice eclipse photos you see online and in magazines.
A sturdy tripod and tripod head are essential. At totality you will need exposures time around 1 to 2 seconds so you can’t reliably hand hold your camera.
If you don’t have a long lens, you can still take eclipse photos by making them more about the night sky that just happens to have a smaller, yellow-orange moon in the photo.
Techniques
Techniques for all lunar eclipses are pretty much the same.
If your camera isn’t already set up this way, set your camera to capture RAW plus JPEG files at the highest resolution, set the color space to Adobe RGB (1998), and set the white balance to daylight. All of this will give you better image quality when it comes time to do the post processing.
Critical focus can be hard to achieve and you can’t put your ultimate trust in autofocus. The best way to focus is to use your camera’s “live view” mode. Before the eclipse starts, begin with your camera in normal viewing mode (through the viewfinder) and autofocus on the moon. Then turn autofocus off. Turn on live view mode, center the moon in the viewfinder, and magnify the image to 10x on the LCD and manually focus the lens. Take a test shot and magnify the image to make sure everything looks sharp. For more information, read How To Get Critical Focus in Live View Mode with a Magnified Image.
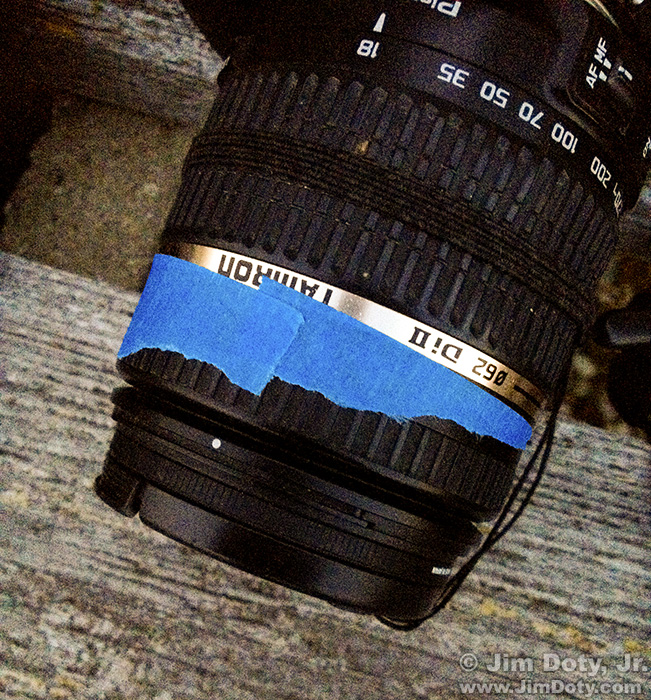
Lens taped at infinity.
If everything looks sharp it is a good idea to tape the focusing ring in place so it doesn’t move. Don’t use duct tape! Gaffer’s tape is best and painter’s tape would be the second choice.
In “live view” mode the mirror of a DSLR is locked up. That is a good thing – you won’t get image degradation due to mirror slap. So it is best to leave the camera in live view mode. If your camera doesn’t have a reflex mirror you don’t need to worry about this.
You don’t want to jiggle the camera by pushing the shutter button, so turn on the two second self timer so there is time for vibrations to die down after you push the shutter button. It would be even better to use an electronic cable release.
Incidentally, live view mode will drain the battery faster than normal viewing mode, especially in cold weather, so make sure you charge your battery and backup battery the night before the eclipse.
Exposure
This article assumes you understand exposure basics and the interactions of aperture settings, shutter speeds and ISO settings. If not, read the exposure series which begins here.
Don’t trust auto exposure. Set you camera to manual metering mode and use the following guidelines.
Before the eclipse begins, set your aperture to f/8, your shutter to 1/100 second shutter, and the ISO to 100 and take a picture. Feel free to bracket by using shutter speeds of 1/200 and 1/50.
As the eclipse progresses and the moon gets darker, you will need to gradually increase the ISO and the shutter speed. While your LCD images are not a totally accurate guide to exposure, keep an eye on the images to make sure your moon isn’t totally washed out or really, really dark. Bracket your exposures from a little too light to a little too dark.
It is impossible to predict how dark each lunar eclipse will be at totality so I can’t tell you in advance what the exact correct exposure will be. Generally you will end up around 1 or 2 seconds with an ISO of 1600, but be flexible. For the 2022 eclipse photo above I ended up at f/8, 1 second, and ISO 2500.
During a two second exposure stars will trail a bit during the exposure, along with some potential blurring of the moon. You can minimize blurring of the moon with an astronomical clock drive set to the motion of the moon (not the motion of the stars). The good news is you can get a surprisingly good image of the moon in a 1 or 2 second exposure without a clock drive as long as you aren’t using a super long lens (500mm and up).
Do not use a shutter speed longer than 2 seconds with lenses as long as 300-400mm. Do not use a shutter speed longer than 1 second with lenses 600mm or longer. If the moon is too dark, go to a higher ISO.
Post Processing
ISO 1600 means a fair amount of noise. Some judicious post processing with Adobe Camera Raw will help reduce the noise to have a cleaner image. You may need to adjust the exposure, clarity, and vibrance sliders in the basic panel to get the optimum image.
Topaz Sharpen AI is also good software to remove noise and sharpen the image.
If you don’t get a chance to photograph this lunar eclipse, you can always use these techniques on the next one. Time and Date, and Space.com will let you know when the next lunar eclipse is going to occur.
Lunar Eclipse Photo Data: Canon 7D Mark II. Canon EF 100-400 lens at 400mm. 1 sec, f/8, ISO 2500.
Eclipse Links
The August 27-28, 2026 Eclipse at Space.com.
The August 27-28, 2026 Eclipse at Time and Date.
The August 27-28, 2025 Eclipse at Earth and Sky.
Photography Links
How To Get Critical Focus in Live View Mode with a Magnified Image
How To Focus Your Lens at Infinity for Night Photography
Why Is Exposure So Important? – the Exposure Series
Book Links
If you want to know more about photographic exposure, making the most of your camera gear, night sky photography, landscapes photography, wildlife photography and a whole lot more, read Digital Photography Exposure for Dummies, one of the highest rated photography books at Amazon.com. Learn more about the book here and order it here.
The Best Night, Astronomy, and Astrophotography Books
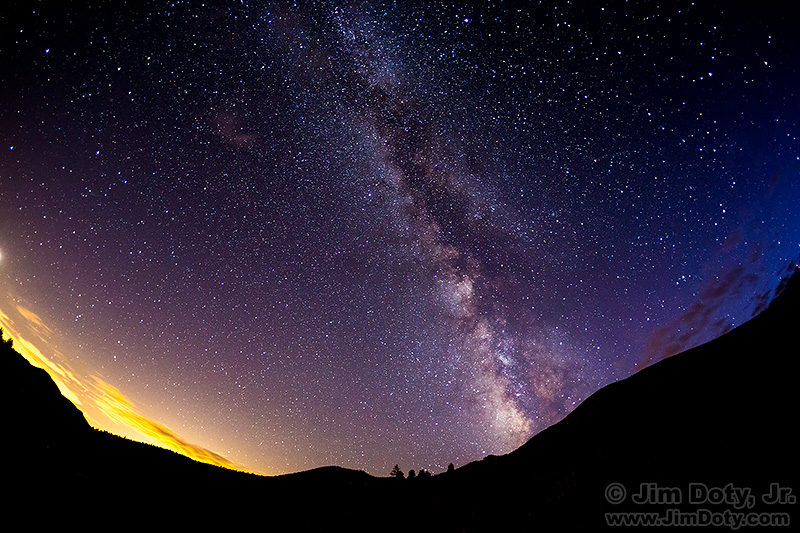
Milky Way from Horseshoe Park, Rocky Mountain National Park, Colorado. September 27, 2015. 8:06:12 PM MDT. Canon 5D Mark III. Canon EF 15mm f/2.8 lens. 30 sec, f/2.8, ISO 3200.