
My favorite iPhone photo apps, including the Slow Shutter app.
It started when a friend asked me how to use a long shutter speed on her iPhone. It was at night not long after the recent Northern Lights excitement all across the U.S. I told her to get the Slow Shutter app. This article is a brief tutorial to get you started using the app at night.
The Slow Shutter app is usually used during the day to blur moving objects against a non-moving background, like cars on a highway, or to blur something like a waterfall. But it is also useful at night. Late in the day the app can give you long red tail light streaks against a non-moving background.
You can see the icon for the app in the screen capture above, along with my other favorite photo apps.
Your phone needs to be steady. I usually put my phone on a tripod, but for this quick demo I held it as steady as I could on top of a trash bin.
Tap the app icon to open the app.
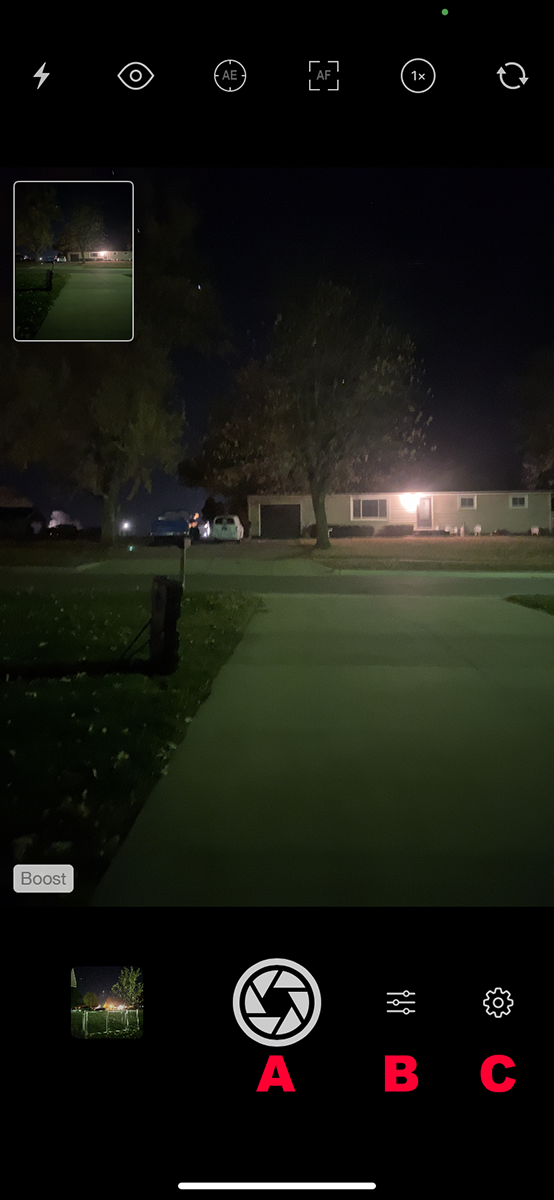
Slow Shutter app screen capture at night.
You will see something like this at the top and bottom, but without the red letters. Whatever your phone’s camera is pointed at will show up on the screen. The letter A marks the shutter button. Tap the sliders above the letter B to choose the Capture Mode options. Tap the “gear” above the letter C to see the Settings for the app. More about this is at the end of this article.
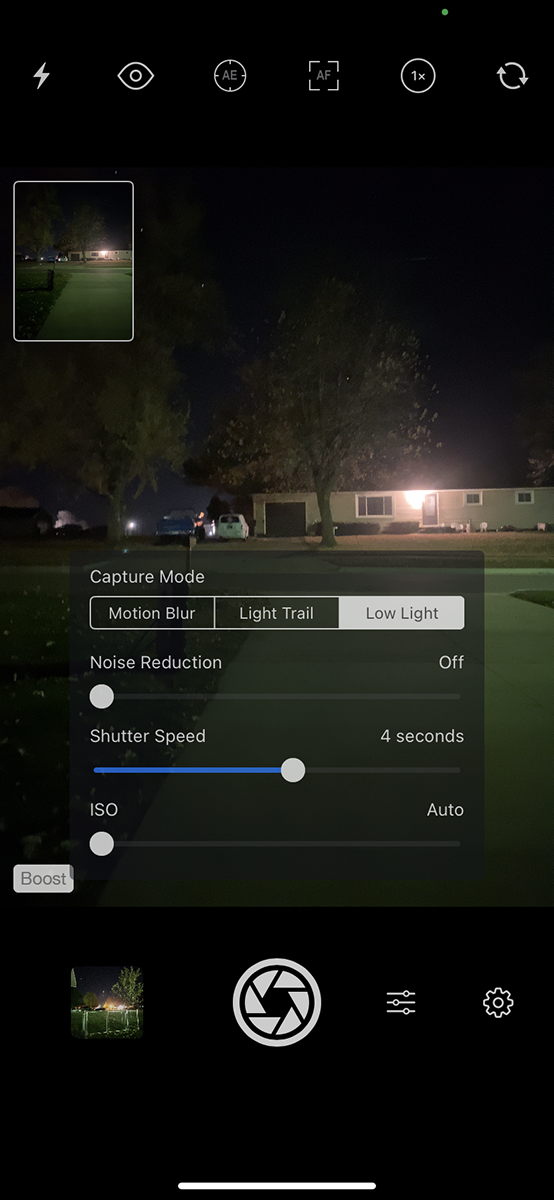
Slow Settings app, Capture Mode choices.
After you tap the sliders to see the Capture Mode options, they will appear as an overlay with your potential photo in the background. Your first choice is between Motion Blur, Light Trail, and Low Light. For night photography tap Low Light. Then you can play with the three sliders to get the look that you want. I suggest you leave Noise Reduction on, so drag the slider somewhere to the left. Experiment with the Shutter Speed. I started with 4 seconds and it worked well for this tutorial. I left the ISO slider at the far left. Feel free to experiment.
Now you can tap the shutter button.
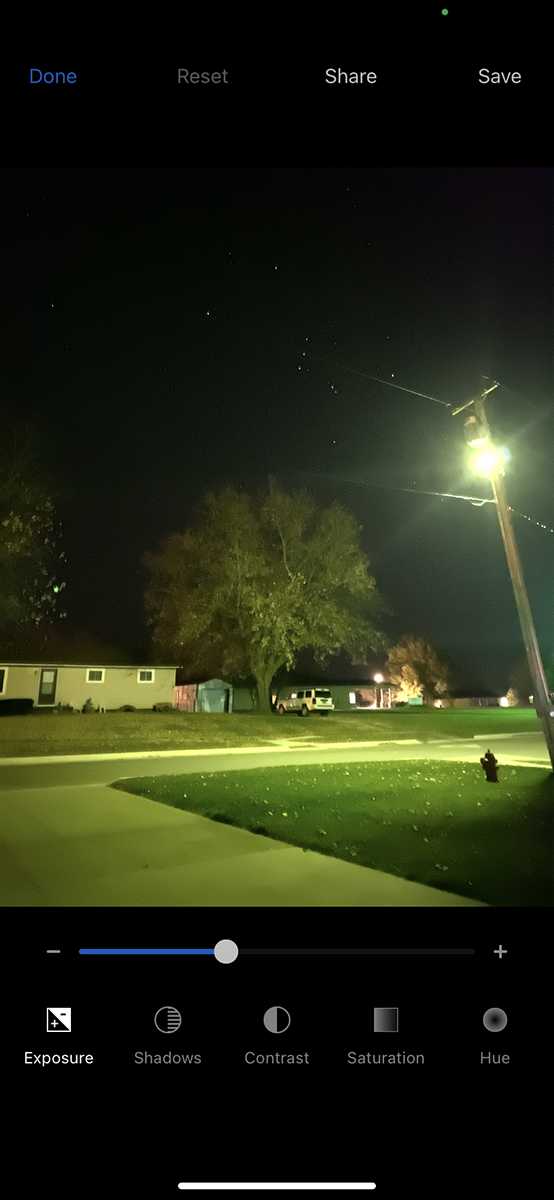
Preliminary photo.
On your iPhone screen you will see a preliminary version of your photo but it has not yet been saved to your phone. You have several options to choose from. If you like what you see, tap SAVE at the upper right. Everything looks very green in this images so I tapped HUE at the bottom right.
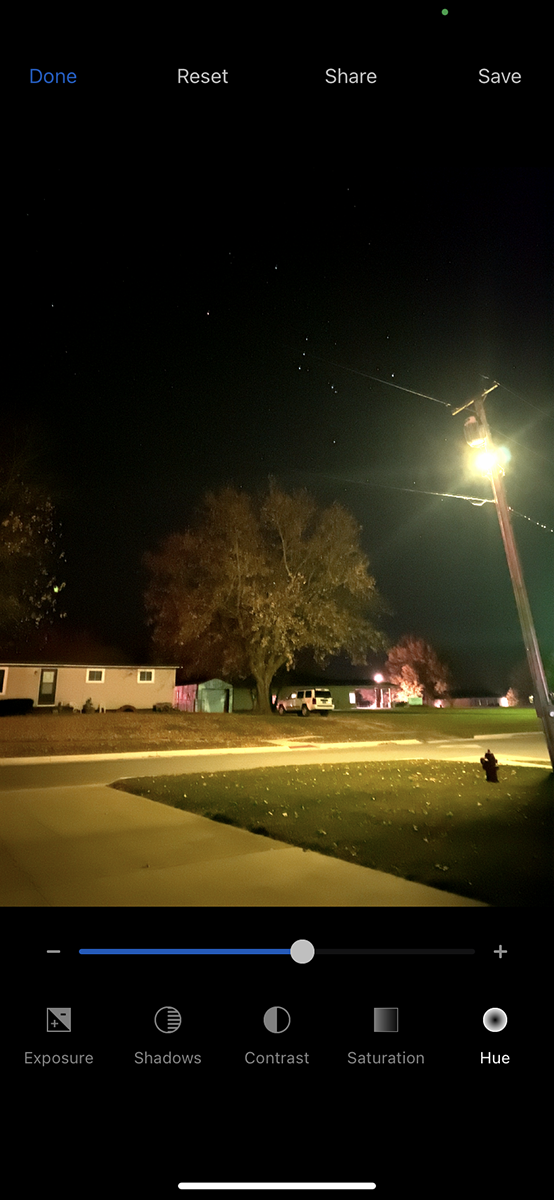
Using the HUE slider.
I dragged the HUE slider to the right and the photo went from green to magenta. You can tap any of the other buttons at the bottom to change those settings. Saturation determines color intensity. Contrast makes light tones lighter and dark tones darker. Feel free to experiment. If you botch things up, tap RESET at the top to start over on your image. I tapped SAVE. You can see the result immediately below.
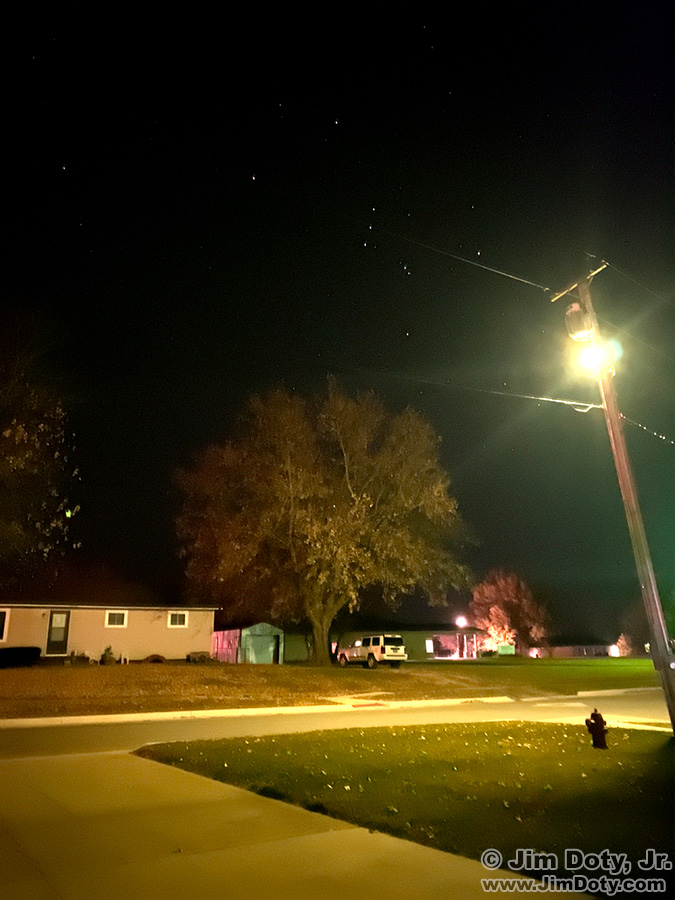
The final image out of my iPhone
After playing with the sliders and tapping save, this is the image I ended up with. It has been resized for the web. The Constellation Orion is nice and bright at the top center of this image. But I thought I could improve on this image. So I opened it in Adobe Bridge.
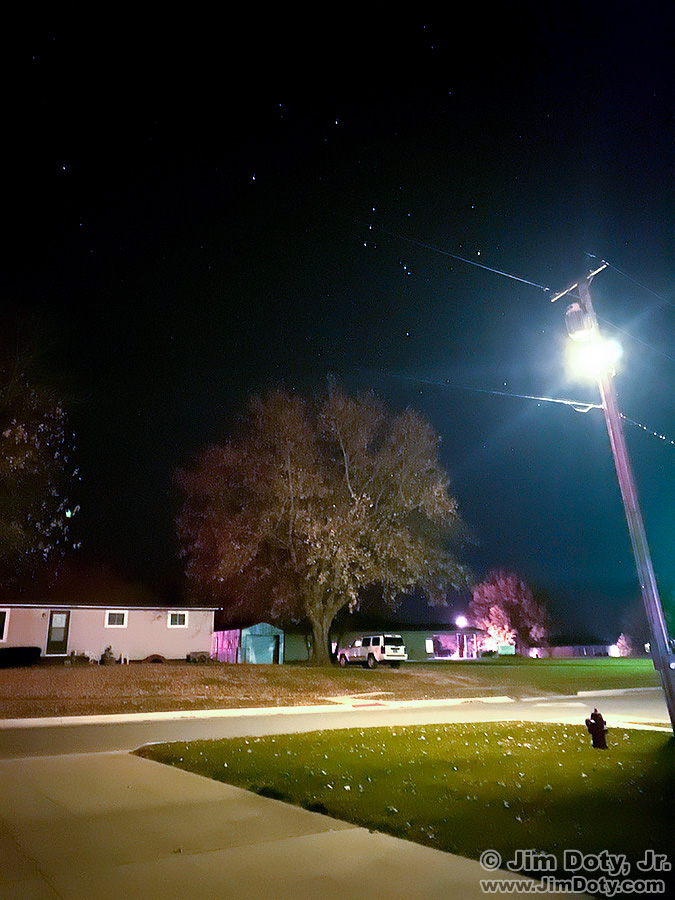
The final iPhone version after processing with Adobe Bridge.
The sliders in Adobe Bridge give me more control than the sliders in the Slow Shutter app. This version of the image is more to my liking.
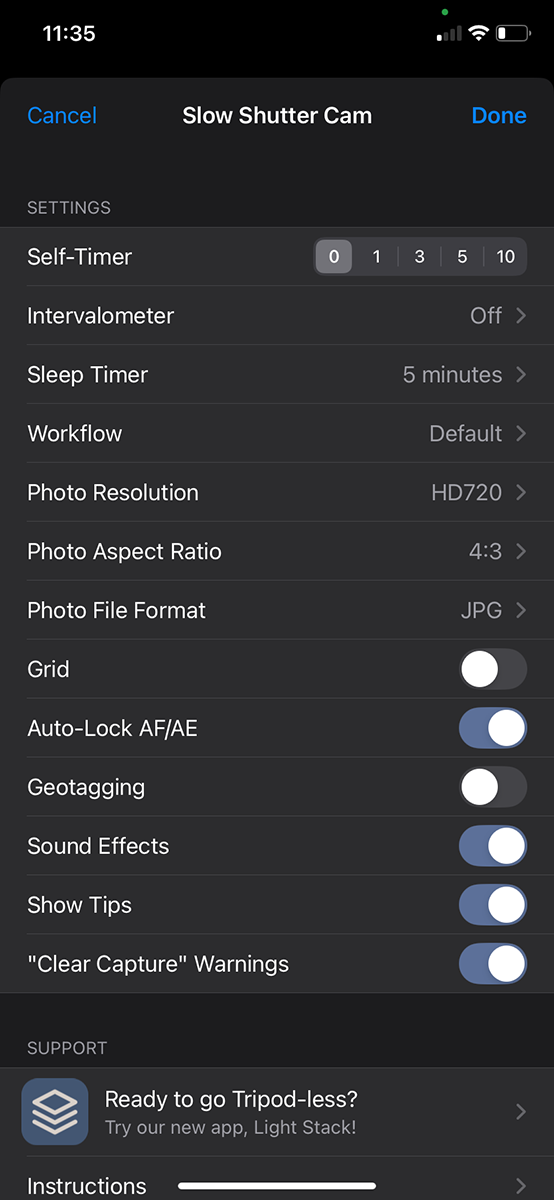
Settings, Slow Shutter app.
Earlier in this article there is a screen capture of the Slow Shutter app with the Settings “gear” (above the red letter C). If you tap the Settings gear you will see these options. I did not play with these options the other night but some of them, like self timer and intervalometer, could be very useful. If you want to geotag your photos, turn that on.
When I want to blur photos, I am usually using a DSLR on a tripod with the appropriate settings, and the same goes for night photography. But it is handy to know that the Slow Shutter app gives you options that can be very handy on your iPhone, either at night, or blurring photos during the day. Don’t forget to keep your iPhone steady when using this app.