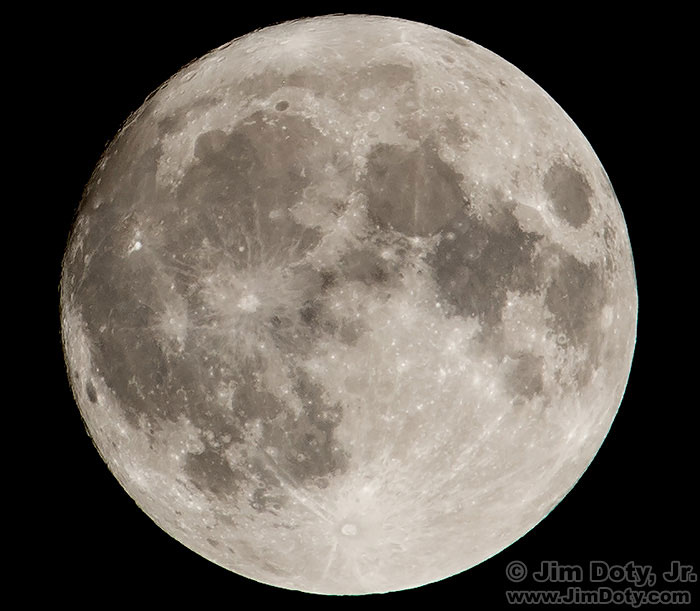
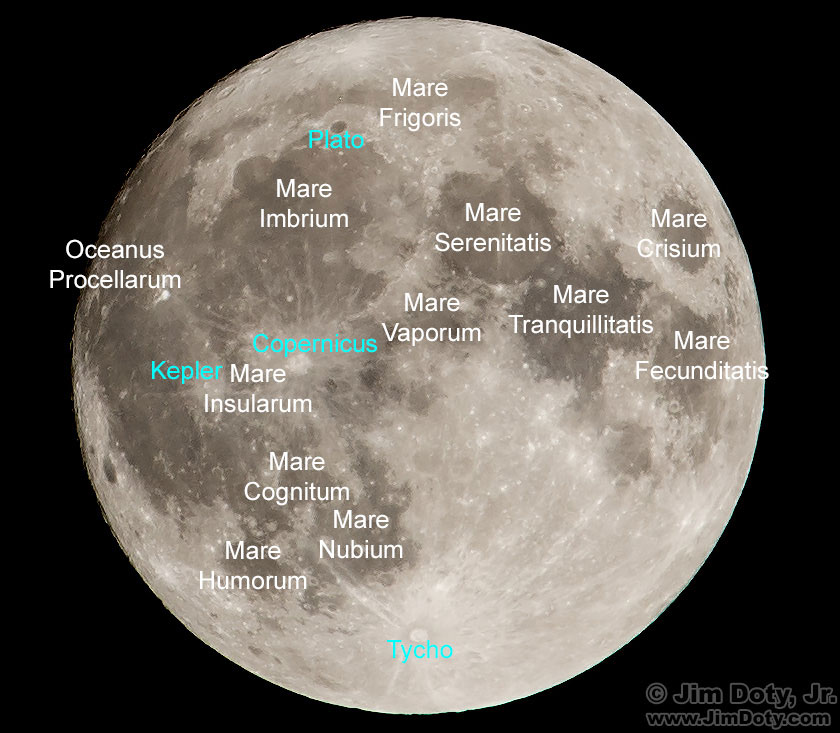
November 13-14, 2016 is a Super Moon. For many people this is the biggest super moon in their lifetime. Go out and look Sunday night, early Monday morning (before moonset), or Monday night.
What Is A Super Moon?
The phrase “super moon” is a fairly recent invention. The phrase was coined to refer to any time the moon will be closer to earth at perigee (more about that later) than it usually is. For this particular super moon it will be closer than at any time since 1948. Since the moon is closer, it will look bigger and brighter. The moon won’t be this big again until 2034. How much bigger is this super moon? 15% bigger than when the moon is at its smallest (farthest from earth). The moon will also be 30% brighter than when it is at its farthest from earth.
Why is this? The moon’s orbit is elliptical so its distance from earth varies over time. At its closest in its orbit around the earth the moon is at perigee. At its farthest it is at apogee. The distance at perigee and apogee vary with each trip around the earth.
The exact moment for this perigee will be November 14, 2016 at 6:22 EST. That is when the moon will be closer to earth than at any time since 1948. But the distance and the size of the moon won’t be very much different Sunday night or Monday night than it will be Monday morning, so go out any time the moon is up and take a look. If it is cloudy where you are and you can’t see the moon, don’t worry. There will be another super moon December 14, 2016 when the moon will be again be pretty close to earth (another super moon) but not quite as close or as big as this month. To the average person there wont be a noticeable visual difference.
How do you photograph a super moon?
The same as any other full moon.
Set the white balance on your camera to daylight.
Use the longest lens you have. The longer the lens the bigger the moon will look. If you are using a DSLR your sensor is probably somewhere between 13×17 and 24x36mm in size. The moon will be roughly (to keep the math really simple) 1mm in size on your sensor for every 100mm of lens focal length. If you are using a 300mm lens the moon will be about 3mm in size on your sensor. That is only 1/8 the height of a 24x36mm sensor used horizontally. If your sensor is 13x17mm in size you will need a 1300mm lens to fill the sensor’s shortest (13mm) dimension. To fill the shortest dimension of a 24x36mm sensor you would need a 2400mm lens. If you want a big moon, you need a long lens. And you can crop if your original image is sharp. The image at the top is cropped from the original frame.
To insure the sharpest possible image, put your camera and lens on a tripod. If your lens has image stabilization turn it off. Use mirror lock up if you have it, and an electronic cable release or the camera’s self timer to avoid jiggling the camera. If your lens has trouble autofocusing on the moon, try manual focus. This is easiest if you pick the edge of the moon to focus on. If your camera has magnification options when you are in “live view mode”, turn on live view, zoom in to 10X magnification and manually focus the lens. Live view mode with a two second self timer (and/or a cable release) is a great way to avoid jiggling the camera, even if you can’t magnify the live view image. Live view mode will run down your battery faster so have a spare battery charged up and ready to go. Keep the spare battery some place warm like a pocket next to your body.
Set the camera ISO to 100. Set the lens aperture to f/11. Try shutter speeds of 1/200, 1/100, and 1/50 second and pick the brightness you like best. Some people like a slightly darker, grayer moon, and some people like a lighter, brighter moon. Trying different shutter speeds gives you choices.
If you don’t have a tripod set the ISO to 400 and the lens aperture to f/11. If your lens has image stabilization turn it on. Try shutter speeds of 1/800, 1/400, and 1/200. Autofocus on the edge of the moon.
Shadows and the Phases of the Moon
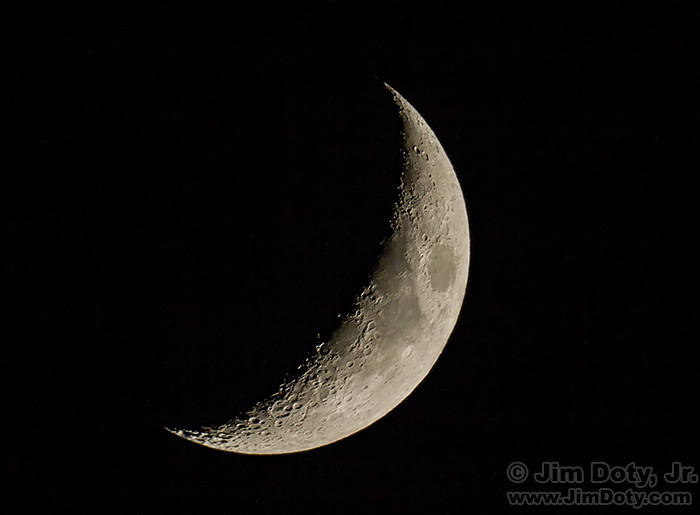
So why don’t super moon photos (or any full moon photos) have nice, sharp, distinct craters with nice shadows? Because during the full moon the sunlight is hitting the surface of the moon straight on from our point of view. To get sharp edged craters with distinct shadows the sun needs to hit the moon from the side which happens around the first and last quarter. At or before the first quarter, or at or after the last quarter will give the best shadows.
ACR Processing Tip
If you are shooting RAW files and processing them with Adobe Camera Raw (ACR), drag the Black slider and the Shadow slider to the left to increase the contrast in the image. It will make the lunar maria pop. How dark you make the maria is a matter of personal taste. It also helps to drag the Clarity slider to the right a bit to increase the overall crispness of the image.
Predicting Where and When the Moon (and Sun) Will Rise and Set
You can Google moonrise and your city to find out when the moon will rise, but it won’t tell you where.
What if you want to photograph the moon rising over a specific part of a mountain range or city skyline? How do you know where it will rise? Get The Photographers Ephemeris (TPE) for your smart phone and/or desktop computer. You can pick any place on the planet and any day of the year and it will show you where and when the sun and moon will rise and set. I use it a lot to plan shooting locations in advance.
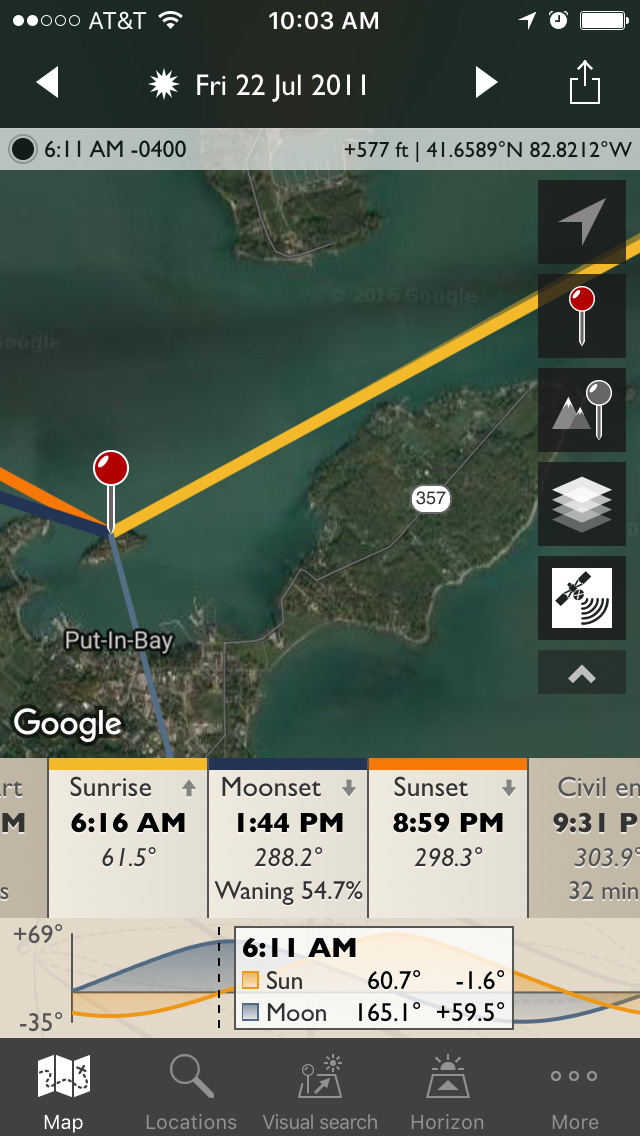
Before my first photography workshop on Gibraltar Island in Lake Erie, I used TPE to figure out in advance where and when the sun would rise July 22, 2011. I found Gibraltar Island on the map and entered the date. The red pin is the shooting location on Gibraltar Island. The bold yellow line shows the direction of the sun at the time of sunrise (6:16 am). By dragging the timeline (which is toward the bottom of the screen) you can see the direction and elevation of the sun and moon at any time of the day. The timeline is at 6:11 am and you can see the direction and elevation of the sun and moon on the timeline (the sun is below the horizon by 1.6 degrees).
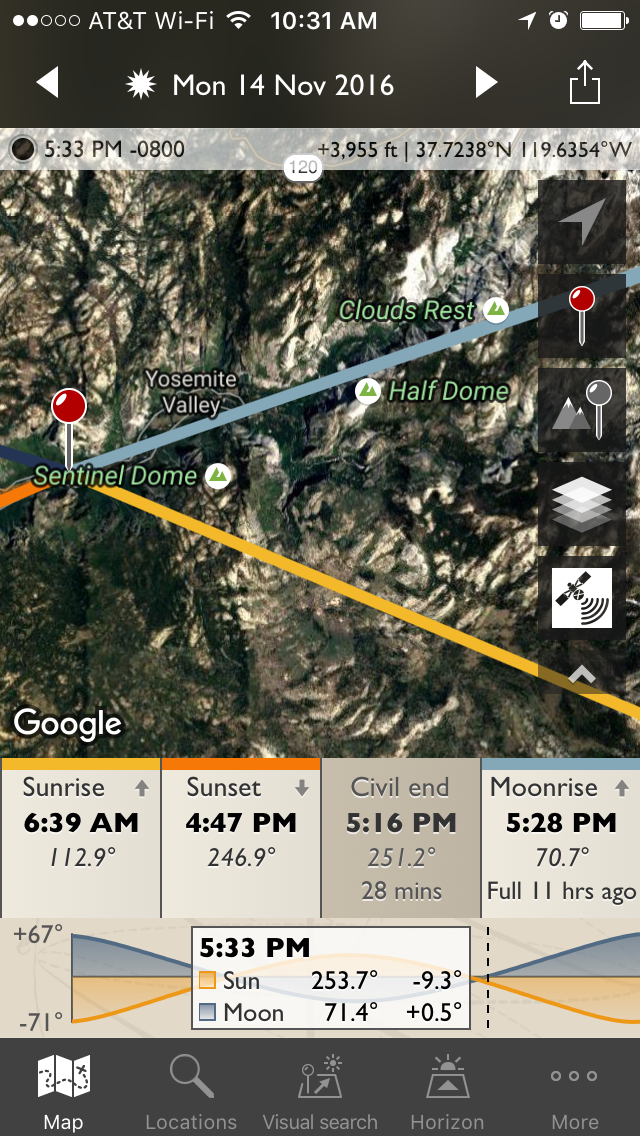
Lets say you want to photograph the moonrise from El Capitan Meadow (in Yosemite Valley), Monday, November 14, 2016. Just plug in the location (navigate on the map or enter the GPS coordinates), enter the date, and TPE will do the rest. Across the bottom of the screen you can scroll across the times for the rising and setting of the sun and moon. Blue bars show you the direction of moonrise and moonset. Yellow shows you the direction of sunrise and orange the direction of sunset. You can zoom in and out to see where things line up on the satellite map. On November 14 the moon will rise in between Half Dome and Clouds Rest. Moonrise and sunrise times are based on a view of an unobscured level horizon. They will rise later behind a mountain or a building, and angle up to the right as they rise, at least in the Northern Hemisphere, so you will need to make allowances for that. TPE will help you do that for mountains and hills if you click on the mountain or hill as the secondary location. To learn how to do that, be sure to check out the tutorial in the links section below.
If you pick your shooting location and the moon or sun won’t rise or set on the horizon where you want them to on a given day of the year, you can find out what day of the year they will rise or set where you want them to (provided you don’t pick a spot so far north or south that sun or moon will never rise or set at your preferred spot on the horizon).
I highly recommend TPE. The desktop version is free. There is a modest charge for the iOS and Android versions.
Originally posted November 13, 2016. Revised and expanded November 15, 2016.
Photo Data
Super Moon (full): Canon 7D Mark II. Canon EF 70-300 f/4-5.6L IS USM at 300mm. f/11, 1/100 sec, ISO 100. Image cropped.
Moon before first quarter: Canon 7D, Meade 2045 telescope (1000mm). f/10, 1/125 sec, ISO 400.
Link
Interactive Google map of the moon
The Photographer’s Ephemeris (TPE)
Moonrise Photography: The Moon in the Landscape – a TPE Video Tutorial
U.S. Naval Observatory (USNO)
USNO: Phases of the Moon
USNO: Sun or Moon Rise/Set Table for One Year

