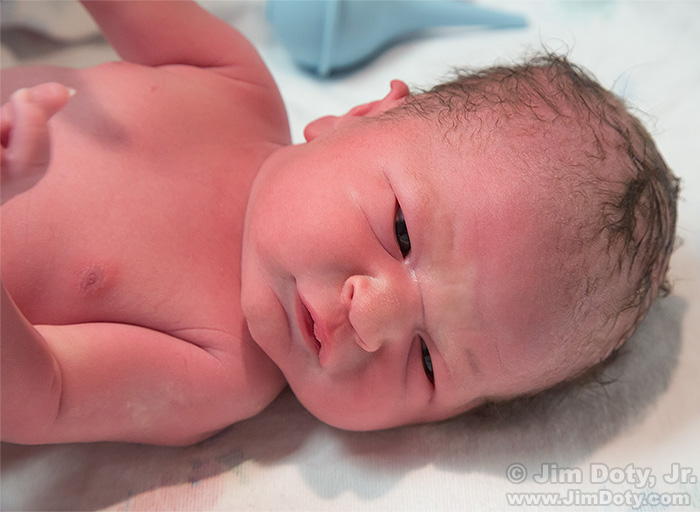
I had the happy privilege of being asked to photograph the birth of a baby boy. The mother found some of my photos on the internet, she was impressed with my work, and sent me an email asking if I was interested in photographing the delivery of her son. Of course I was!
There were schedule complications since babies arrive when they want to. Whenever anyone else wanted to book a photo shoot anywhere near the delivery date, I told them about the delivery room shoot and if the baby arrived on the same day as their shoot, we would have to reschedule. Everyone understood.
The mother and I did a “beautiful baby bump” photo shoot at my studio last week and we had scheduled a second baby bump shoot for 1:30 pm yesterday. We had our shoot yesterday afternoon, but in the delivery room instead of my studio. I’ve never has so many extra people show up for a photo shoot!
The maternity staff was very helpful and one nurse was in charge of telling me where I needed to be to get good photos of the whole process without getting in the way. The above photo was taken while they were in the process of cleaning him up.
I did everything with the available light in the room. No flash was used. My camera was set to a high ISO to allow for reasonably fast shutter speeds and an aperture that would give me enough “near to far” depth of field. I was shooting under fluorescent and tungsten lights with very different color temperatures and different lighting intensities.
I had to change shutter speeds (and sometimes the aperture) every time the light source changed. Given the range of tones in the room from white to very dark, automatic exposure would not work, so it was manual all the way. A baby with light skin tones surrounded by people in dark scrubs is a recipe for an over exposed baby (pun intended). Before the action got fast and furious, I pre-metered the light intensity under the different light sources so I had them locked in to my memory banks.
I color corrected the images after the fact with Adobe Camera Raw (one of the many advantages of RAW files over JPEG files). Ordinarily I would do a custom white balance, but that doesn’t work when you are moving quickly back and forth quickly between two different light sources. With all the action going on, you don’t want to miss a prized photo while messing with the white balance.
I had a wonderful time! So did everyone else.
Photo Data: Canon 5D Mark III. Canon EF 24-105mm lens at 80 mm. f/8, 1/100 sec., ISO 3200. The RAW file was processed with Adobe Camera Raw for white balance correction and to remove luminance noise from the high ISO.
Links
To learn all about exposure, metering, depth of field, working with different light sources and matching the white balance of your camera to the color temperature of the light, read Digital Photography Exposure for Dummies. It has a five star rating at Amazon.com and it is one of the most comprehensive books on exposure currently available. You can learn all about the book in this article and order it here at Amazon.com.
The best books on Adobe Camera Raw and how to process RAW files for maximum quality are by Bruce Fraser and Jeff Schewe. Learn more in Mastering Photoshop & Lightroom: Adobe Camera Raw (ACR).

