It was an amazing night for Northern Lights in Northern Michigan, and I was leading a photography workshop. What a treat for all the photographers! I specifically picked this location on Lake Michigan so we would have the lake, some trees for framing the image and a good view in the expected direction of the Northern Lights.
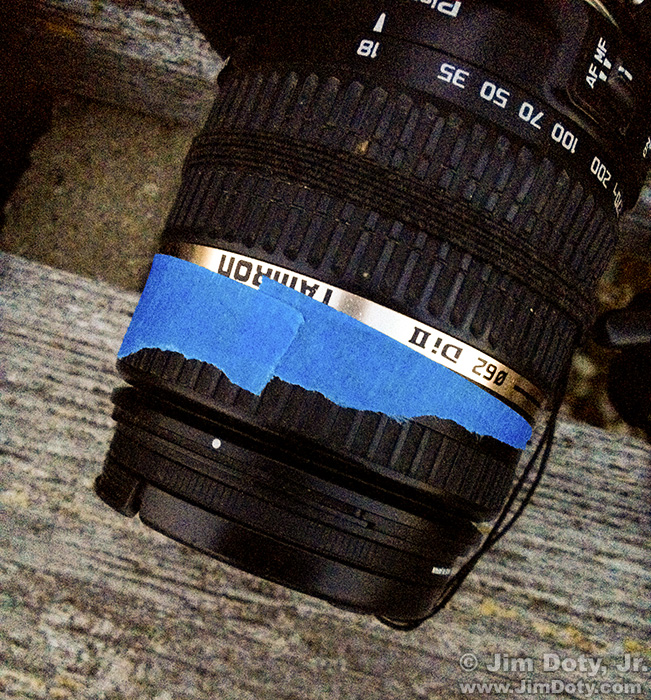
The key to photographing the Northern Lights is a wide angle lens focused exactly at infinity. Since most zoom lenses will focus past infinity, you need to figure out where infinity is by focusing on a far distant object during the daytime and checking where that is on your focusing scale. If you don’t have a focusing scale, tape the focusing ring down so it doesn’t move. I had everyone focus on the distant horizon line between the lake and the sky, take some pictures and magnify them to make sure the focus was accurate, turn off autofocus, and wait for the sky to darken and the stars to come out.
This lens has no distance scale. So this photographer autofocused on the distant horizon while it was still daylight, took a picture, checked it on the LCD to insure critical sharpness, turned off autofocus, and taped the focus ring in place with painter’s tape so it wouldn’t move. When it got dark this photographer was all set for night photography.
Set your lens aperture to f/4.
As a general rule set your shutter speed to 15 seconds for a wide angle lens and 30 seconds for an ultra wide angle lens (to prevent the stars from trailing too much). If the stars are trailing too much with the focal length of the lens you are using, go to a shorter shutter speed.
For a more precise shutter speed, you can use the “Rule of 600” to prevent star trailing. Divide 600 by the focal length of your lens to determine the maximum shutter speed in seconds to get an image without objectionable star trailing. If you are using a 20mm lens, divide 600 by 20 to get 30 seconds, the longest shutter speed you can use to avoid excessive star trailing.
Start with an ISO of 1600 or 3200. The Northern Lights vary in intensity so you will need to experiment a bit. If the image is too bright cut back to a lower ISO setting. If the image is too dark try a higher ISO setting.
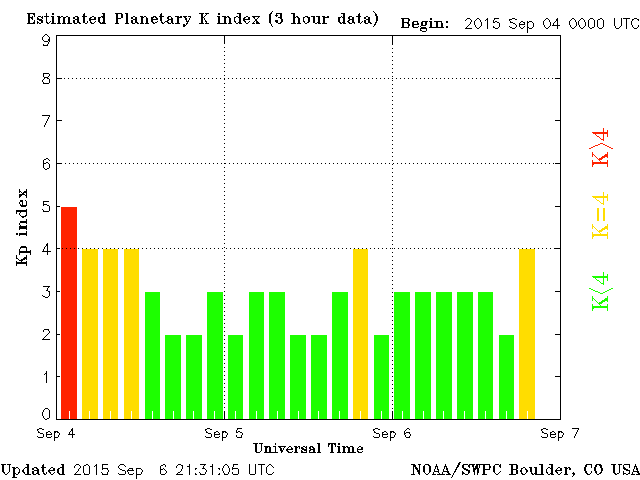
There are several sites that predict the likeliness of the Northern Lights appearing in the night sky. I recommend you go to NOAA’s Space Weather Prediction Center (SWPC). Look at the “Estimated Planetary K-Index” and compare it to the map below. The chart will look something like this:
The chart is based on estimates, not guarantees that you will see the Northern Lights. But comparing the current estimated K-index from the SWPC with the map below will increase your odds. You can also sign up for email alerts for current updates so you don’t have to keep going to the SWPC.
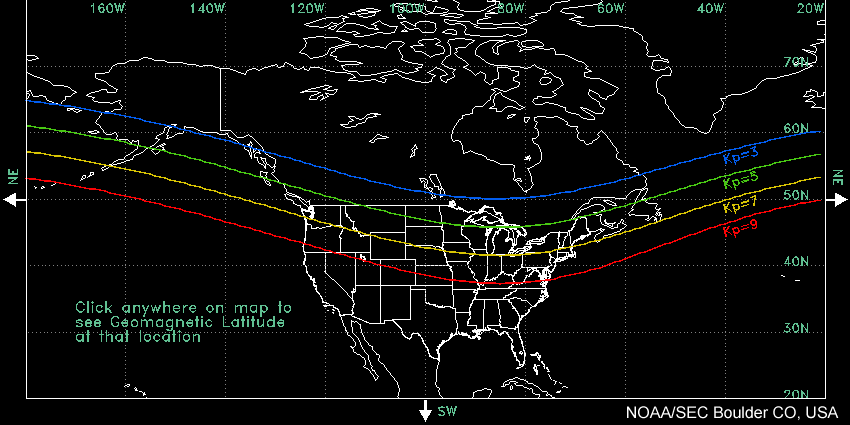
The higher the Kp index (also called the K index in some reports) the farther south the Northern Lights are visible from the North Magnetic Pole.
This map shows you how far south you are likely to see the Northern Lights for a given Kp index. As an example, if the Kp index is 5, it is reasonably likely the Northern Lights will be visible in most of Canada, Michigan’s Upper Peninsula, far northern Wisconsin, the northern half of Minnesota, half of North Dakota, the northeast corner of Montana, and most of Alaska.
Of course you need a clear night sky far from big city lights.
Photo Data: Canon 5D Mark III. Canon EF 17-40mm f/4L lens at 17mm. 30 sec, f/4, ISO 3200.


